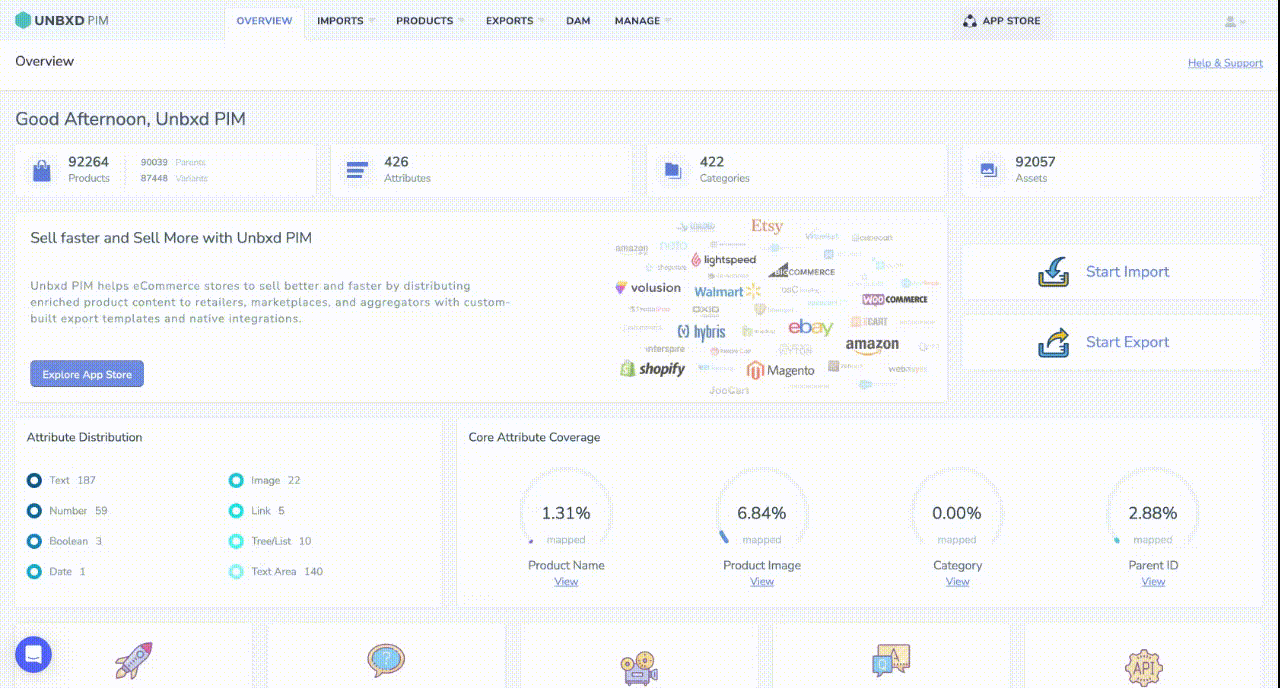
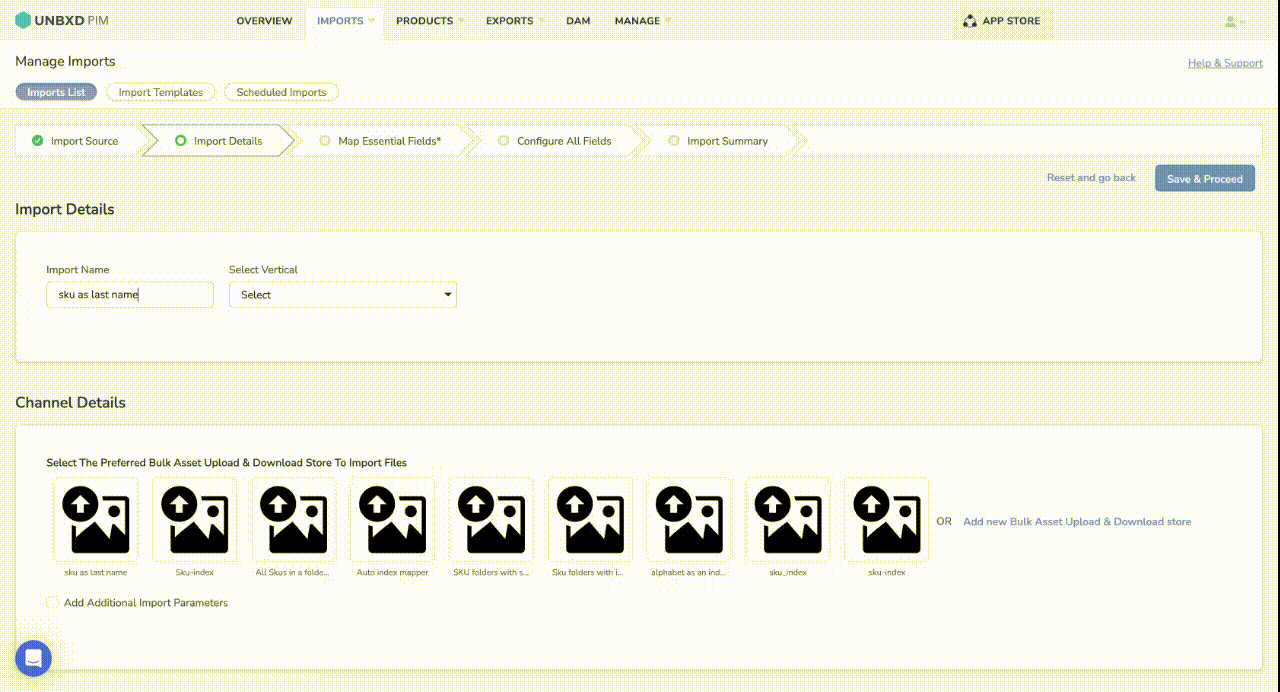
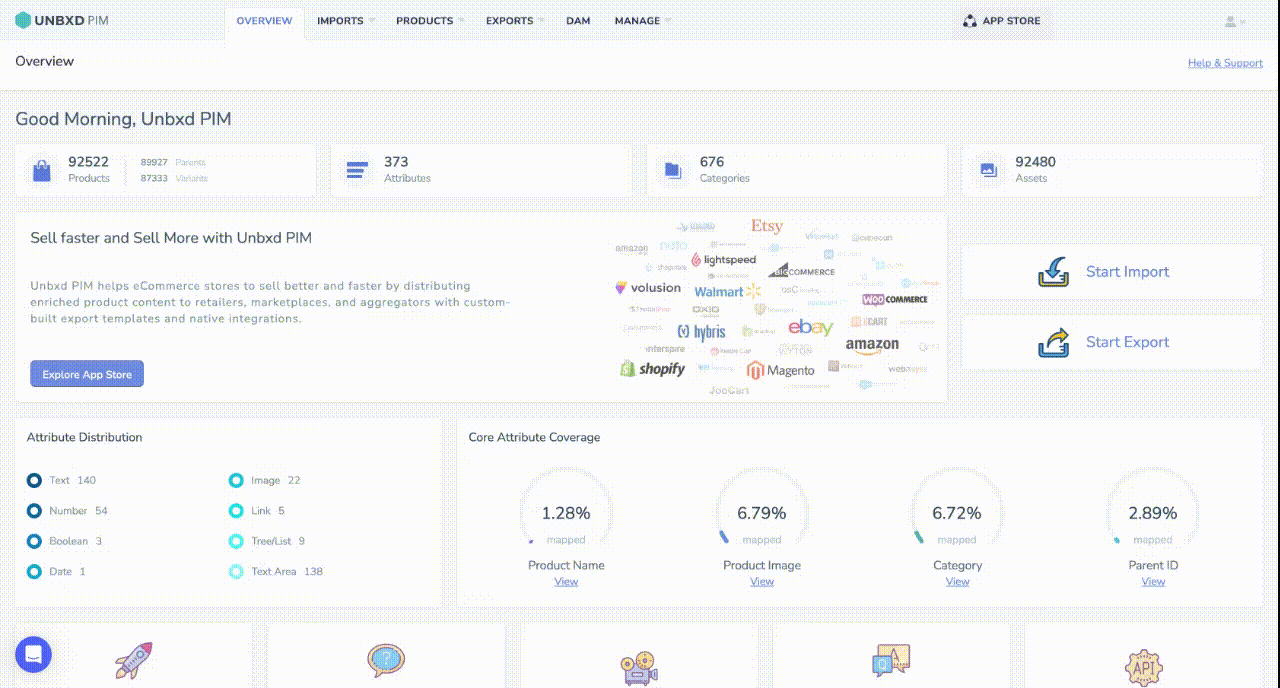
Bulk Asset Upload and Download
Important Note:
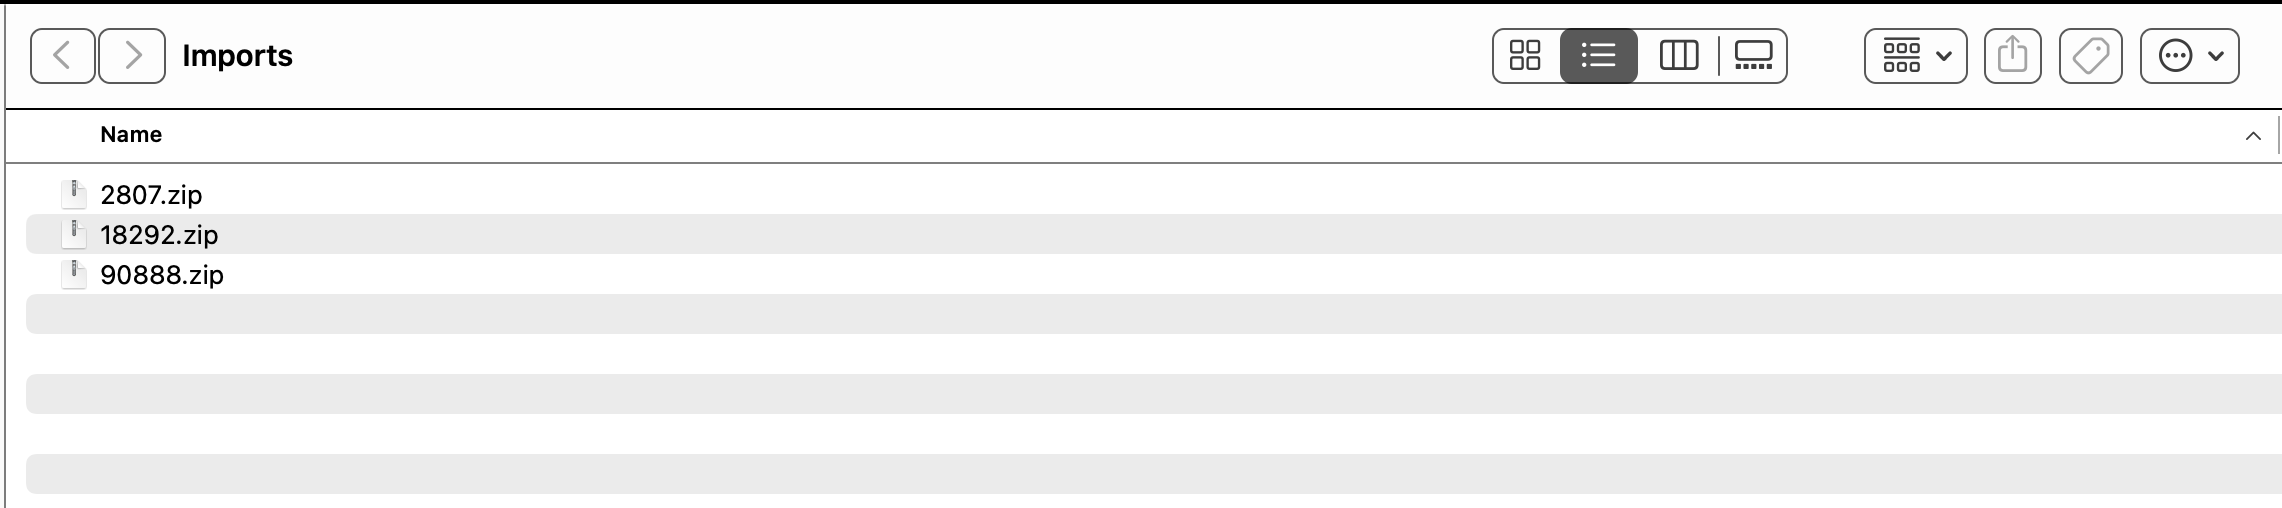
- Remember that only zipped folders can be imported.
- Always while mapping the properties, the datatype of the image should be image and not link.
- Extensions supported are ‘.png’, ‘.jpg’, ‘.jpeg’, ‘.tiff’, ‘.bmp’, ‘.gif’, ‘.pdf’,’.pptx.’
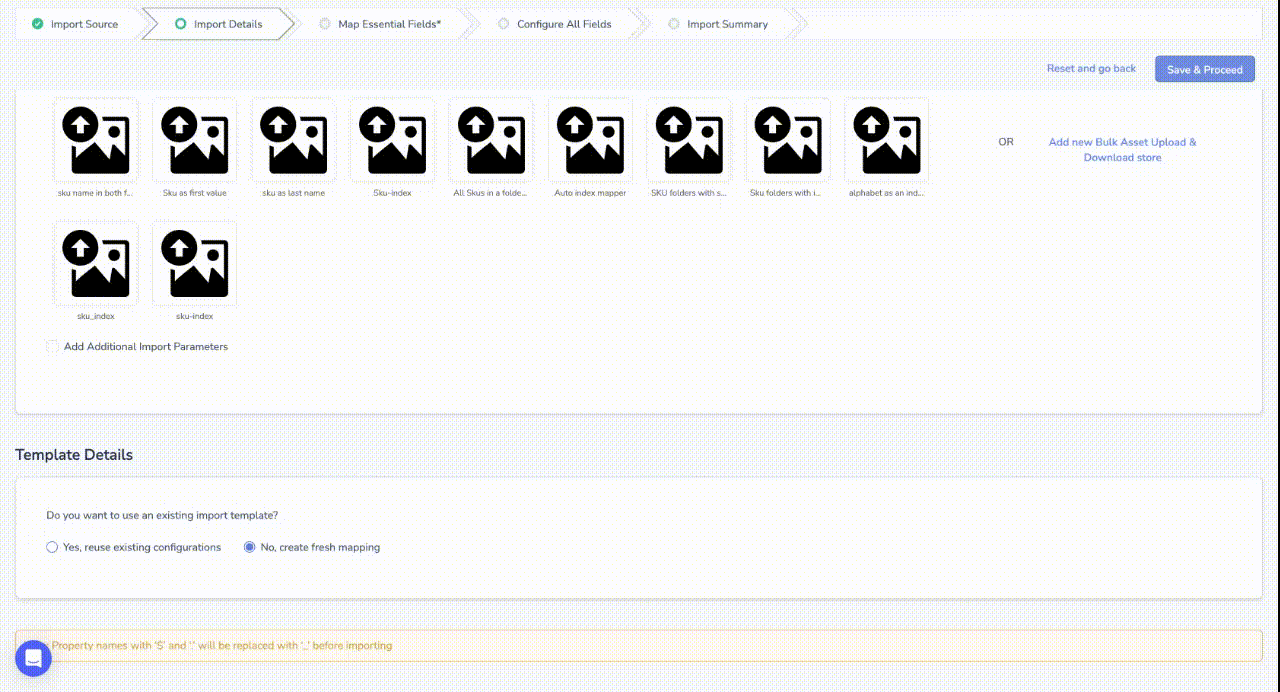
For Importing Image in PIM we have 11 options
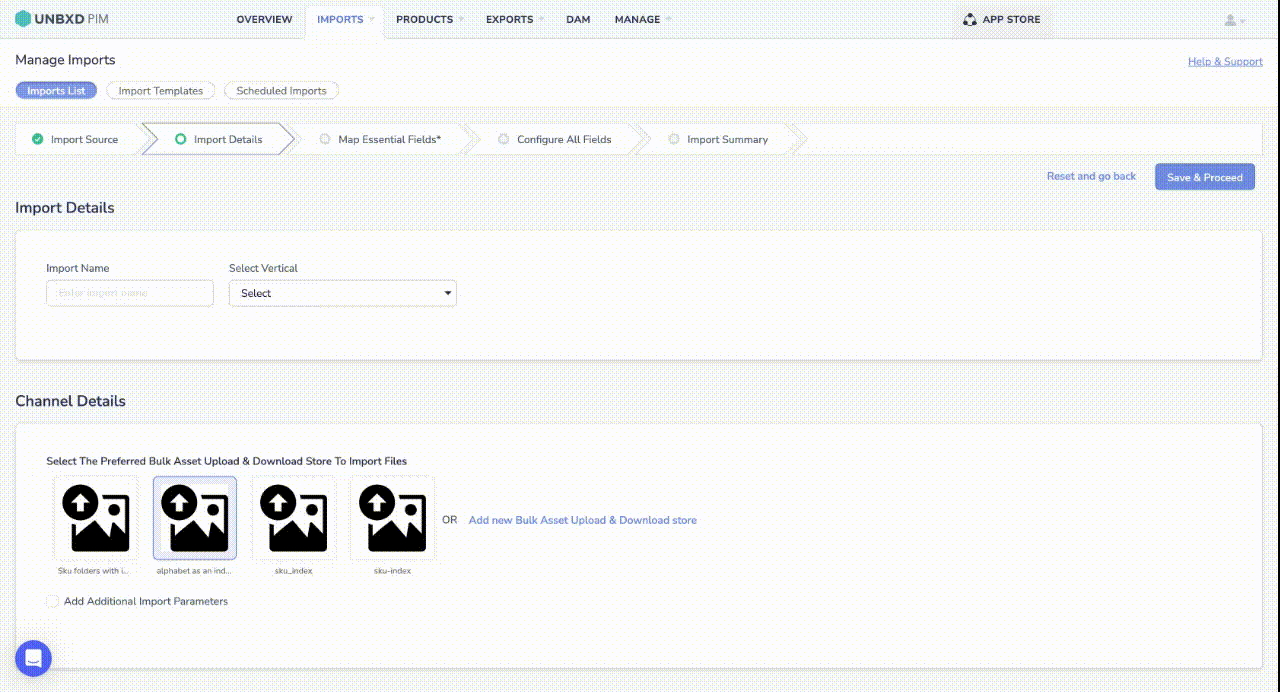
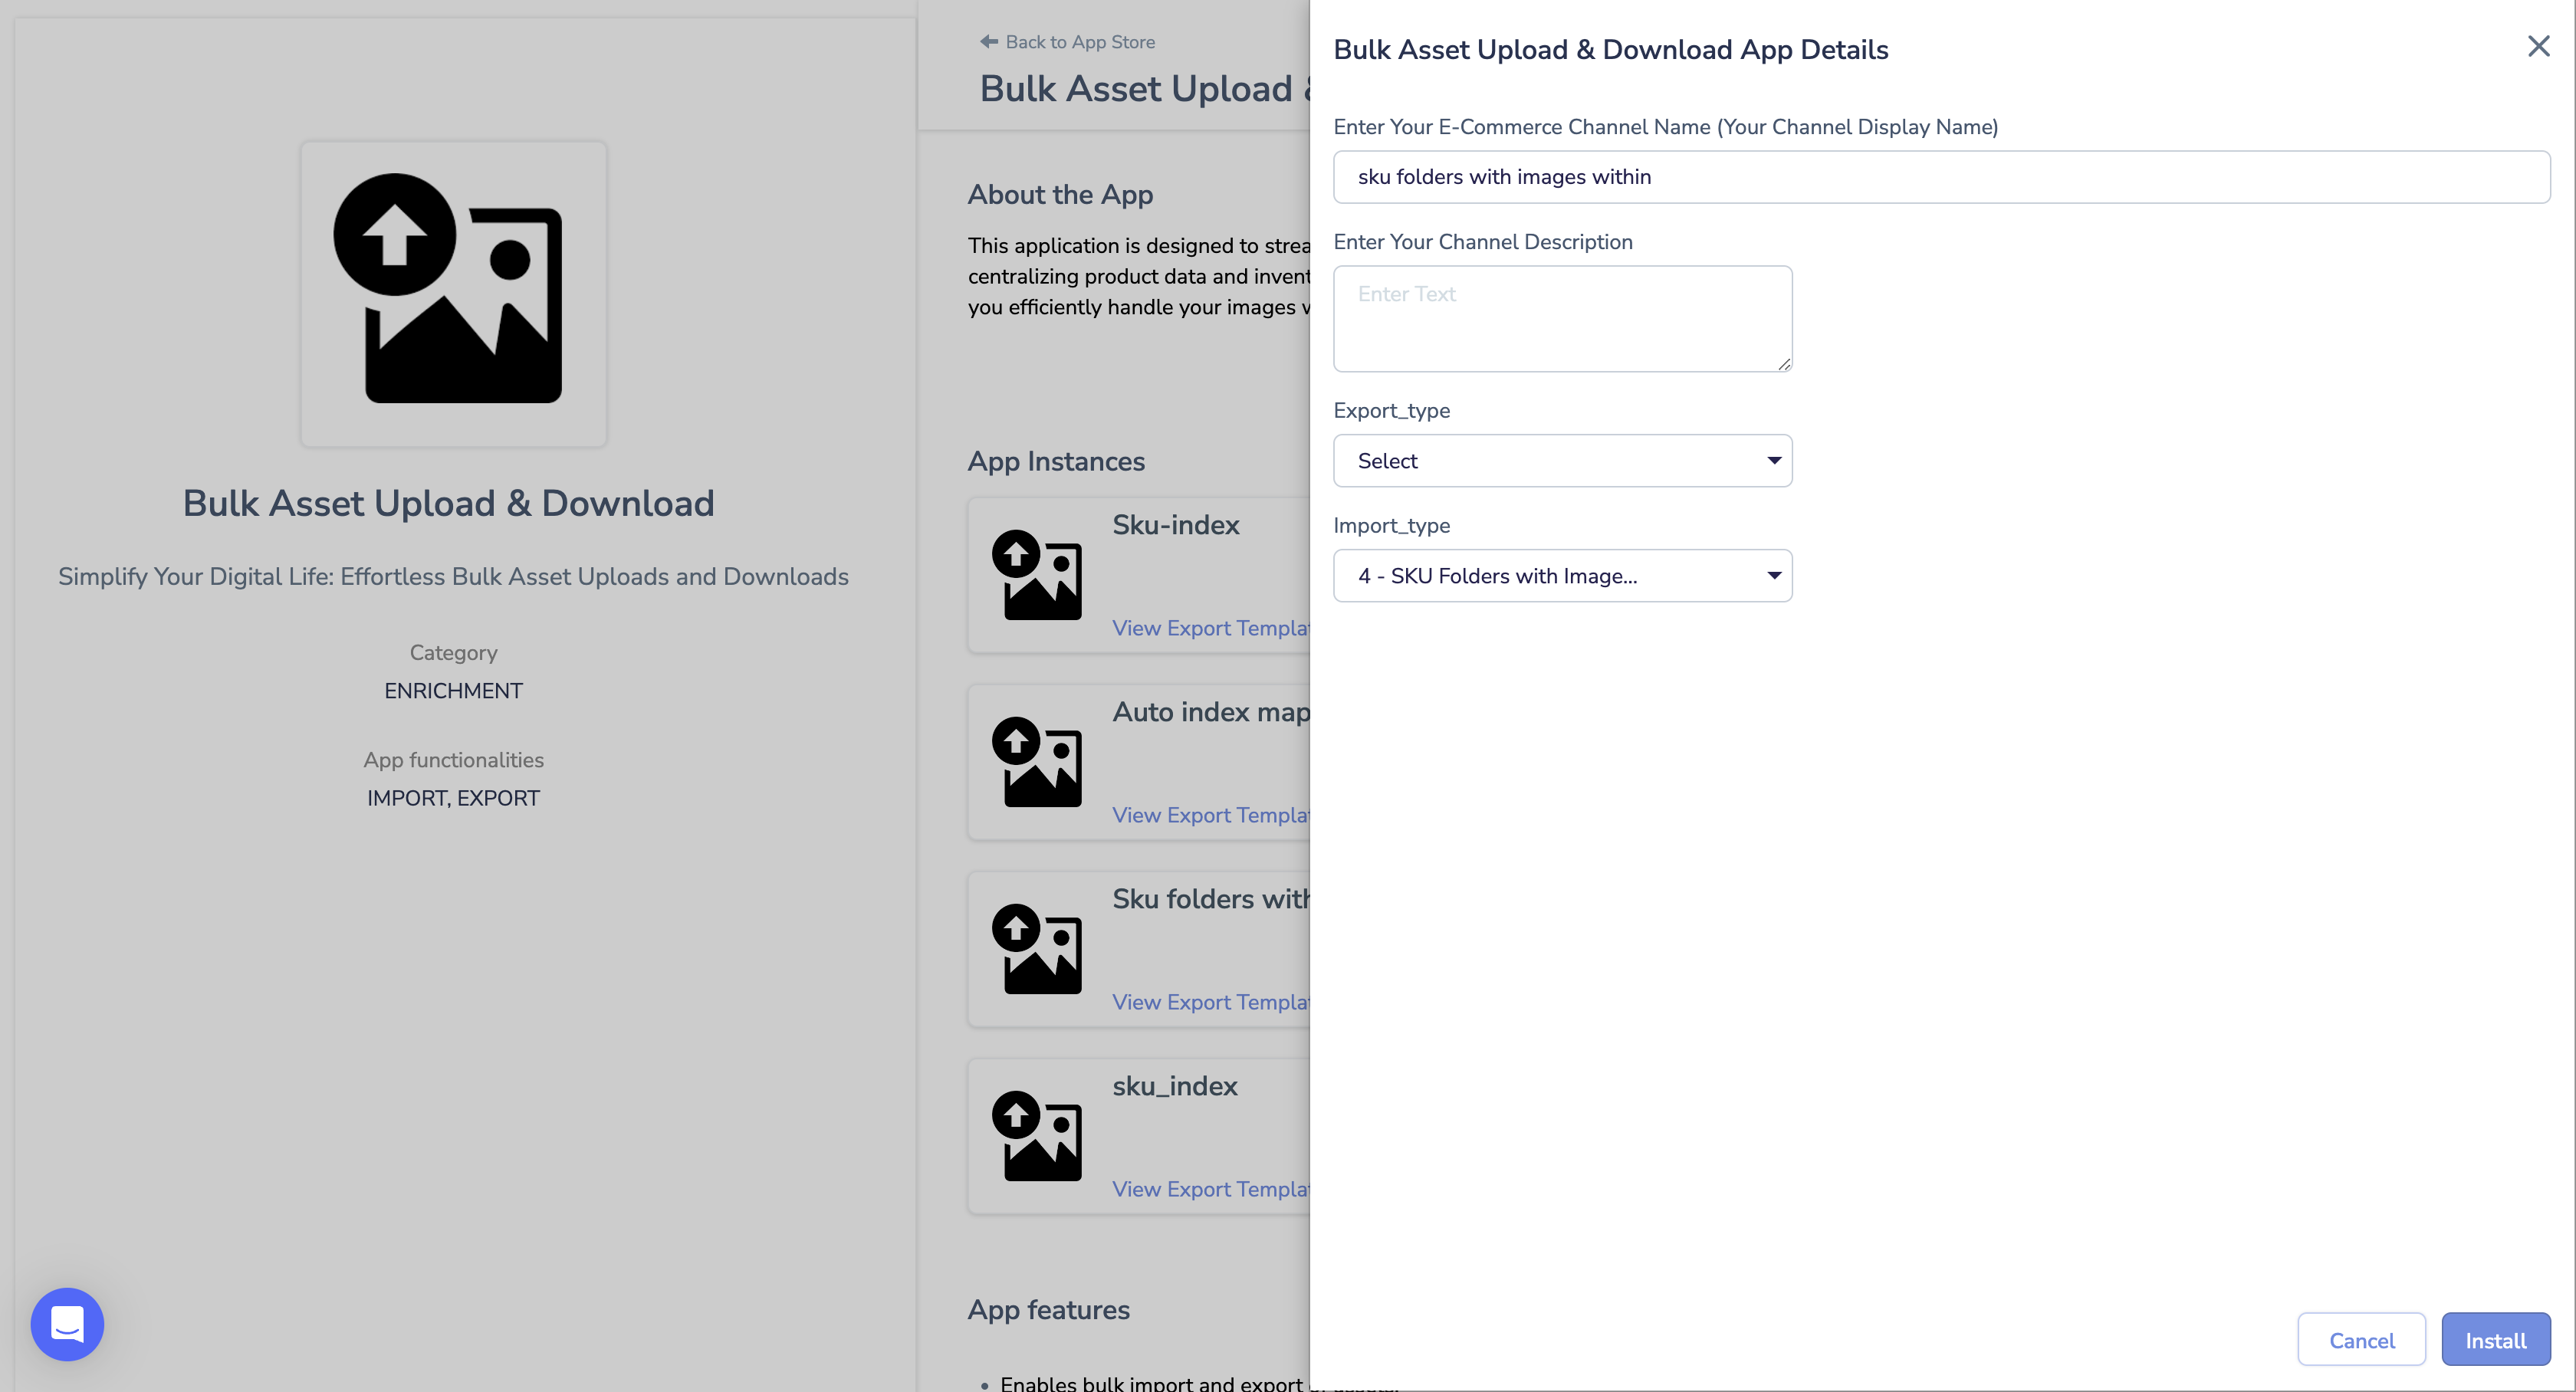
To Install Bulk Asset Upload & Download:
- Click on App Store
- Search and click on Bulk Asset Upload and Download
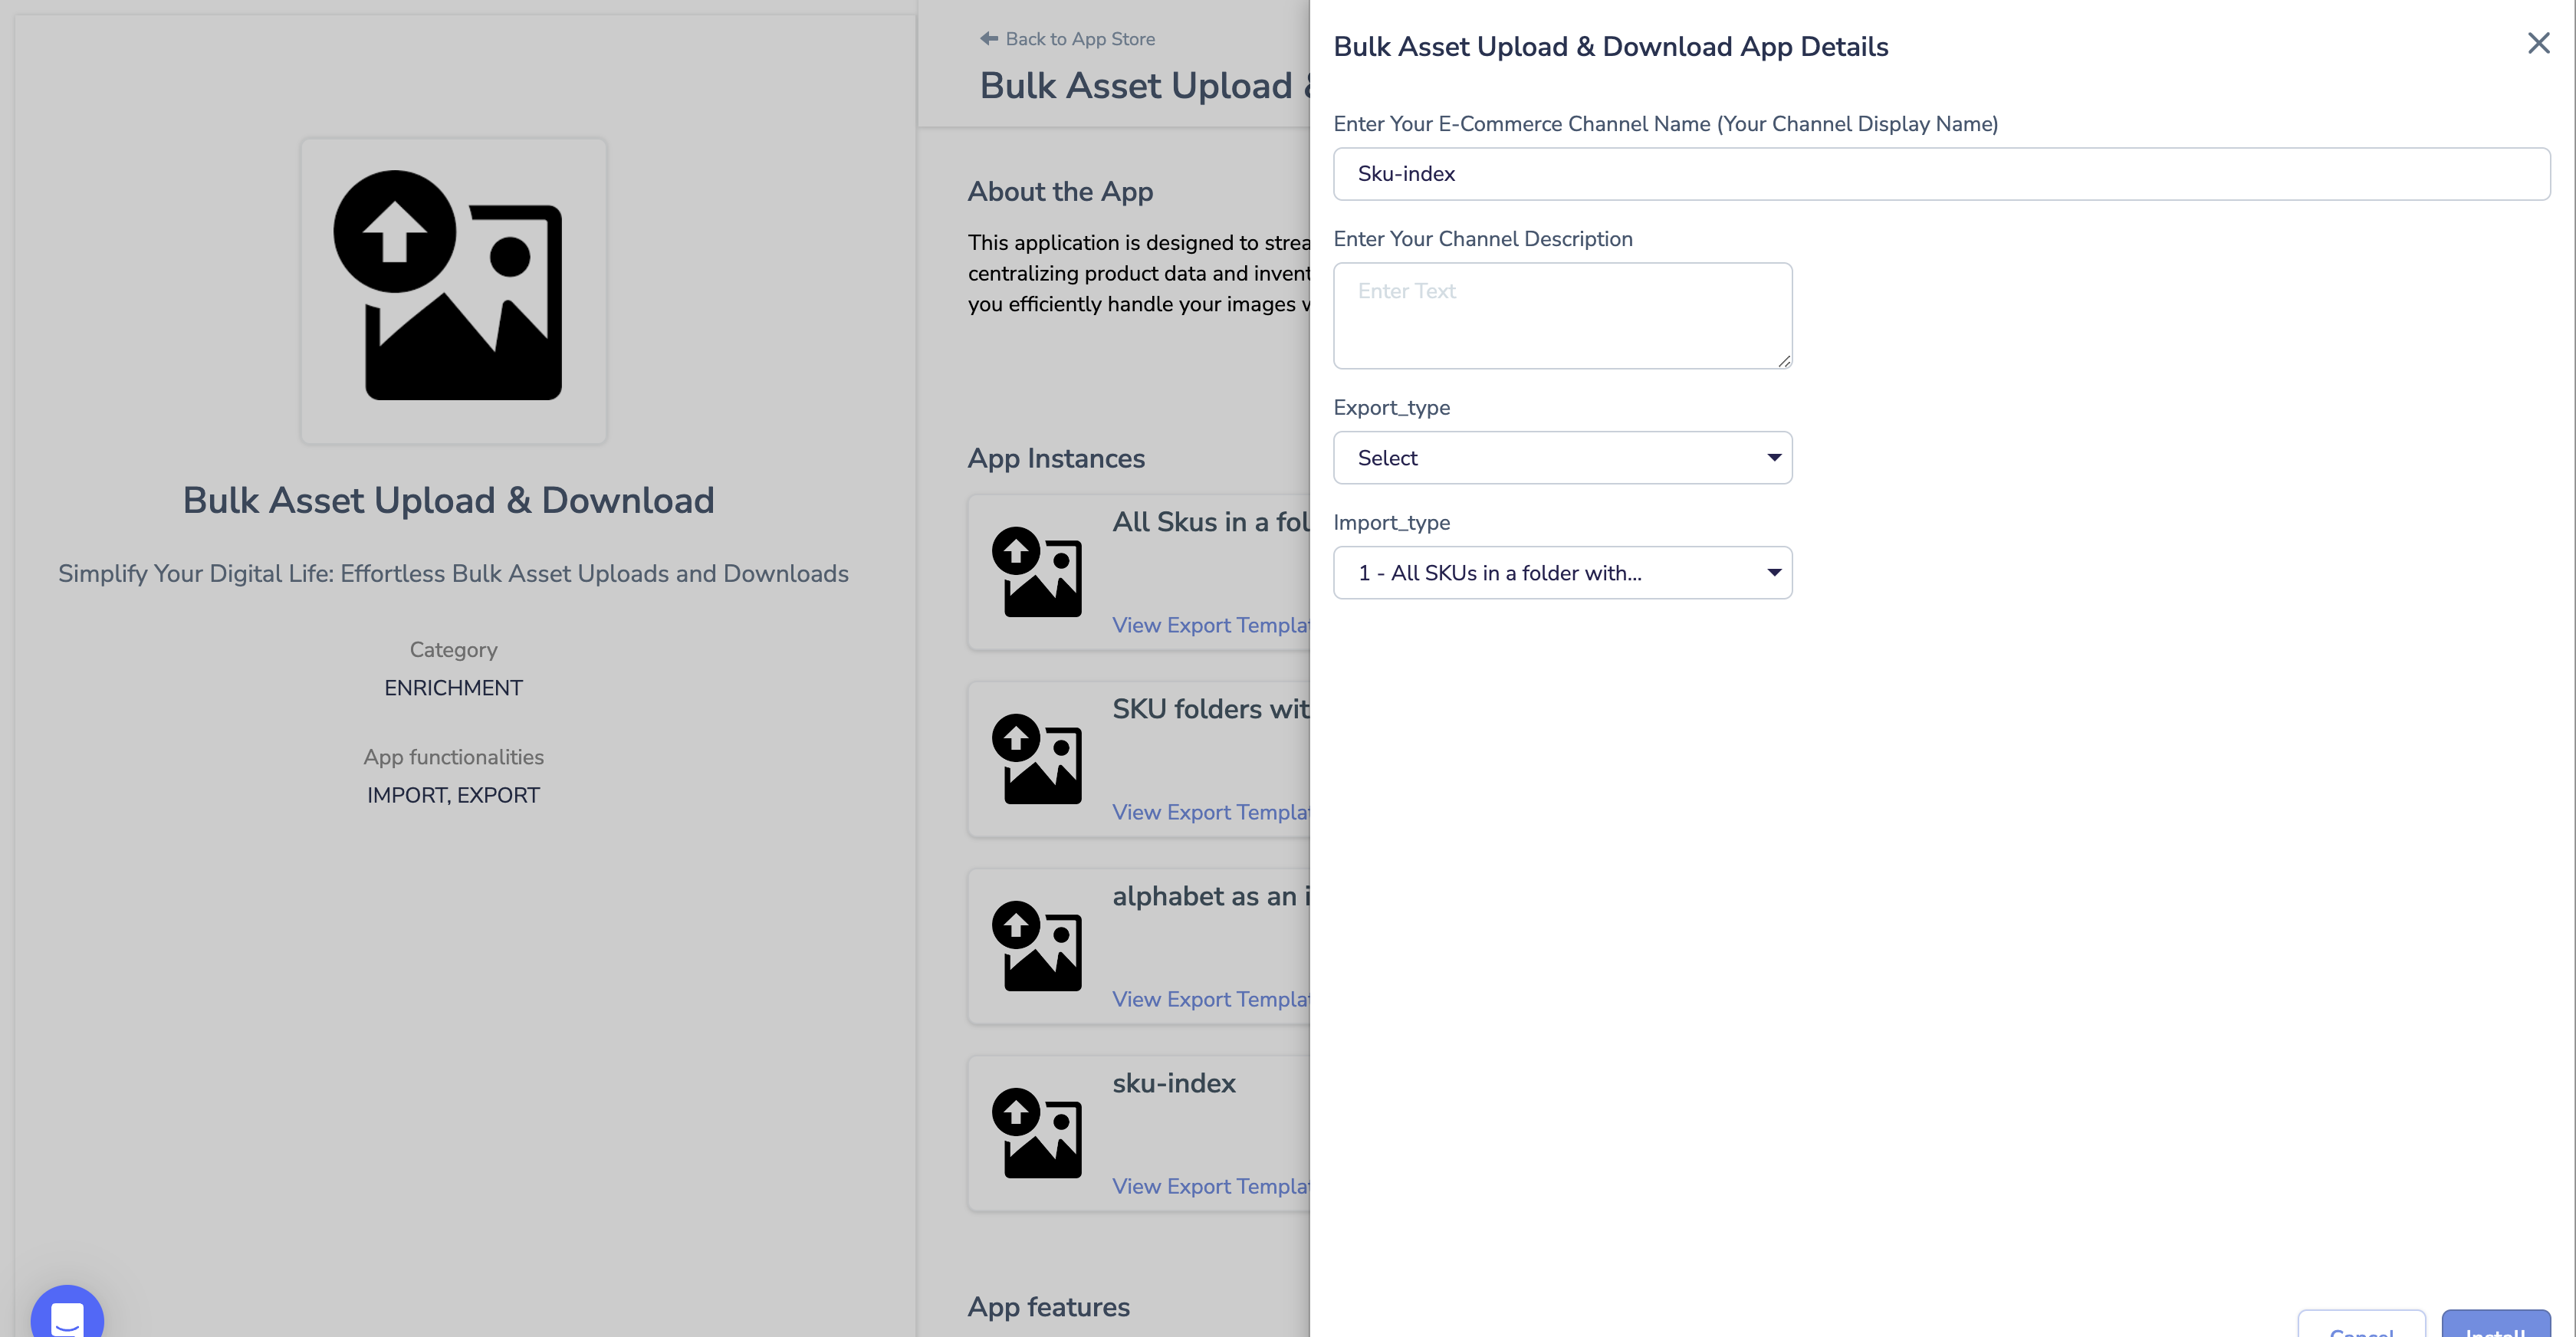
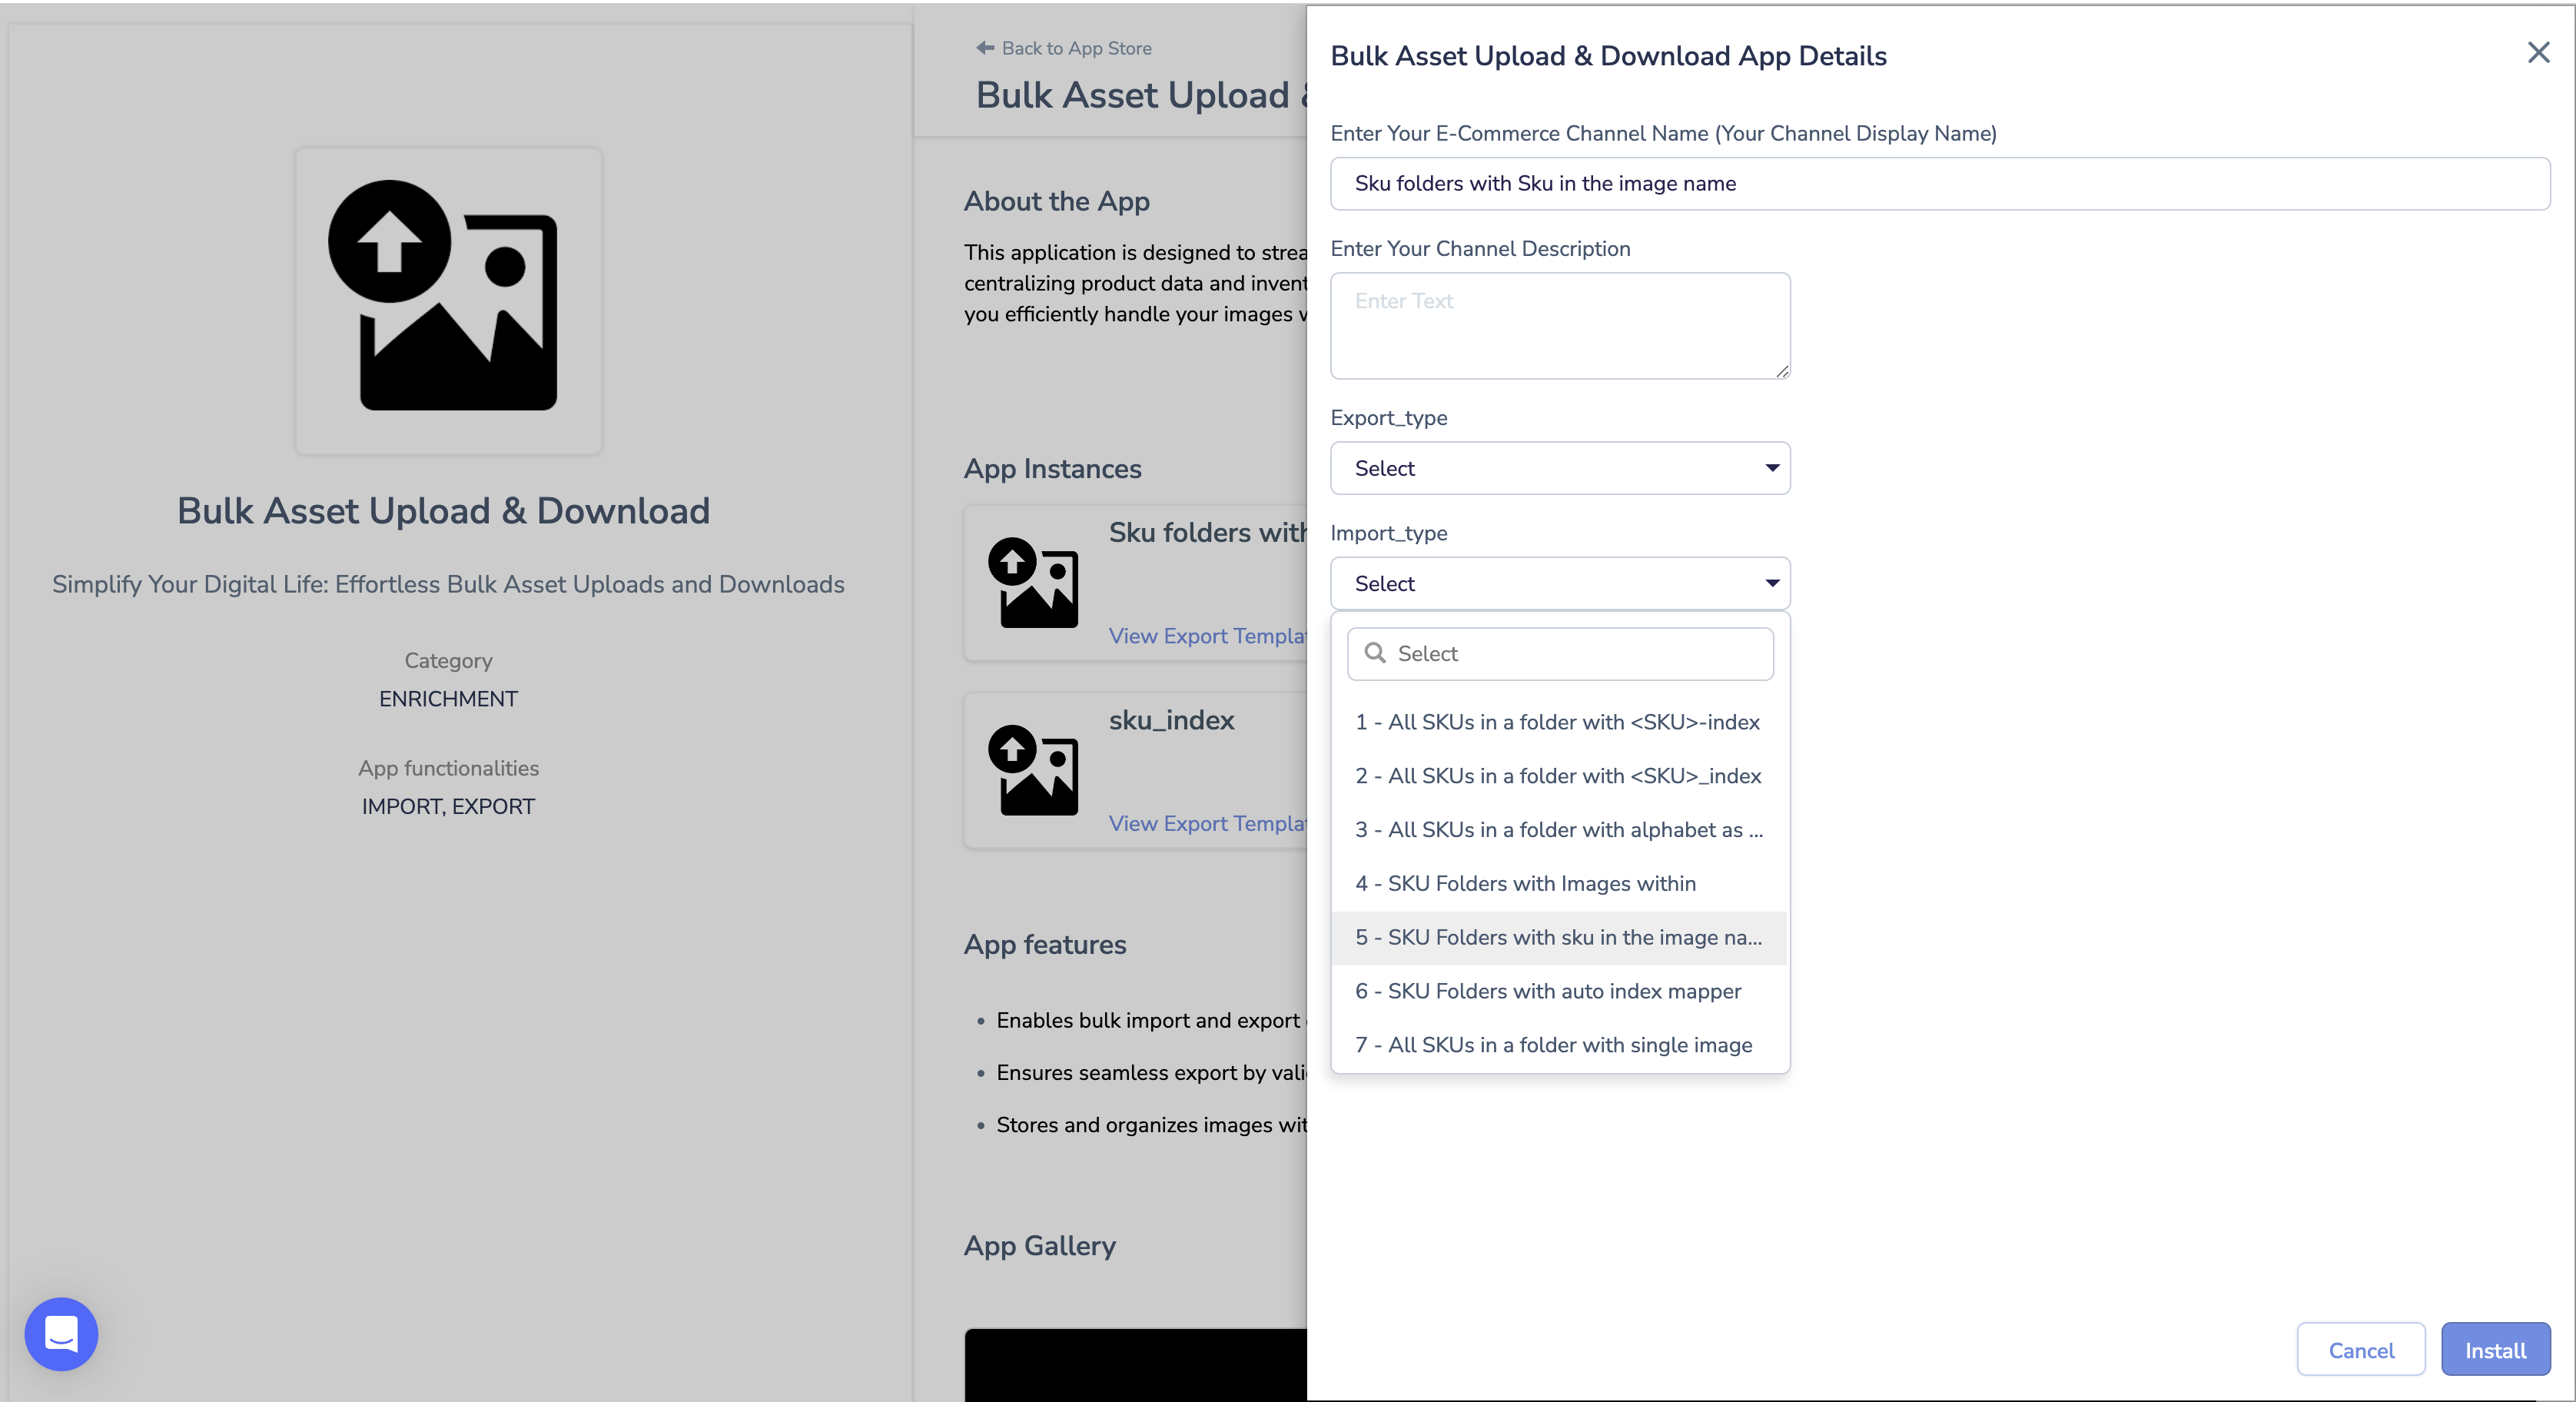
- In Bulk Asset Upload and Download App Details
- Give a name for the App[specifically the image format]
- Select either the export format or import format
- Click on Install.
1- All SKUs in a folder with <SKU>-index
While Installing the app choose All Sku in a folder with SKU-index.
In this case, the folder name is “SKU,” example “1980,” and the image names follow the pattern “SKU-index,” such as “1980-1,” where “1” represents the index.
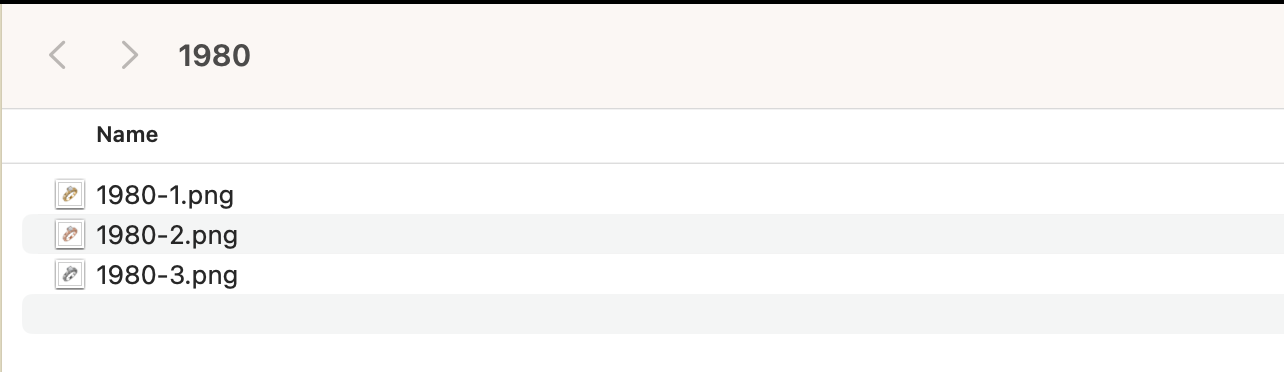
If your image folder format looks like the above folder then follow these steps:
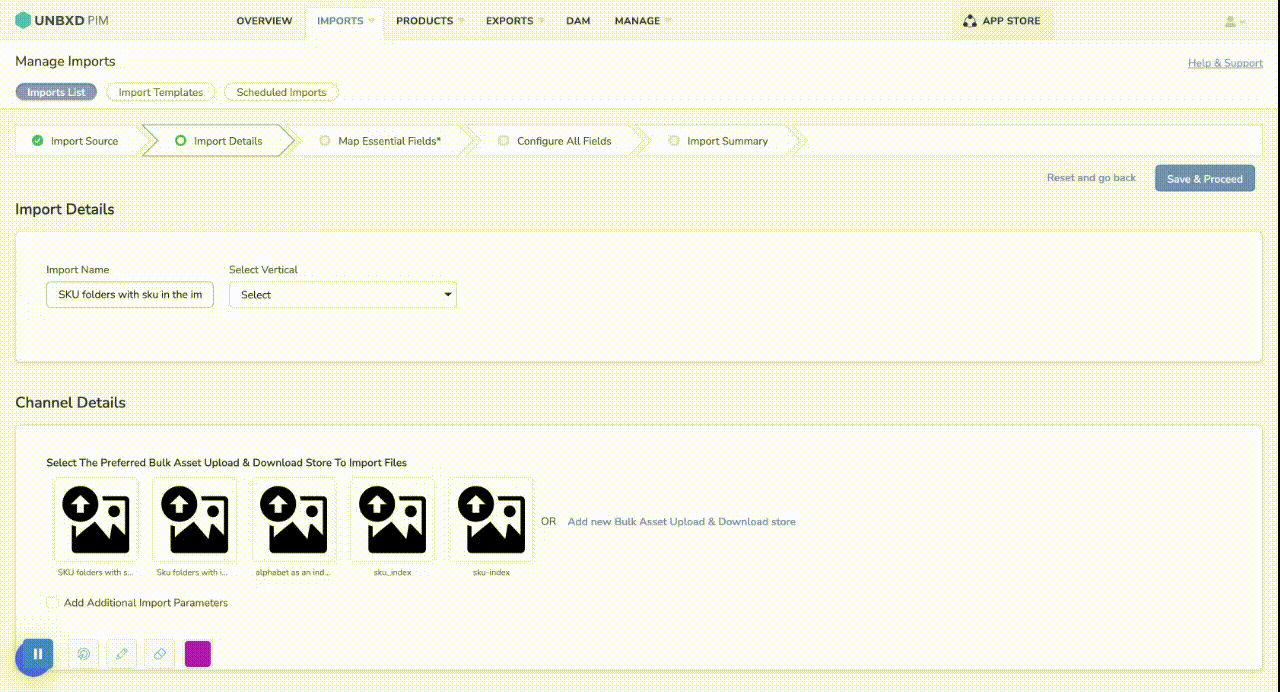
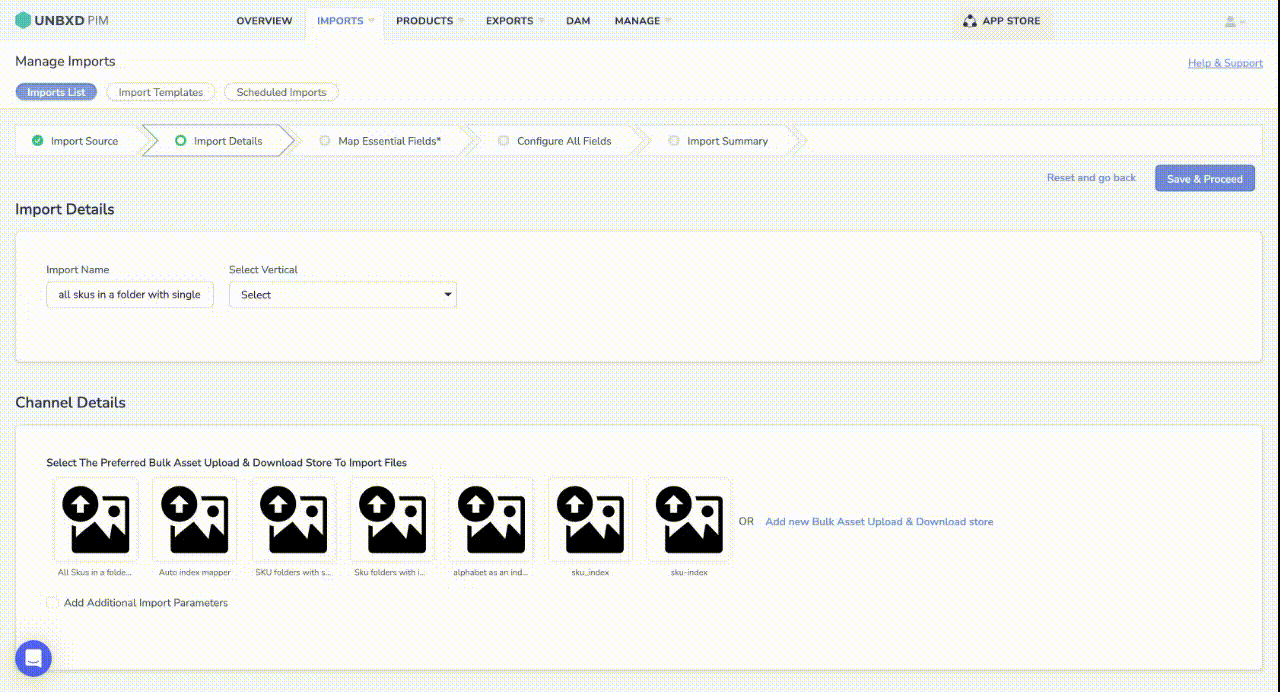
- Click on Imports
- Search and Click on Bulk Asset Upload and Download
- Give a name for the import
- Select the Bulk Image Upload icon of the format you selected while installing the app[SKU-index]
- Click on Save & Proceed
- Map the Unique ID
- Click on Save and Proceed
- On Configure All Fields Page, Map the images with the PIM Image property
- Click on Save and Import.

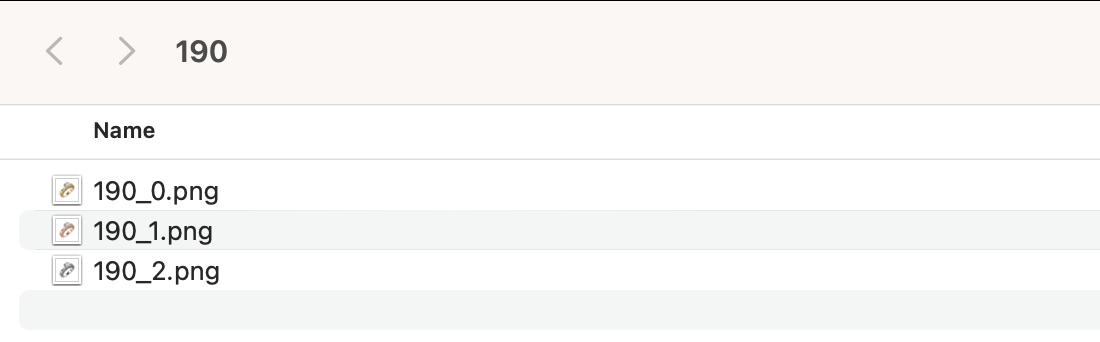
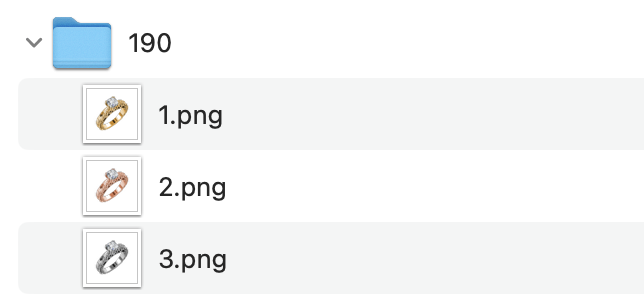
2 – All SKUs in a folder with <SKU>_index
While Installing the app choose All Sku in a folder with SKU_index.
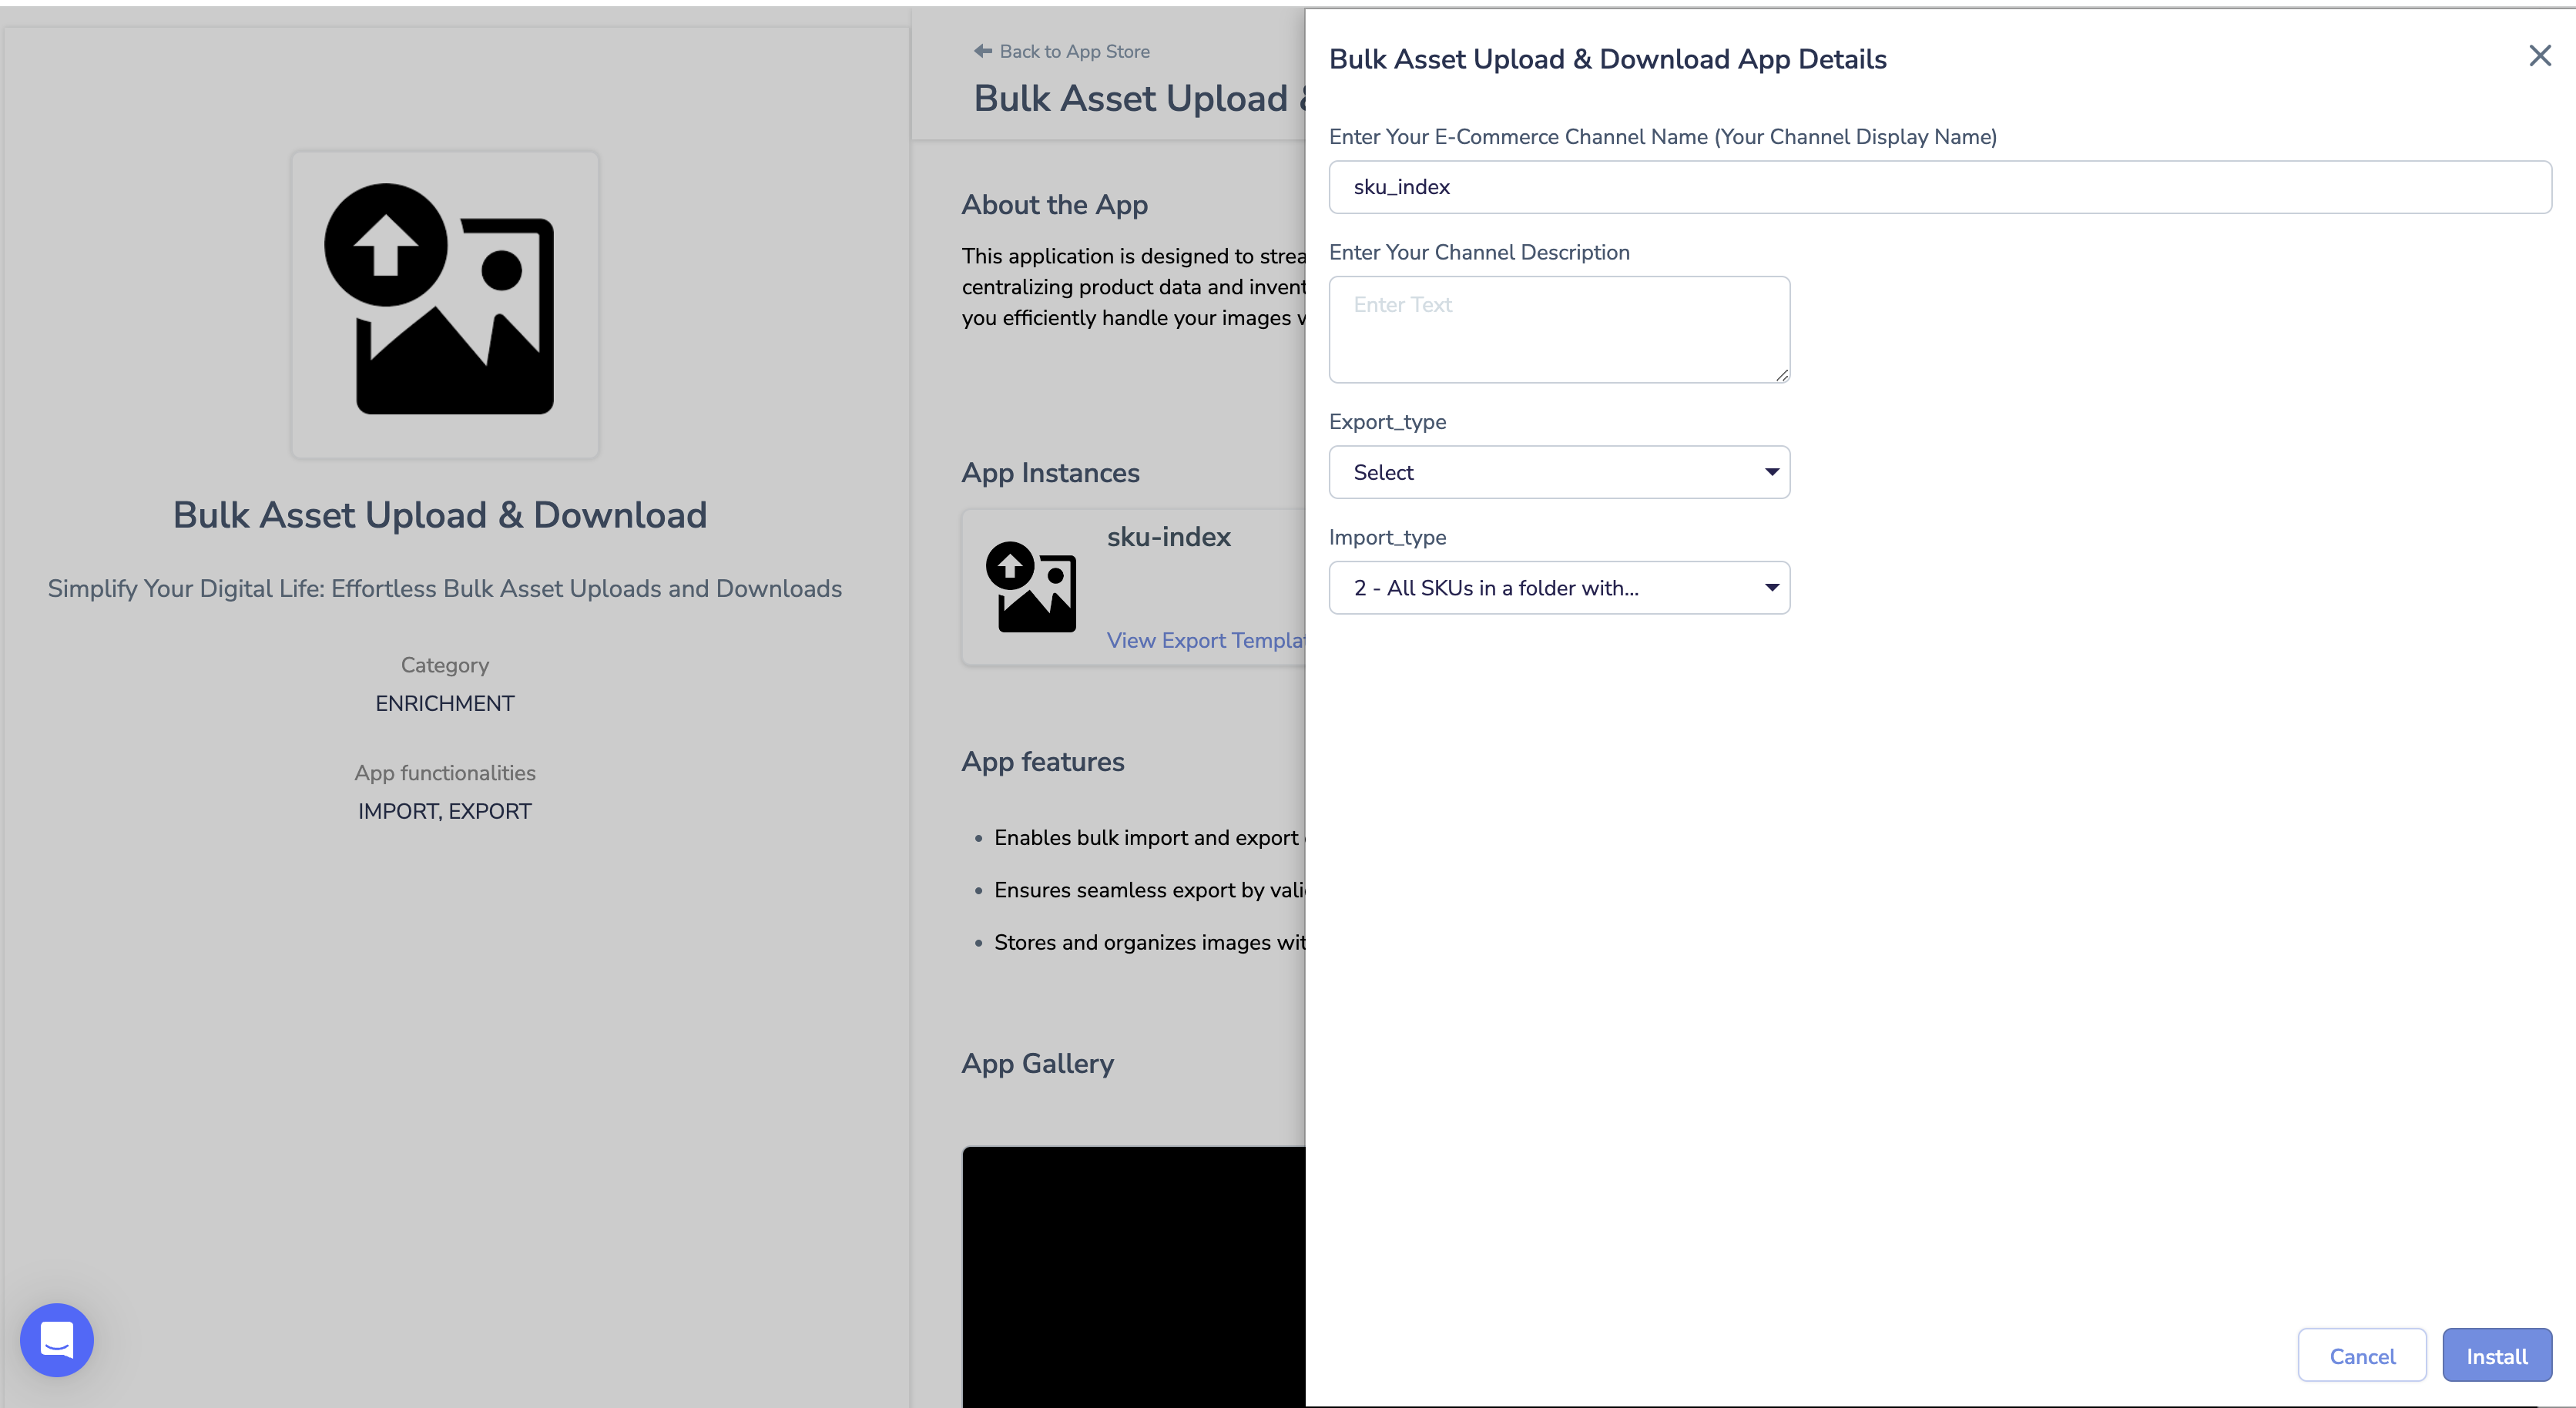
In this case, the folder name is “SKU,” i.e “190,” and the image names follow the pattern “SKU_index,” such as “190_0,” where “0” represents the index.
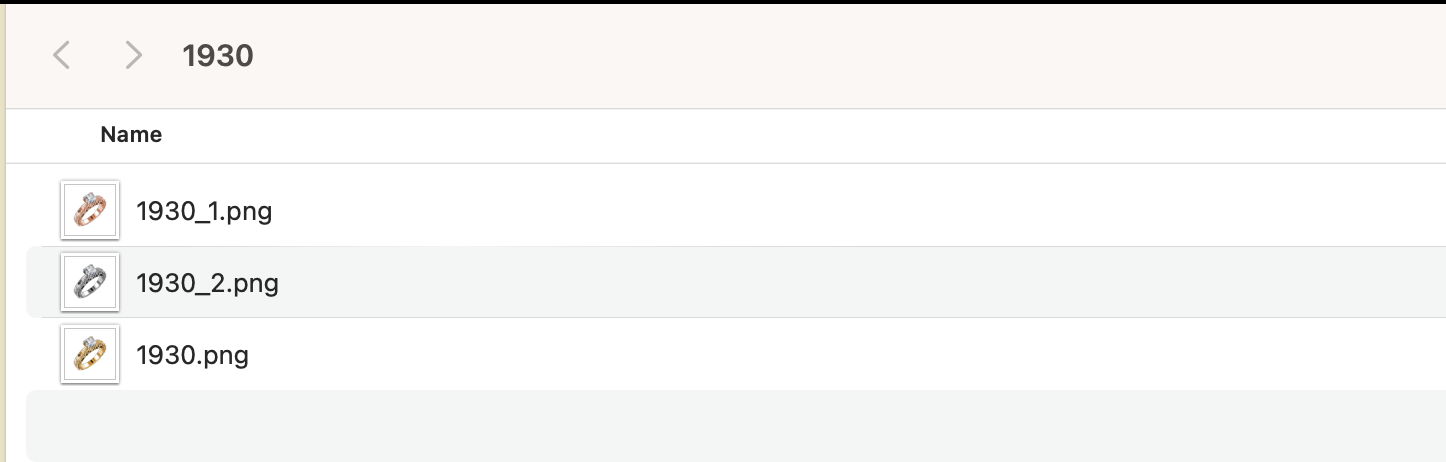
NOTE: Besides the previously mentioned format, this option accommodates an extended format such as 1930, 1930_0, 1930_2, 1930_3, etc.
If your image folder format looks like the above folder then follow these steps:
- Click on Imports
- Search and Click on Bulk Asset Upload and Download
- Give a name for the import
- Select the Bulk Image Upload icon of the format you selected while installing the app[SKU_index]
- Click on Save & Proceed
- Map the Unique ID
- Click on Save and Proceed
- On Configure All Fields Page, Map the images with the PIM Image property
- Click on Save and Import.

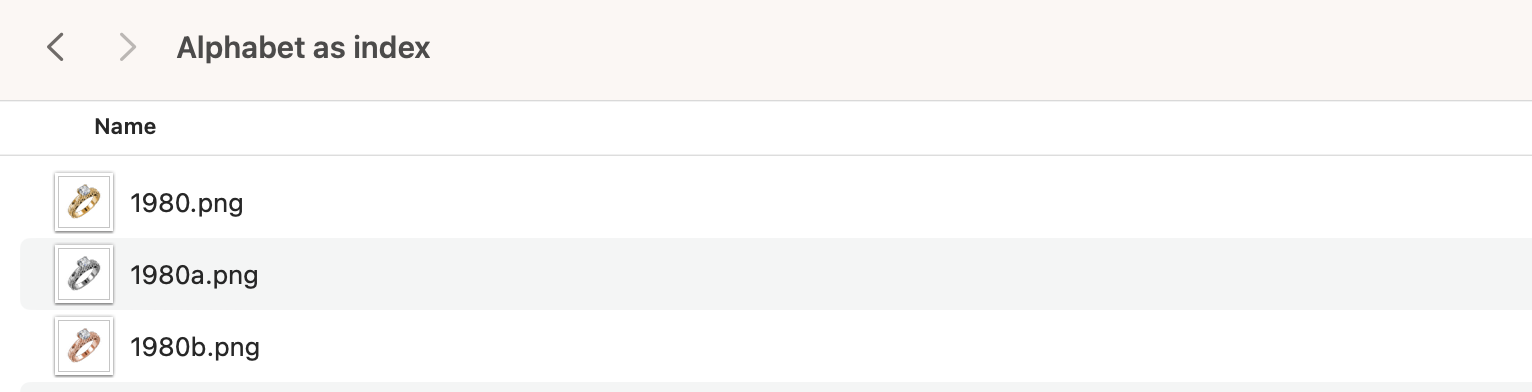
Option 3 – All SKUs are in a folder with the alphabet as an index.
While Installing the app, choose All Sku in a folder with SKU_index.

In this case, the folder name can be anything, and inside the folder, you should use a specific image naming format, such as SKU, SKUa, SKUb, and so forth.
For example, if you have an SKU like “1980,” the first image should be named “1980,” the second image “1980a,” and the third image “1980b.”
If your image folder format looks like the above folder then follow these steps:
- Click on Imports
- Search and Click on Bulk Asset Upload and Download
- Give a name for the import
- Select the Bulk Image Upload icon of the format you selected while installing the app[Alphabet as an index]
- Click on Save & Proceed
- Map the Unique ID
- Click on Save and Proceed
- On Configure All Fields Page, Map the images with the PIM Image property
- Click on Save and Import.
Refer the video for better understanding
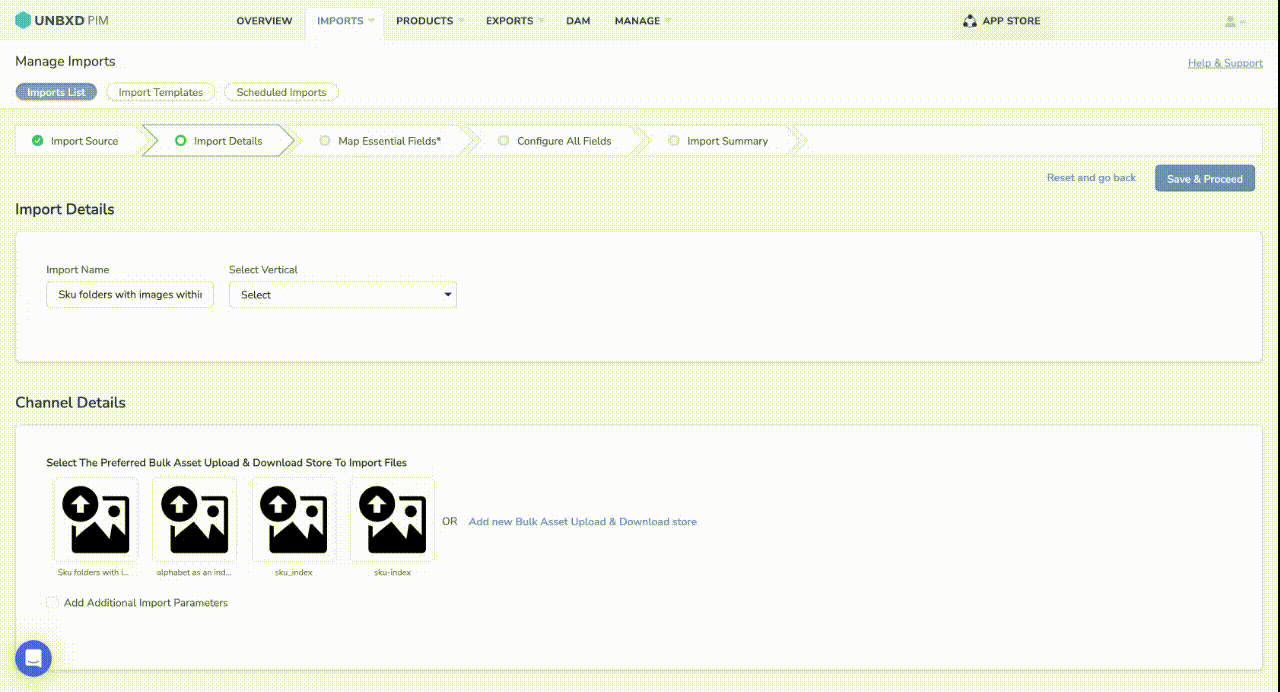
Option 4-SKU Folders with Images within
While Installing the app choose Sku folders with images within option.
You can create multiple folders inside a folder for bulk image upload using SKU Folders with Images within method
Create a folder name it as SKU and name images as 0,1,2 etc.
If your image folder format looks like the above folder then follow these steps:
- Click on Imports
- Search and Click on Bulk Asset Upload and Download
- Give a name for the import
- Select the Bulk Image Upload icon of the format you selected while installing the app[Sku folders with images within]
- Click on Save & Proceed
- Map the Unique ID
- Click on Save and Proceed
- On Configure All Fields Page, Map the images with the PIM Image property
- Click on Save and Import.
Below is the video for reference
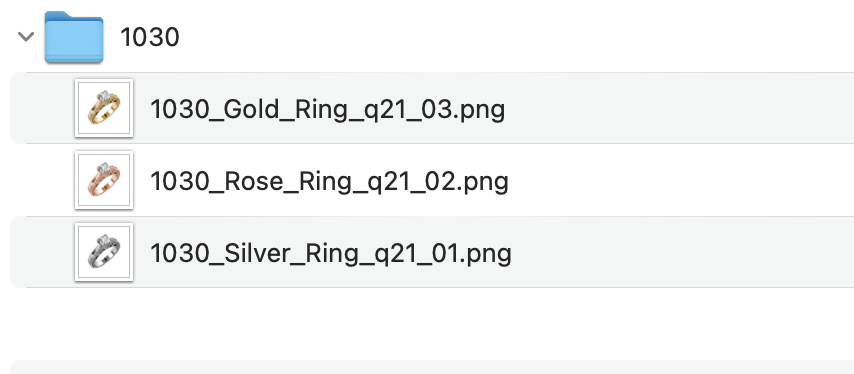
Option 5 – SKU Folders with sku in the image names
An excellent way to do this is to make a folder for each SKU and include the SKU number in the names of all associated image files. For instance, if your SKU is 1930, create a folder called “1930” and name your images “1930 FF.jpg,” “1930 FS.jpg,” and so on. This technique may take a little extra effort upfront, but it will save you time and frustration by simplifying, finding, and managing your files.
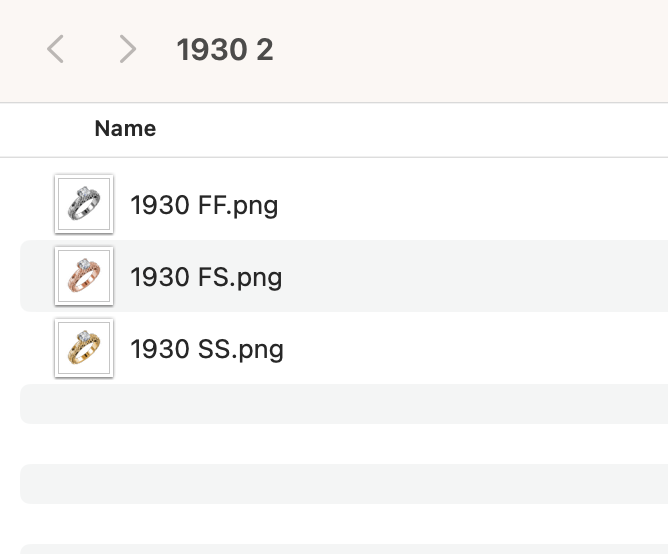
The folder is named after the SKU number, which is “1030,” and the images within it follow the format of SKU number_ProductName_Quarter_Number.
For example, one of the image names is “1030_Silver_Ring_q21_01,” where “1030” is the SKU, “Silver_Ring” is the product name, “q21” represents the quarter, and “01” is the image number.
While Installing App
Select Option SKU folders with sku in the image name.
If your image folder format looks like the above folder then follow these steps:
- Click on Imports
- Search and Click on Bulk Asset Upload and Download
- Give a name for the import
- Select the Bulk Image Upload icon of the format you selected while installing the app[Sku folders with images within]
- Click on Save & Proceed
- Map the Unique ID
- Click on Save and Proceed
- On Configure All Fields Page, Map the images with the PIM Image property
- Click on Save and Import.
Below is the video for reference
Option 6 – SKU Folders with auto index mapper
When creating the folder, place all images inside it. As for the image naming convention within the folder, start with the SKU, add any relevant details, and conclude with a numerical value.
Below is the video for reference
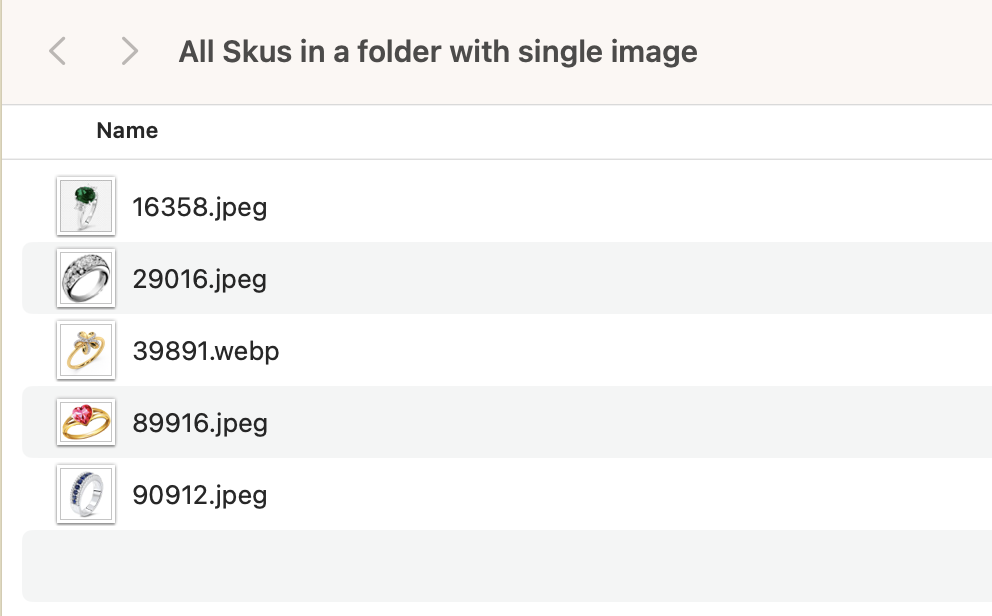
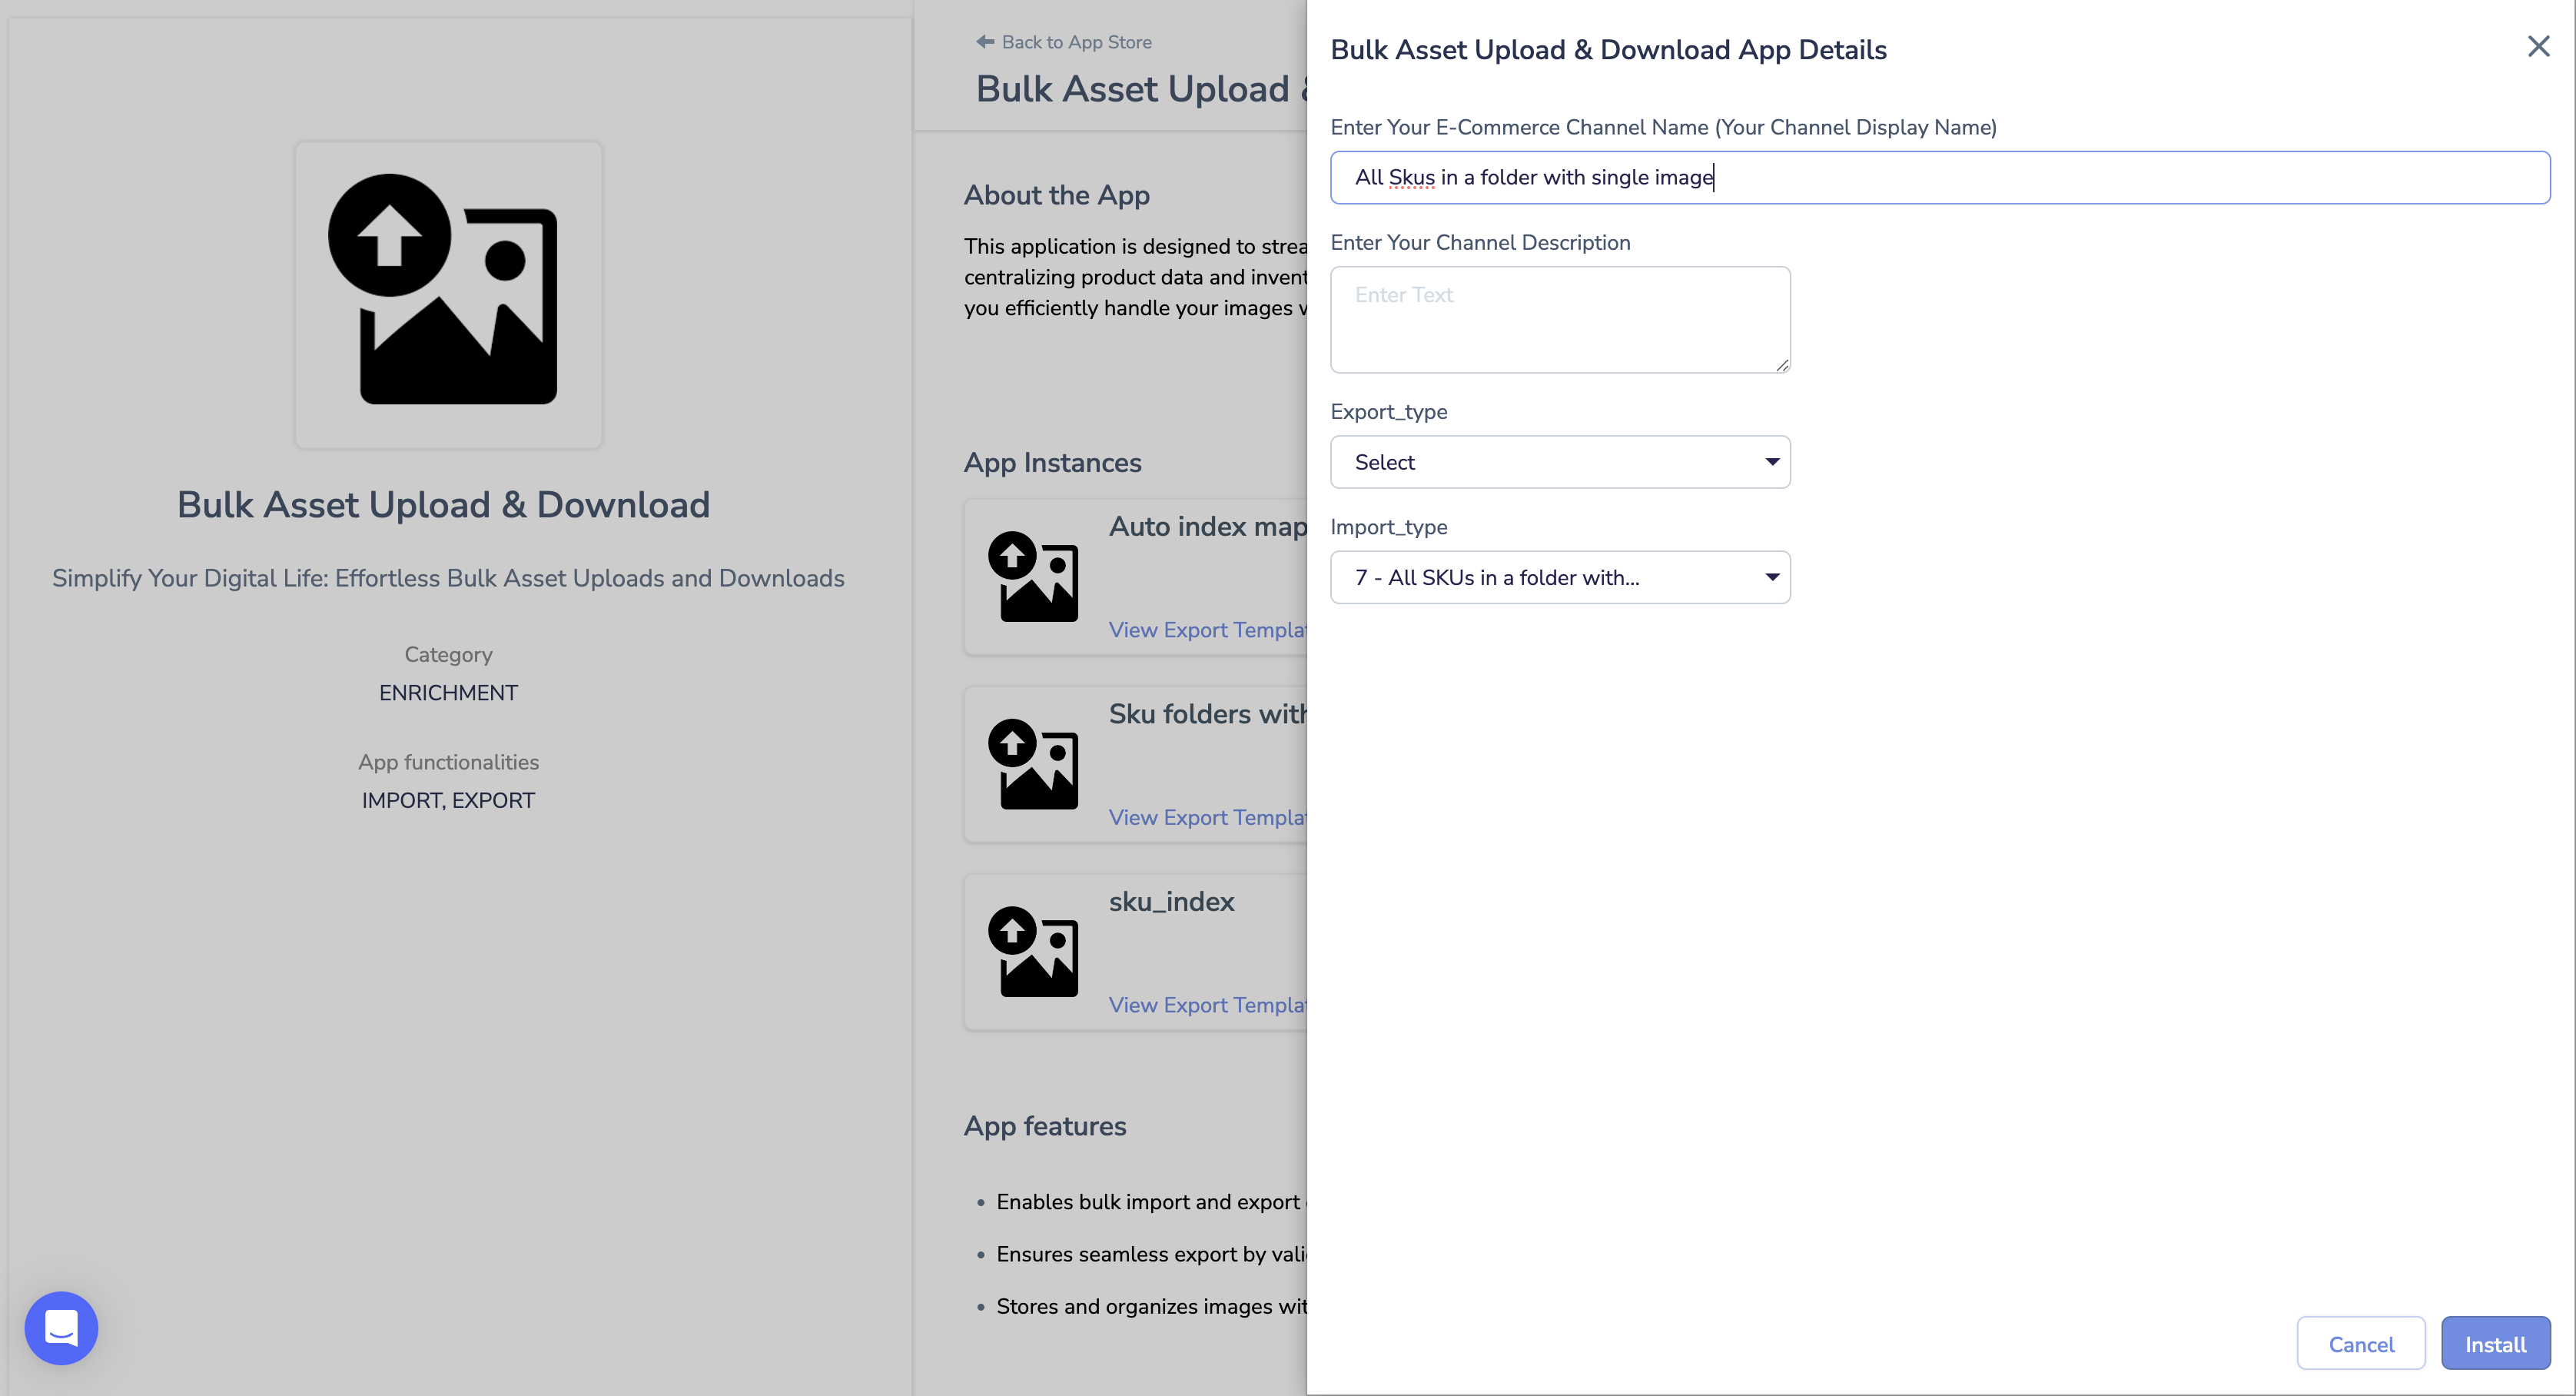
Option 7 – All SKUs in a folder with a single image
You have the flexibility to name the folder as you wish, and the images contained within it are labeled according to their SKU. For instance, the folder can be named “All SKUs in a folder with a single image,” and within it, you may find a single image named “16358,” “29016”,”39891″ etc which corresponds to its SKU.
While Installing App
Select Option All Skus in a folder with single image
If your image folder format looks like the above folder then follow these steps:
- Click on Imports
- Search and Click on Bulk Asset Upload and Download
- Give a name for the import
- Select the Bulk Image Upload icon of the format you selected while installing the app[Sku folders with images within]
- Click on Save & Proceed
- Map the Unique ID
- Click on Save and Proceed
- On Configure All Fields Page, Map the images with the PIM Image property and Sku with the Unique id in system.
- Click on Save and Import.
Below is the video for reference
Option 8 – All SKUs in a folder split with – for sku and image name
The folder containing the product images should be named using the format “sku-image-name”, and the individual images should be renamed with a random string at the beginning, followed by the product SKU and image name separated by a hyphen. For instance, if the product SKU is “sku1” and the image name in the Product Information Management (PIM) system is “imagename1”, then the corresponding image name should be “abcd-sku1-imagename1”
Refer this video link for reference
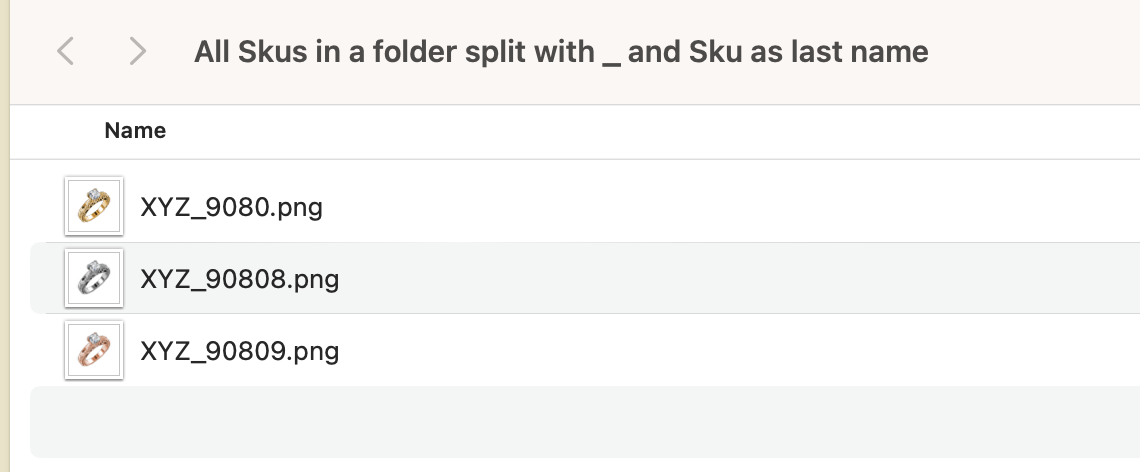
Option 9 – All SKUs in a folder split with _ and SKU as last value
While Installing App
Select Option All Skus in a folder with single image
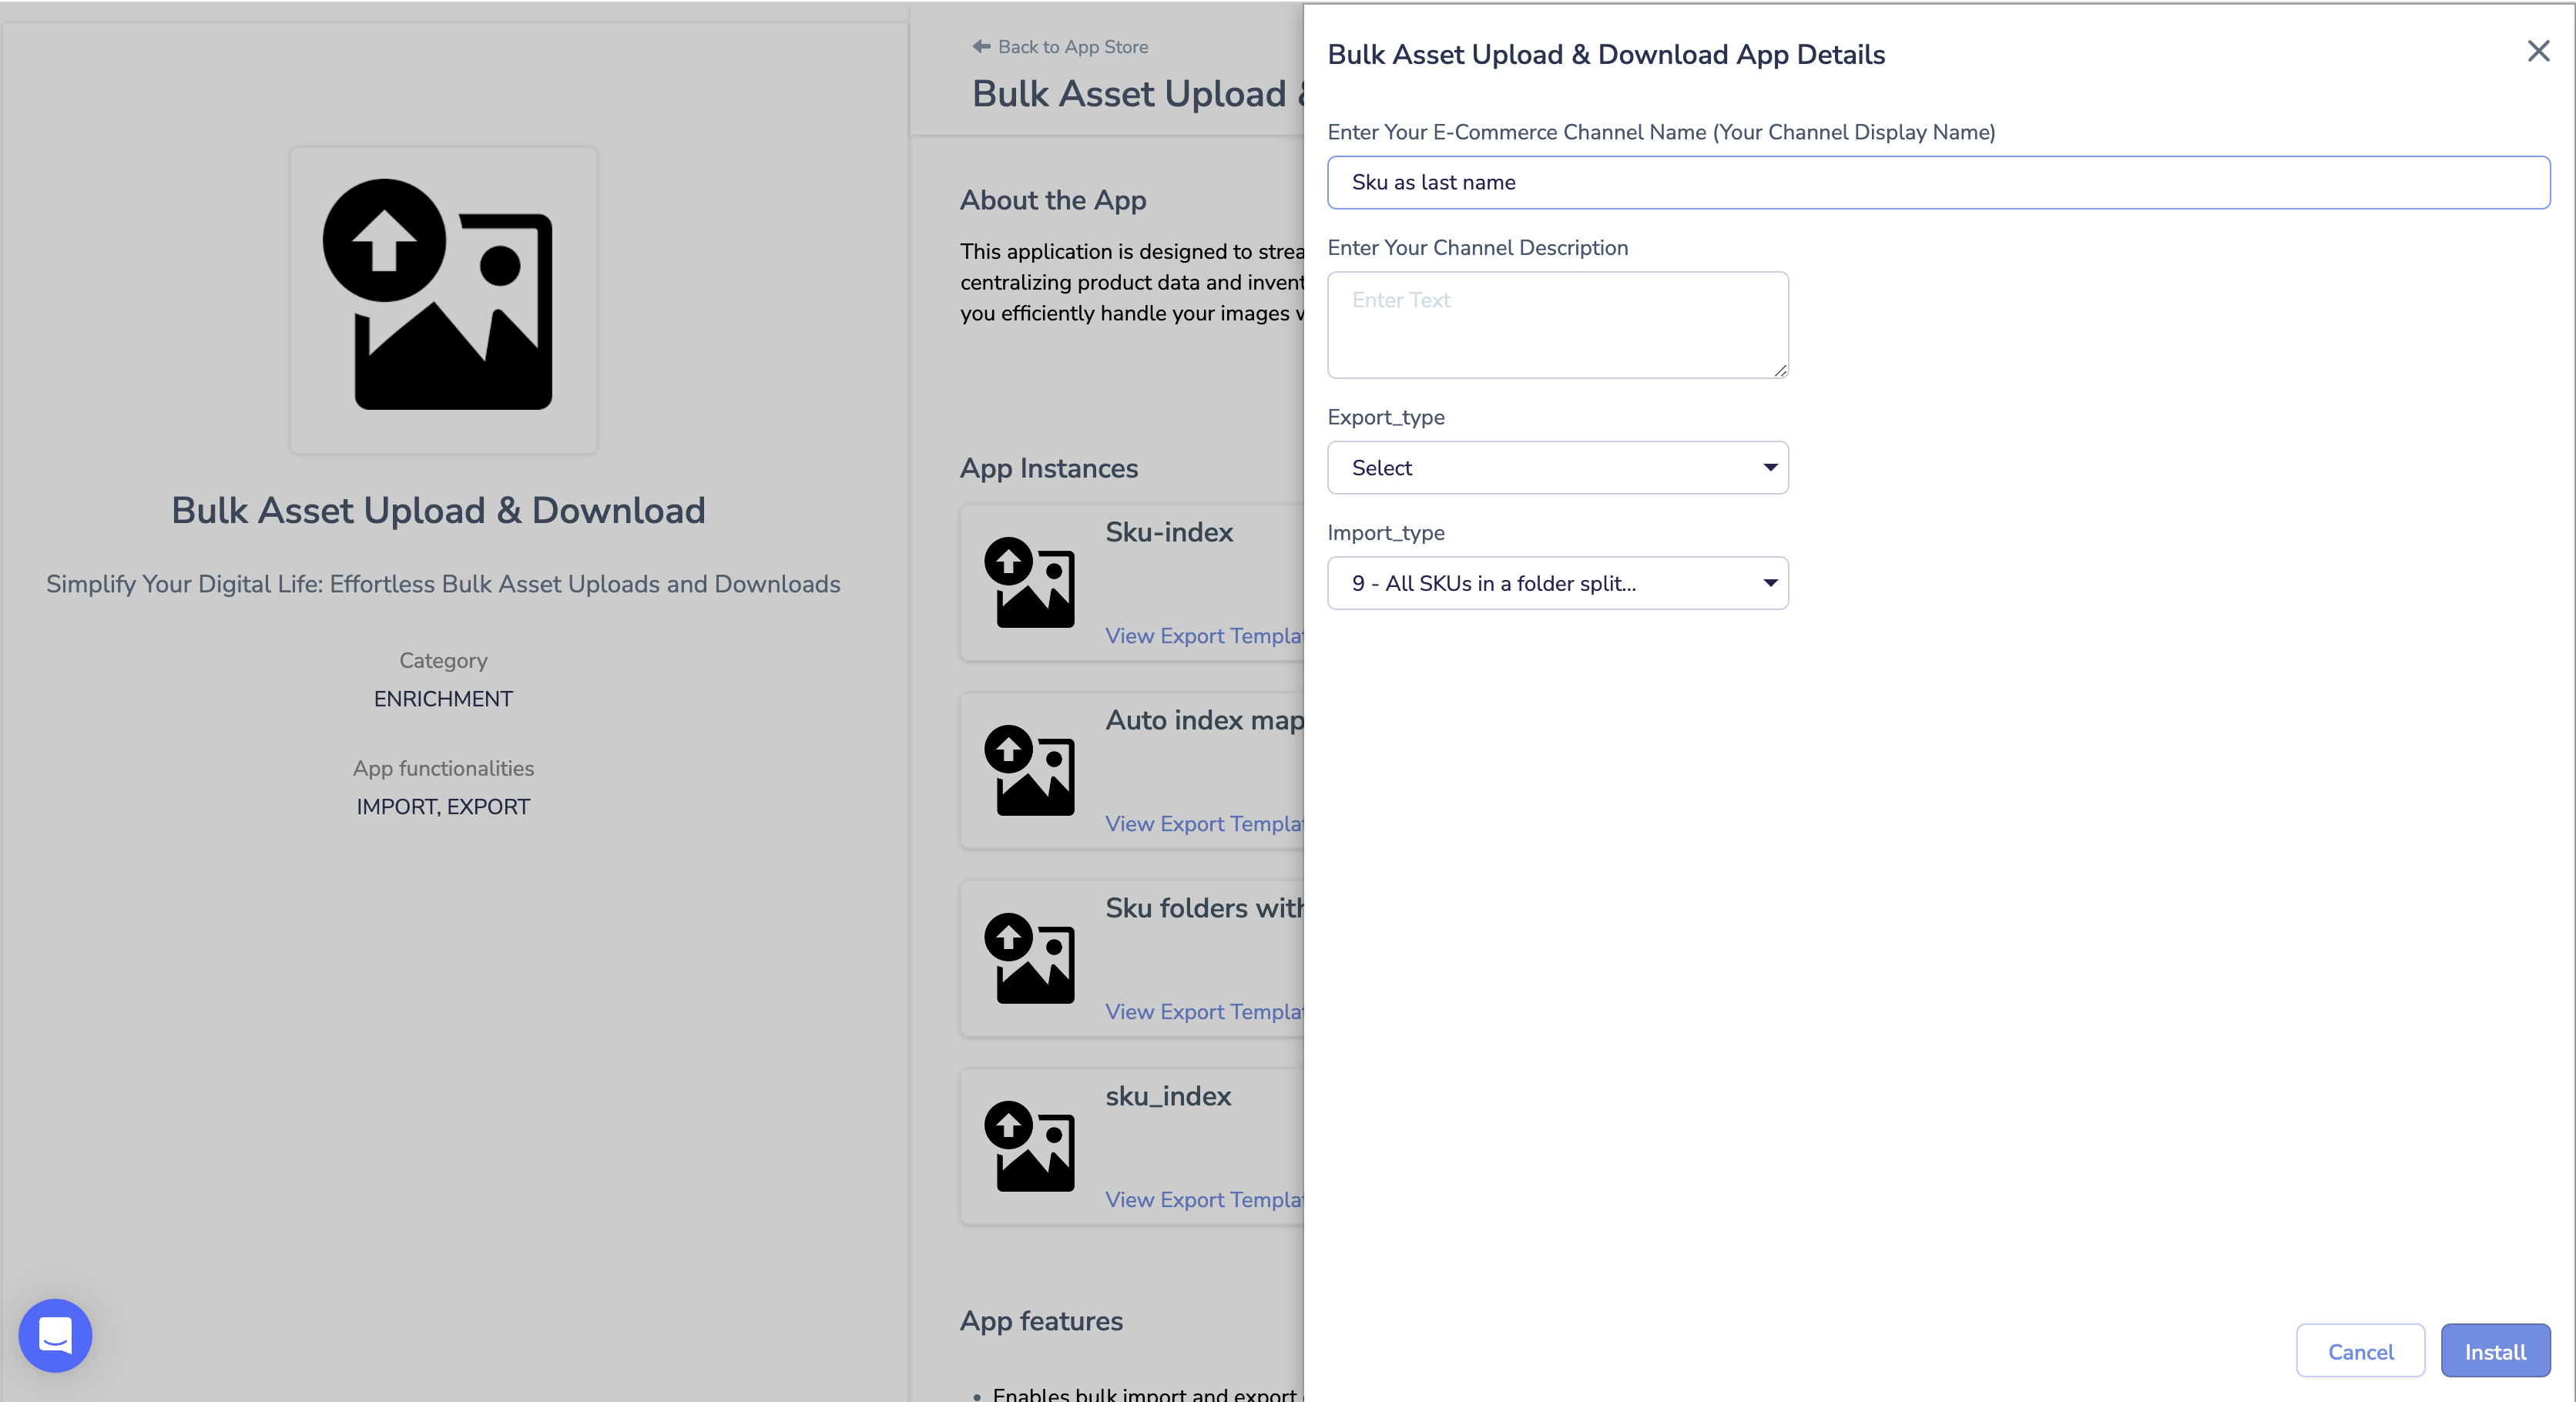
Name the folder
To organize the product images, create a folder with any desired name (without spaces) and add all the images with SKUs in the folder. The SKUs should be separated by an underscore and the SKU itself should be the last value. For the image names, start with any random value and end with the corresponding product SKU. For instance, if the SKU is 9080, the image name can be named as XYZ_9080, while the second image can be named as XYZ_9080 and so on.
Below is the video link for reference
Option 10 – All SKUs in a folder split with _ and SKU as the first value
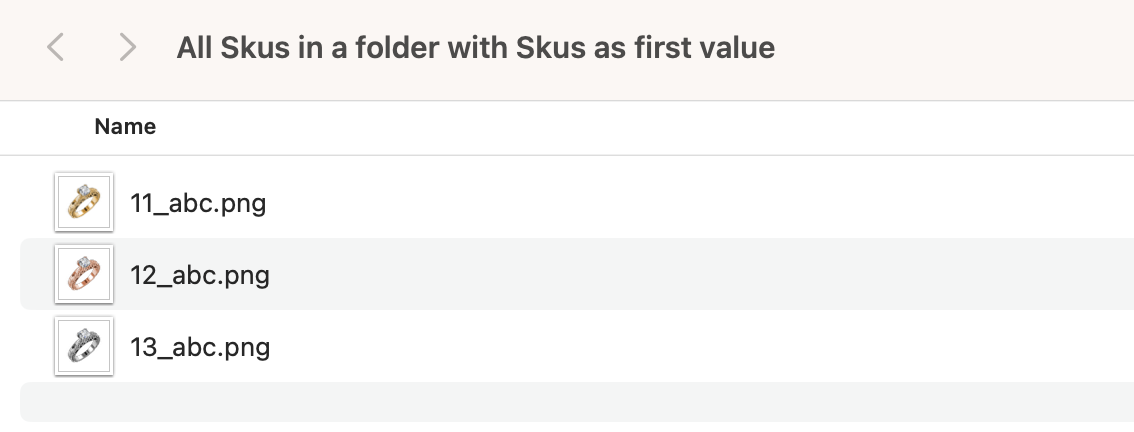
To organize the product images, create a folder named SKU_some random text (without spaces) and add all the images with SKUs in the folder. An underscore should separate the SKUs, and the SKU itself should be the first value. For image names, use the naming convention SKU_text.
For example, if the SKU is 1680, the name of the image should be 1680_abc.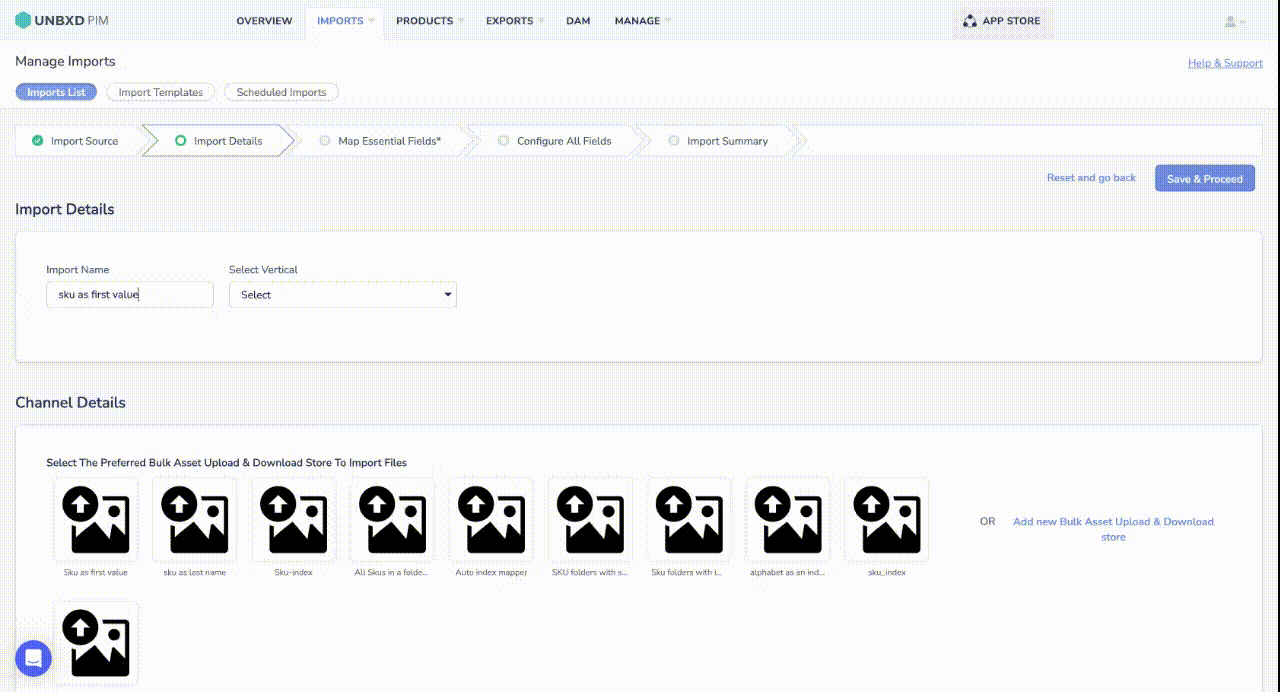
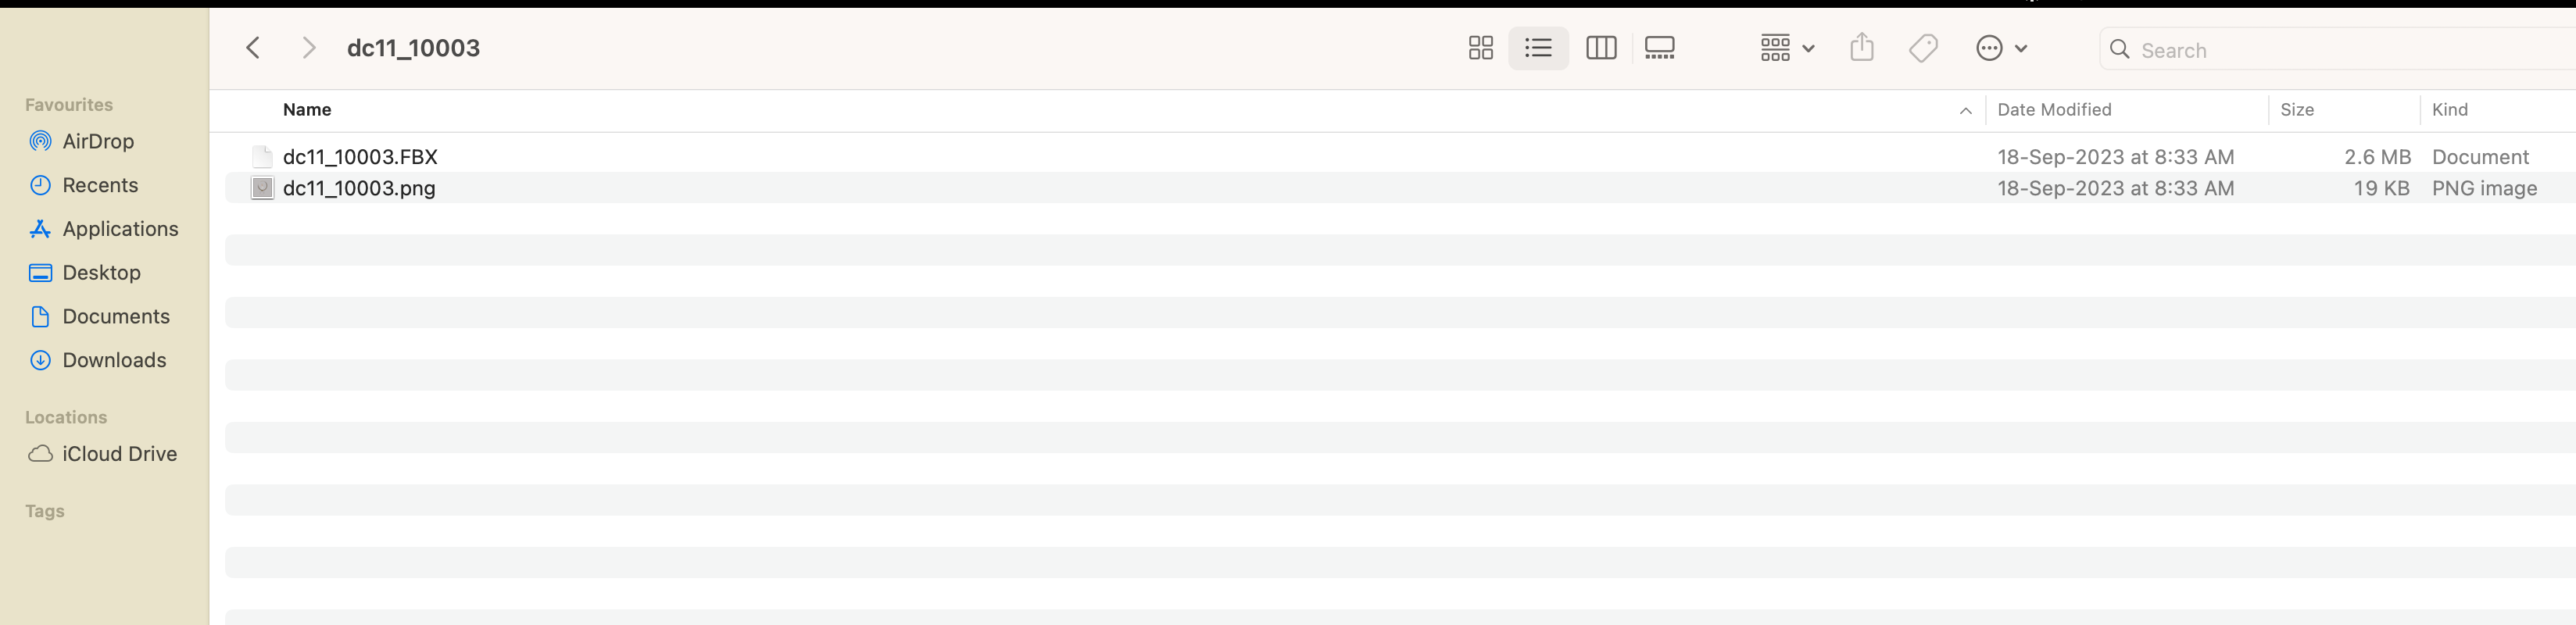
Option 11 – SKU Name in both Folders and Images within
This option has to be selected when you have sku names in the folder along with multiple format[png, jpeg, tiff etc] images all with the sku as the image names.
For Example: abc.png and abc.FBX
The folder looks like this[With 2 image extensions FBX and png]
Below is the video for reference
Option 12 – Upload the Entire Zip File
This option should be choosed when you have a zipped file that needs to be stored as a file within the PIM system. For example, place a zipped file inside another file, and then zip that file as well before uploading
The File which should be zipped should look like this:
Option 14 – All SKUs in a folder with <SKU>_<random char>_index
All SKUs in a folder with <SKU>_<random char>_index is to be selected when you need to organize SKUs uniquely by adding a random character and an index to each SKU, making them easy to identify and manage.
Example: 5800016_JXC/T_0.jpg, 5800016_ttq_0.jpg, 5800016_unbxd_0.jpg