


Creating a New Role
Roles are crucial in the Unbxd Product Information Management (PIM) system, as they define the responsibilities and permissions of each team member.
Each role represents a specialized skill or job, such as a “Photographer,” responsible for capturing and uploading product images into the PIM system.
When creating a role, you can assign members and set both property and system permissions.
While you create a role, you can also do the following:
-
-
-
- Assign members to a role
- Set property permissions for a role
- Set system permissions for a role
-
-
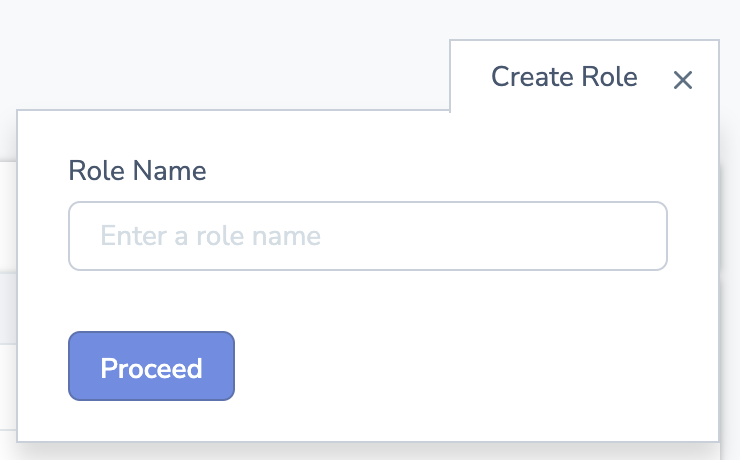
Create a New Role
- Click on the profile icon at the top-right corner of the screen, then select the ‘View Organization’ link from the dropdown menu.
- From the next screen, select ‘Roles & Permissions’. You’ll be directed to the ‘Roles Listing’ page.

- Click on ‘Create Role’, located at the top of the ‘Roles Listing’ page.
- Enter a name for the new role in the provided text box.
- Click ‘Proceed’ to create the role.

Assigning Members to a Role in Unbxd PIM
Once a role is created, you can assign members to it, who will then carry out the responsibilities defined by the role.
Here’s a step-by-step guide on assigning members to a role:
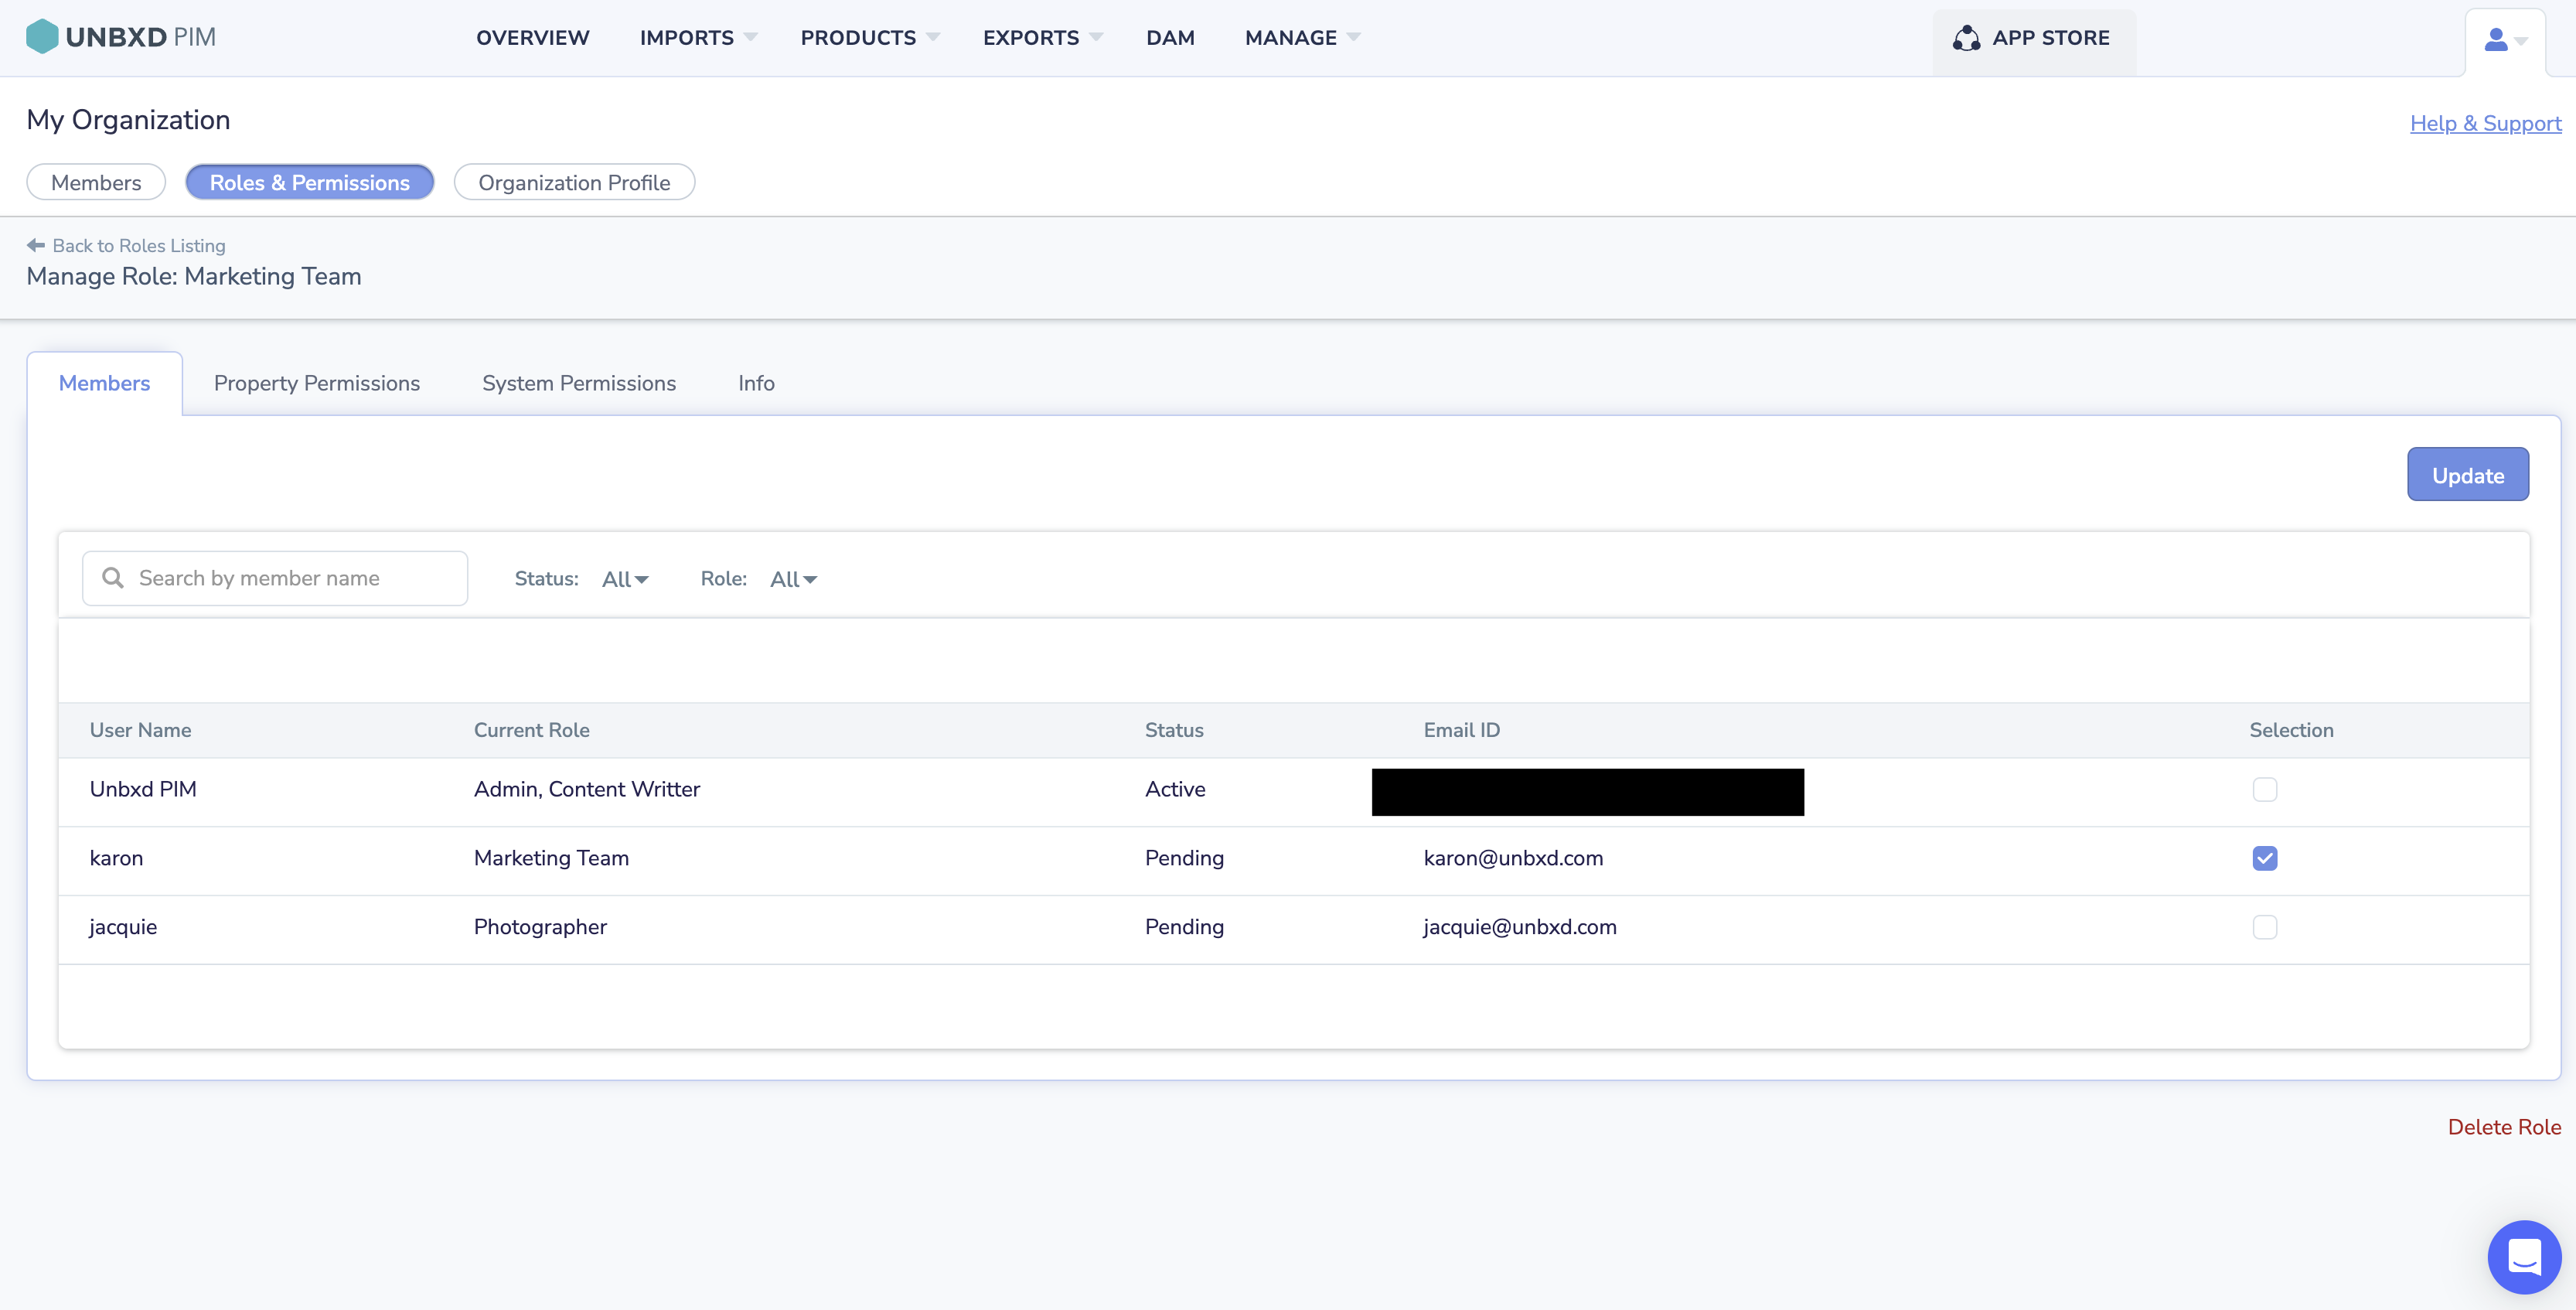
Assign Members to a Role
- Navigate to the ‘Members’ tab within your newly created role.
- If you’re searching for a specific member, use the search box to locate them by their name.
- If you wish to view members based on their activation status, select either ‘All’, ‘Active’, or ‘Pending’ from the ‘Status’ dropdown menu. Here’s what each status means:
- ‘All’: Displays all the members.
- ‘Active’: Shows only the members who have activated their Unbxd PIM account.
- ‘Pending’: Displays the members who haven’t yet activated their Unbxd PIM account.
- If you want to filter members by their roles, select the appropriate role name from the ‘Role’ dropdown menu.
- In the ‘Selection’ column, check the checkboxes corresponding to the members you want to assign to the role.
- Click ‘Update’ to save your changes.
Setting Property Permissions for a Role
In Unbxd Product Information Management (PIM), property permissions allow you to control the level of access each role has to sensitive product information. This is especially useful when you need to restrict certain data, such as the price of an unreleased product.
Types of Property Permissions
- Manage: The role can edit the property value.
- Read Only: The role can only view the property value.
- Hide: The role cannot view the property value at all.
How to Set Property Permissions
- Click on your Profile Icon, and then click Organization.
- Click on Roles. You’ll now be on the Roles Listing page.
- Click on the Edit icon (represented by a pencil symbol) for the role you want to edit.
- Navigate to the Property Permissions tab.
- If you’re searching for a specific property, use the search box to find it by its name.
- In the Permissions column, hover over the property you want to set permissions for and select Manage, Read Only, or Hide.
- Click Update to save the changes.
Setting System Permissions for a Role
System permissions in Unbxd Product Information Management (PIM) provide a higher level of control over various operational aspects. By assigning system permissions, you can tailor the level of access each role has to different components of the PIM system, aligning with the unique needs of your organization.
Types of System Permissions
- Manage: Allows the role to perform all operations related to the system component.
- Read Only: Allows the role only to view the system component.
- Hide: Completely restricts the role’s access to the system component.
These permissions can be set for various system-level operations, including:
- Organization Setup
- Import
- Property Definitions
- Product Management
- Assets
- App Store
- Task
- Catalog
- Category
- Workflow
Example:
If the “Product Management” operation is set to “Manage”, the respective role can perform all product-related actions on the Products Listing page. If it’s set to “Read Only”, they can only view product information.
If “Hide” is selected, the role will not have any access to the Products Listing page.
How to Set System Permissions
- Click on your Profile Icon, and then select Organization.
- Click Roles & Permission to access the Roles Listing page.
- Click the Edit icon (represented by a pencil symbol) for the role you want to edit.
- Navigate to the System Permissions tab.
- If you’re searching for a specific system-level operation, use the search box to find it by its name.
- In the Permissions column, hover over the operation you want to set permissions for, then select Manage, Read Only, or Hide.
- Click Update to save your changes.
Changing a Role’s Name
Renaming a role within your organization’s setup can easily be done with the following steps:
- Navigate to the Info tab for the role you wish to modify.
- Locate the Role Name input field.
- Delete the existing name and enter your desired new name.
- Once you’ve typed in the new role name, click the Update button to save your changes.