Structured information to guide you through Unbxd PIM with minimal assistance


Editing an Existing Task
Once you create a task, you can edit an ongoing task. Editing a task includes:
- Adding more assignees
- Editing name or instruction
- Downloading Task Product Reports
- Adding products to task
- Adding more properties
- Stopping the task
- Deleting the task
- Changing Task status directly from Product Listing Page.

Add more assignees to a task
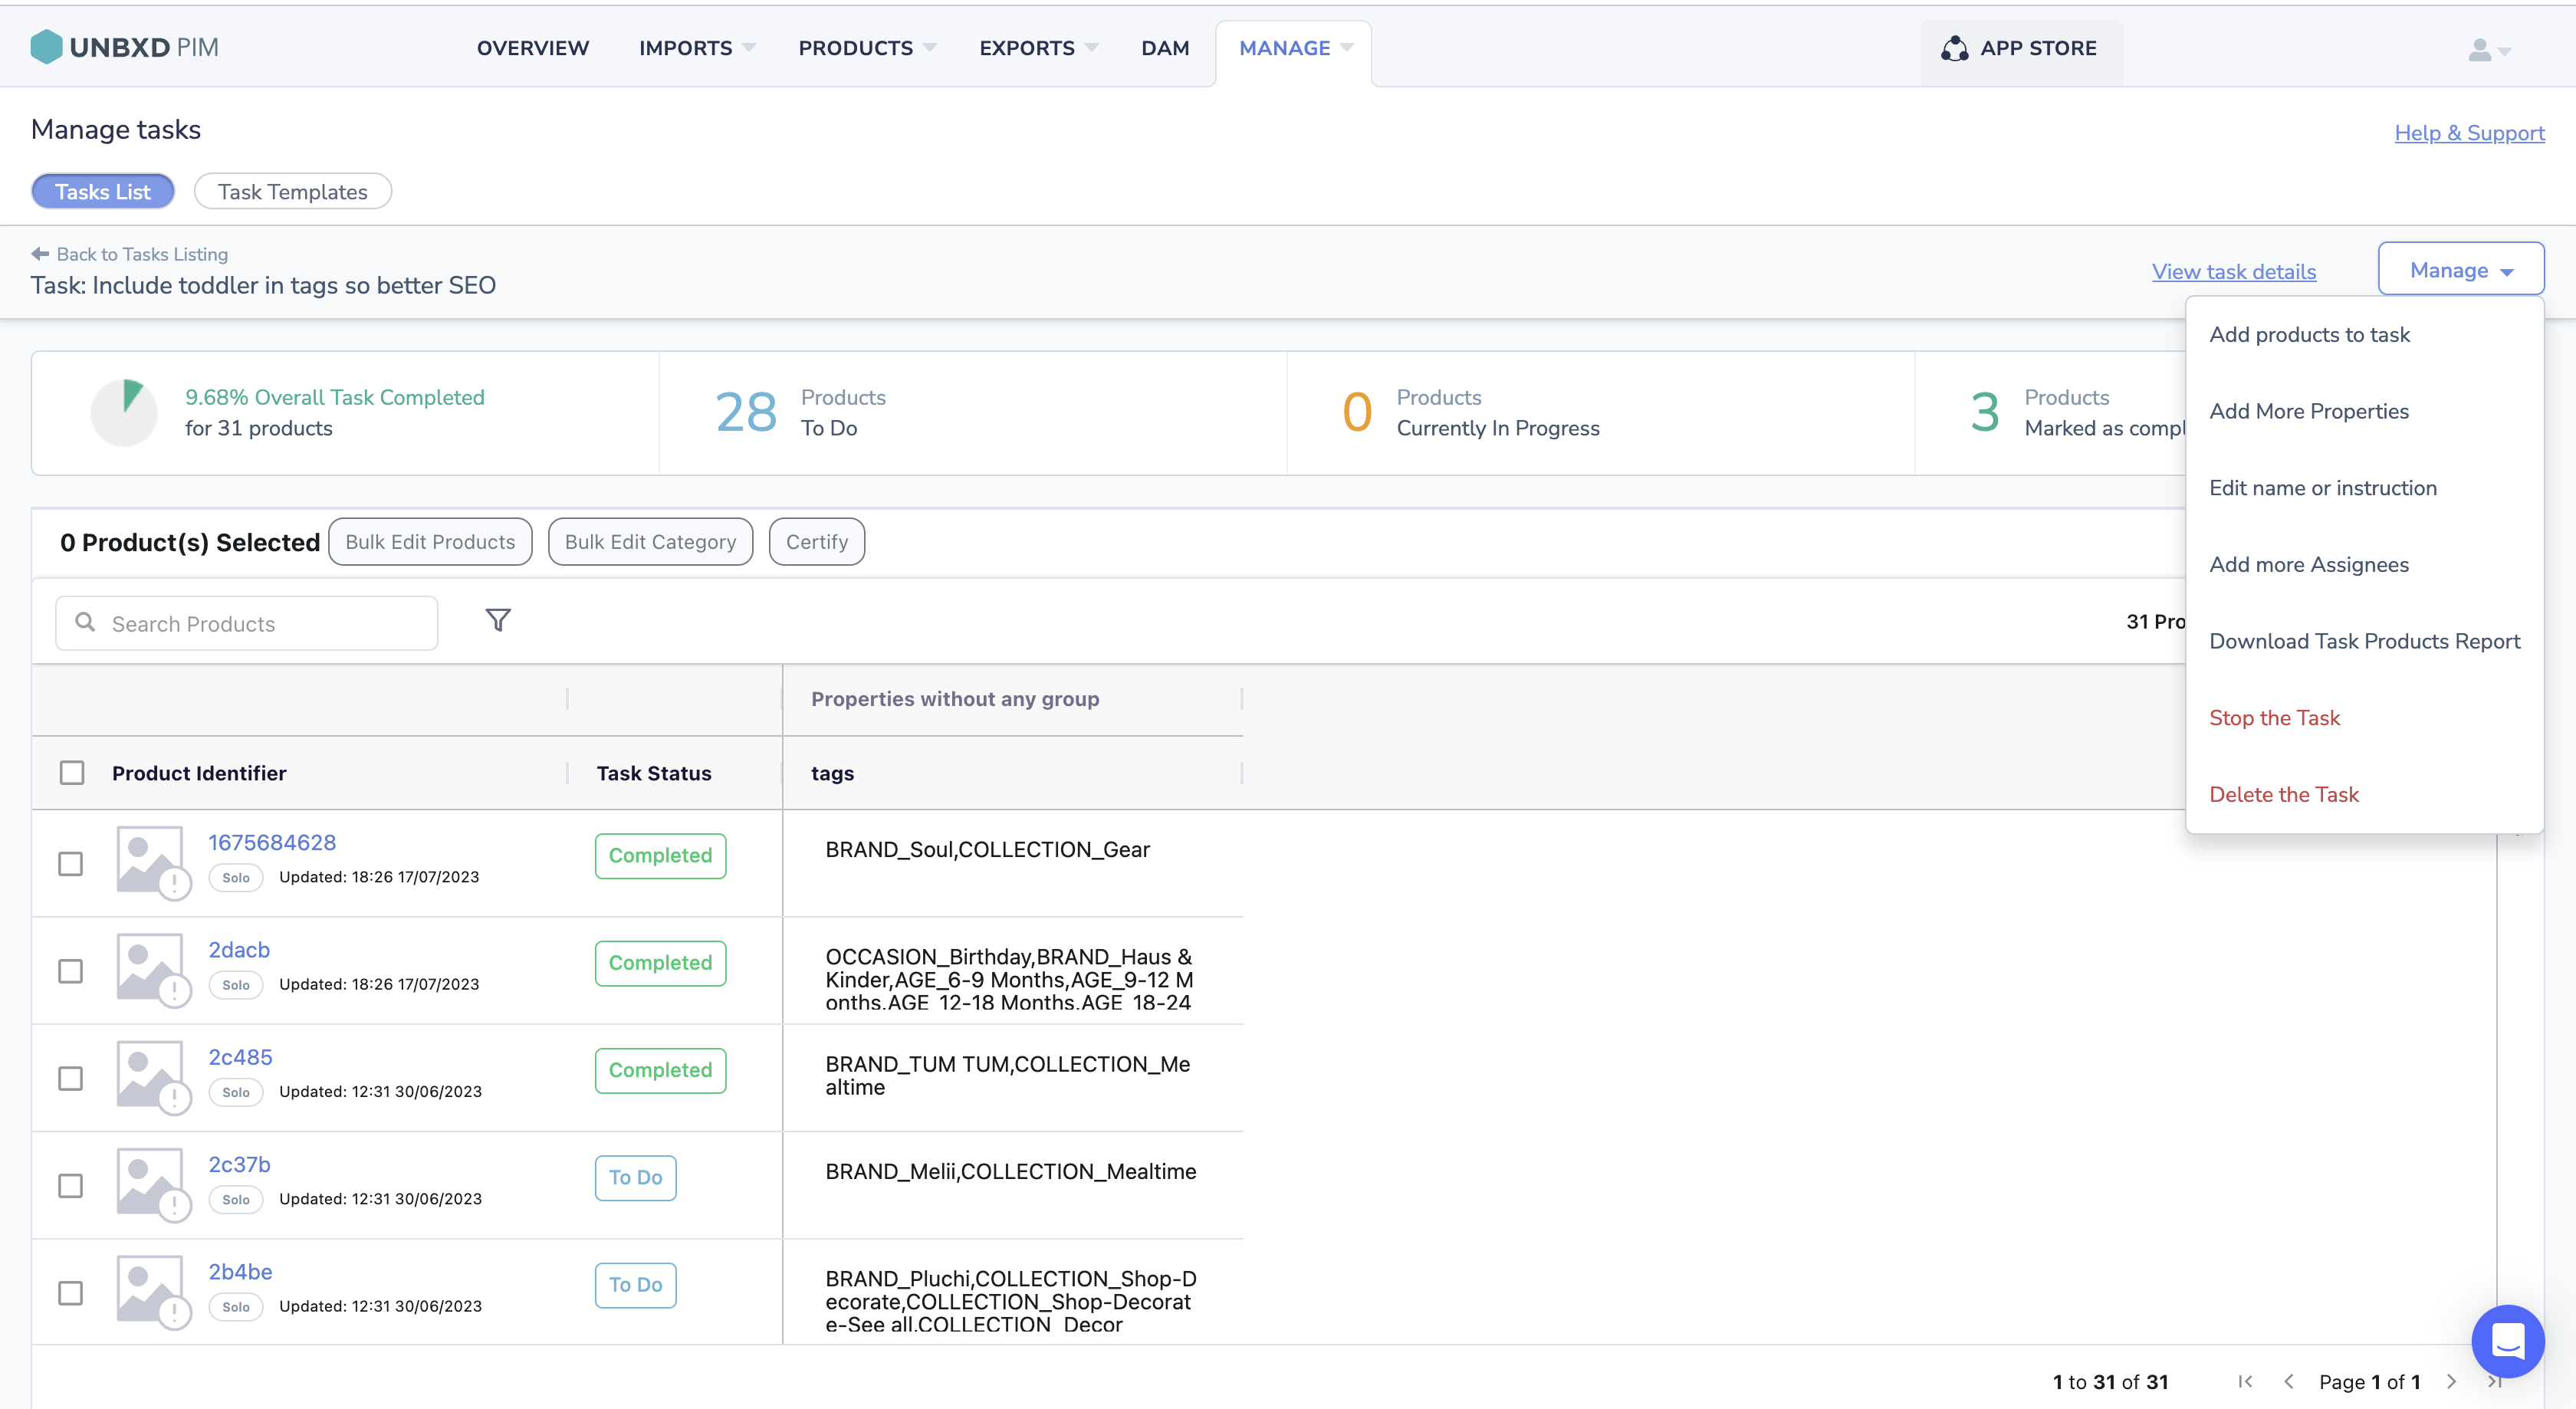
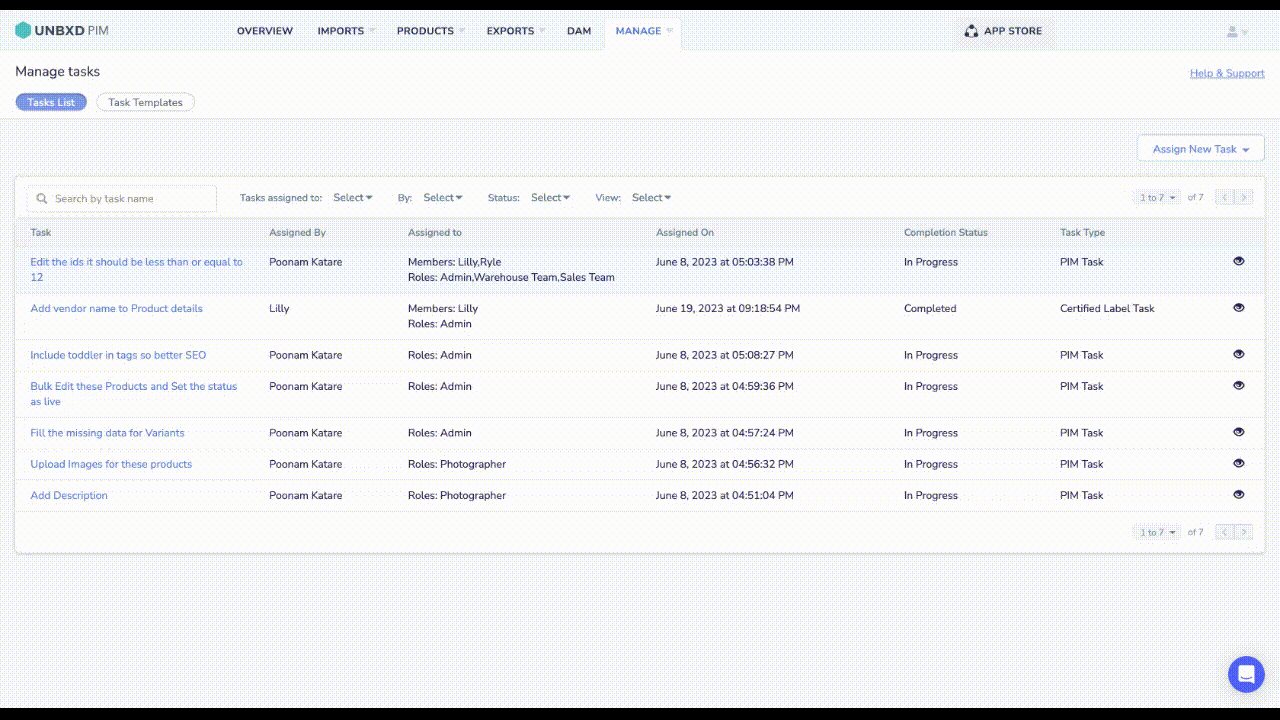
- On the MANAGE tab, click Tasks to access the Tasks Listing page.
- Locate the task you want to add more roles/members to and click the corresponding task card.
- Click Manage and then select Add more Assignees. This action opens the Add More Assignees window, where you can view the selected roles and members.
- In the Assign the task to list, select the additional member(s) and/or role(s) you want to add to the task. Click Add to Task.
Note: The person initially in charge of a task has the authority to assign it to another team member but is unable to disassociate themselves from the task.

Edit the name or instruction for a task
- On the MANAGE tab, click Tasks to access the Tasks Listing page.
- Locate the task you want to edit the name or instruction for and click the corresponding task card.
- Click Manage and then select Edit name or instruction. This action allows you to change the task’s name or instructions.
- Update the name or instruction as desired.
- Click Update Task to save the changes.
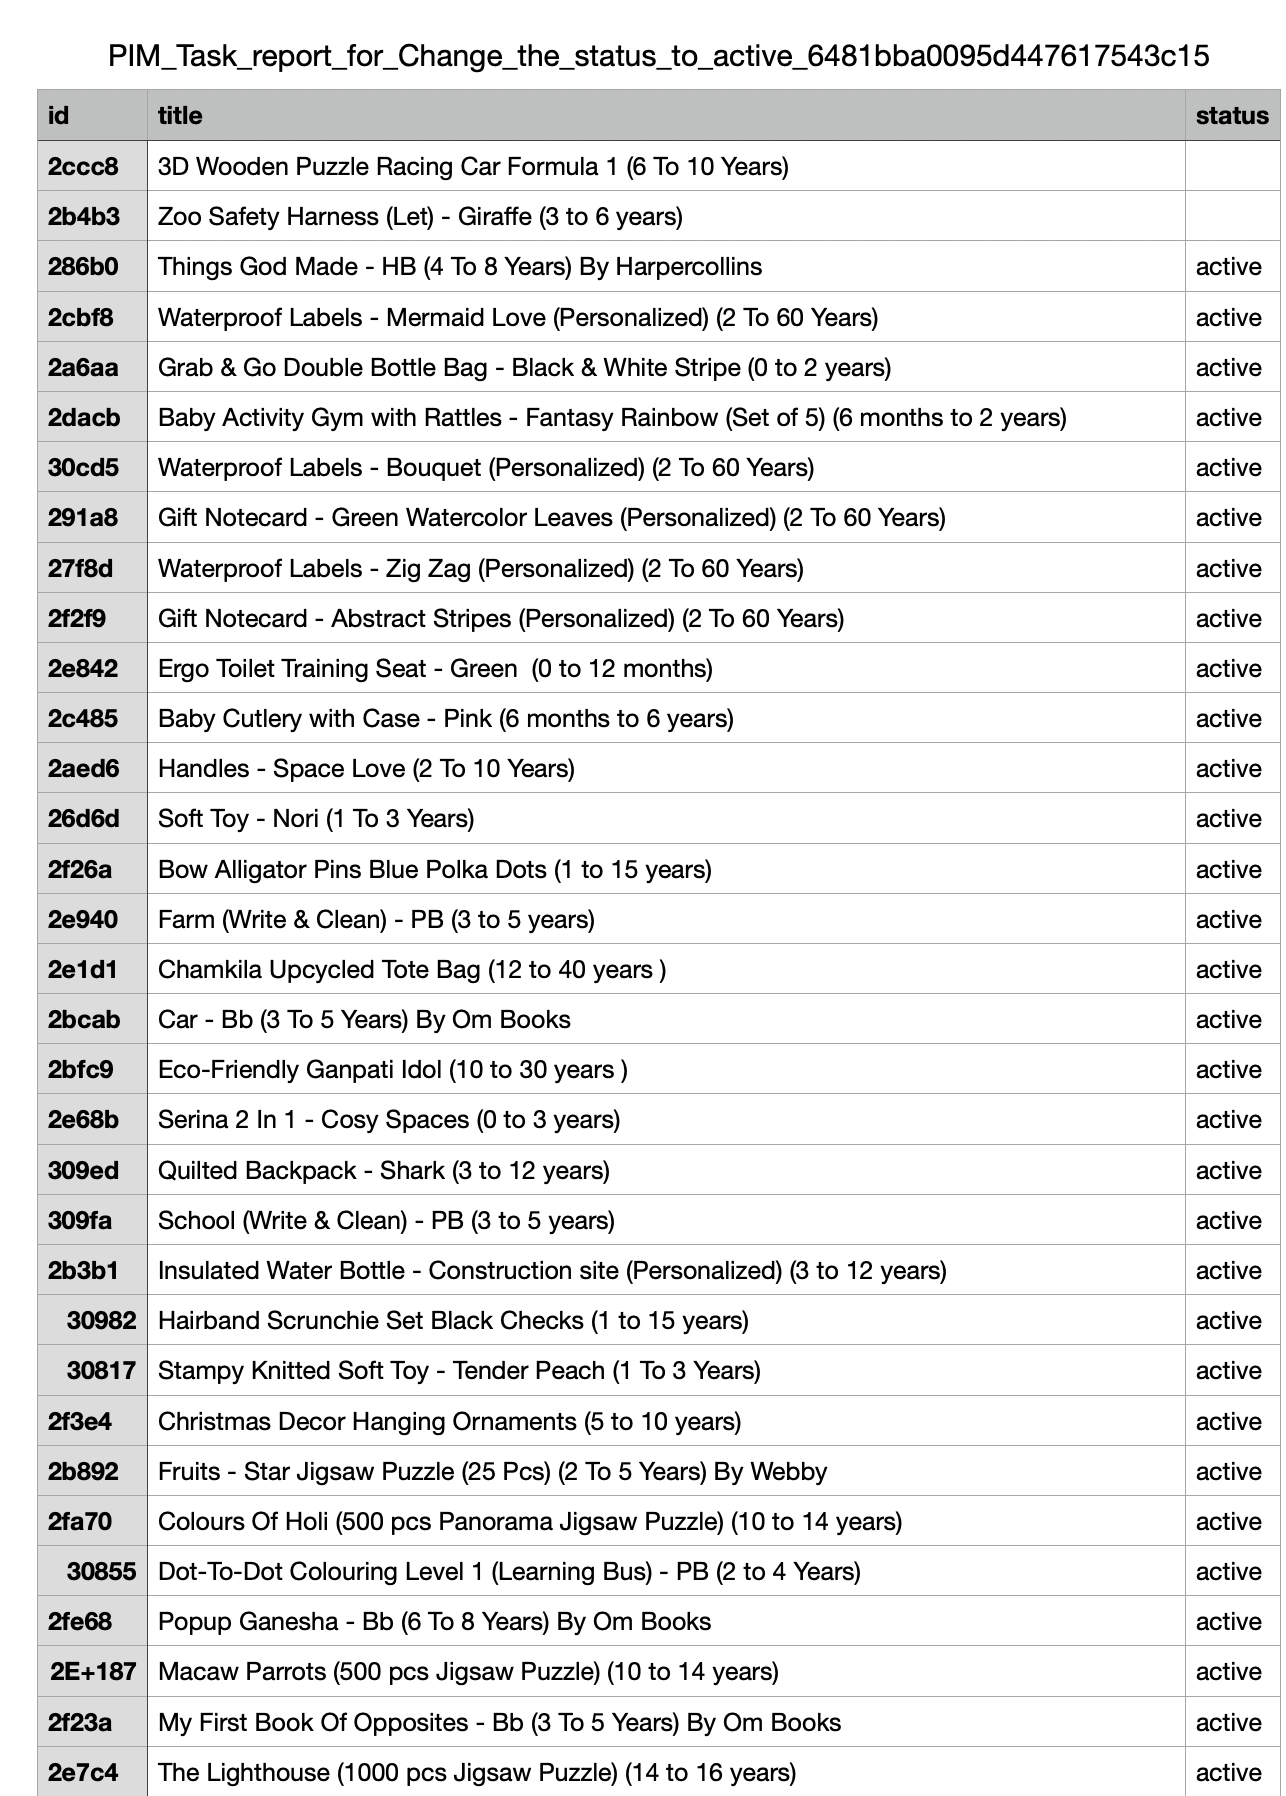
Download the task products report
- On the MANAGE tab, click Tasks to access the Tasks Listing page.
- Locate the task you want to download the task products report and click the corresponding task card.

The downloaded file looks like this and will help you identify missing details.
Add Products to a task:
- On the MANAGE tab, click Tasks to access the Tasks Listing page.
- Locate the task you want to add products and click the corresponding task card.
- Click Manage and then select Add Products to task. This action allows you to add more products to already existing task.
- Checkmark all the products that you want to add task
- Click Add products to task to save the changes.

Add more properties to a task:
- On the MANAGE tab, click Tasks to access the Tasks Listing page.
- Locate the task you want to add properties and click the corresponding task card.
- Click Manage and then select Add more properties. This action allows you to add more properties to already existing task.
- Checkmark all the properties that you want to add
- Click Add properties to task to save the changes.

Stop the ongoing task
- On the MANAGE tab, click Tasks to access the Tasks Listing page.
- Locate the task you want to stop.
- Click Manage and then select Stop the task.
- A confirmation tab appears,Confirm by clicking on Stop task.

Delete an ongoing task
- On the MANAGE tab, click Tasks to access the Tasks Listing page.
- Locate the task you want to stop.
- Click Manage and then select Stop the task.
- A confirmation tab appears,Confirm by clicking on Stop task.
Change Task status directly from Product Listing Page.
- Click on Manage
- Click on the the desired task for which you want to change the task status
- Below Task status double click you can see an dropdown select from the above options:To Do,In Progress,Completed.
1 of 1 users found this section helpful