Structured information to guide you through Unbxd PIM with minimal assistance
Scheduling an Import
Scheduling an import allows for the automated retrieval of updated import files, ensuring the seamless import of product information updates into your PIM system.
To begin the scheduling process, the first step is configuring an SFTP location, which serves as the server location where you can store your import file.
In addition to scheduling the import, you can set the import frequency, enabling regular updates to be pulled from the designated SFTP location.
Note: Once you schedule an import, you must manually start the schedule.
Schedule an import in Unbxd PIM
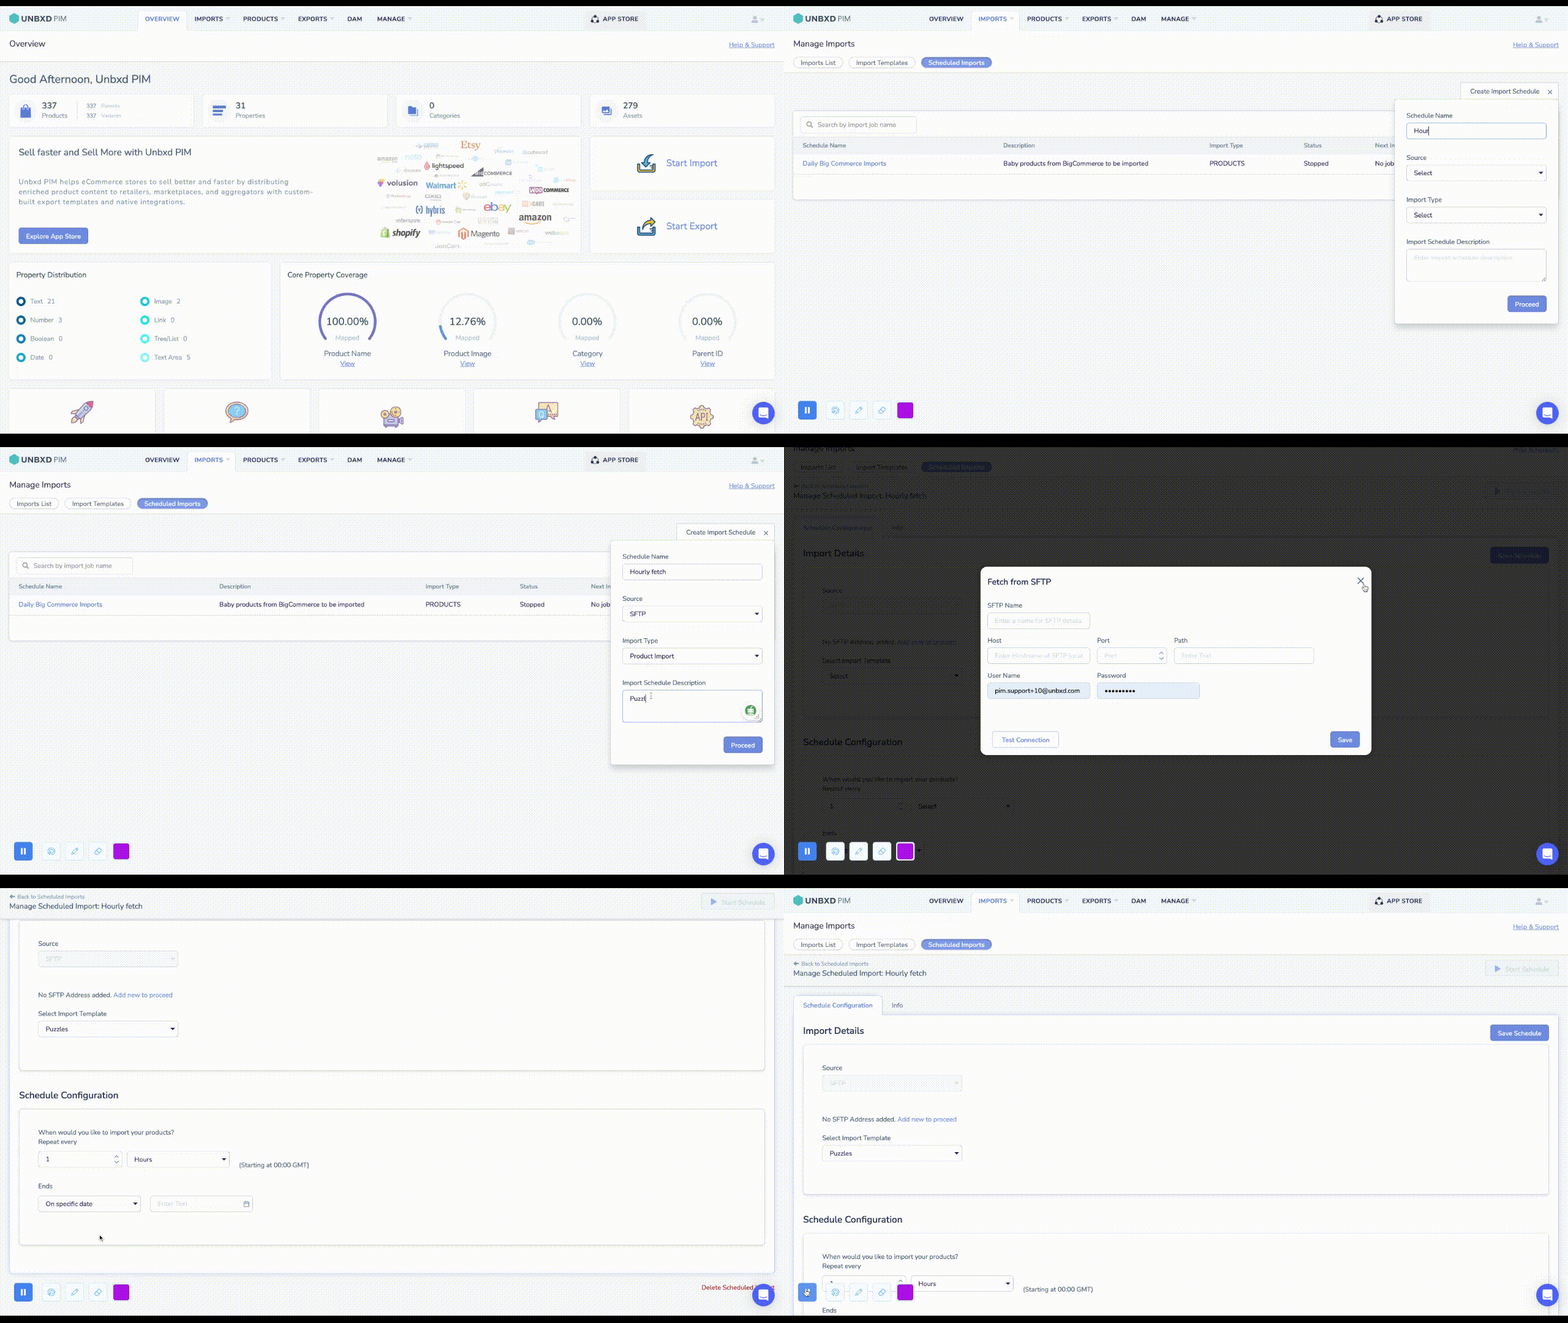
- On the Import tab, click “Scheduled Imports”.
- The Scheduled Imports Listing page will appear. Click “Create Import Schedule”.
- Enter a name for the import schedule and select the import type from the Import Type list (e.g., Product Import). Optionally, provide a description for the import schedule.
- Click “Schedule Import”.
- In the Select SFTP list, choose the SFTP location you want to use for the import. If you need to add a new SFTP location, click “Add New” and provide the necessary details such as name, hostname, port number, path to the file, username, and password. You can also test the connectivity of the SFTP location by clicking “Test Connection”.
- Choose the file fetching method based on your requirements:
- To fetch all files from the SFTP location, click “Fetch all files from the address”.
- If you want to use an import template, select the desired template from the “Select Import Template” list.
- If you want to use an import template, select the desired template from the “Select Import Template” list.
- Set the import frequency:
- Enter a number in the first box to specify the repeat frequency (e.g., every 2 hours, every 3 days).
- Select Hours, Days, Weeks, or Months from the second box.
- Configure the specific time, time zone, and recurrence details based on your import frequency selection.
- In the “Ends” list, choose one of the following options:
- Select “Never” if you want the scheduled import to continue indefinitely.
- Select “On a Specific Date” to specify an end date for the scheduled import and enter the date in DD/MM/YYYY format.
- Select “After Specific Occurrence” to define the number of times the import should repeat before ending and enter the repetition count.
- Click “Save Schedule”. The status of the schedule will be shown as “Stopped.”
- To start the schedule, click “Start Schedule.” The status of the schedule will change to “Running.”


0 of 0 users found this section helpful


