


Digital Asset Management - Manage your Digital Files
Unbxd PIM allows you to organize, transform, store, and retrieve digital files of the products from one single point of entry. With large volumes of digital assets, multiple roles, and members working on the different aspects of an asset, this centralized location reduces the time to market for products. The Assets system helps your brand and sales teams ensure that the organization’s images and other digital assets are safe, secure, accessible, and protected.
The digital assets managed through Unbxd PIM include various image formats:
- .jpeg,
- .png,
- .gif,
- .jpg,
- .tiff,
- .bmp,
- .pptx
DAM Tab
Once you successfully import your products into Unbxd PIM, you can leverage the DAM functionality by navigating to the DAM tab.
This tab provides you with two levels of detailed information:
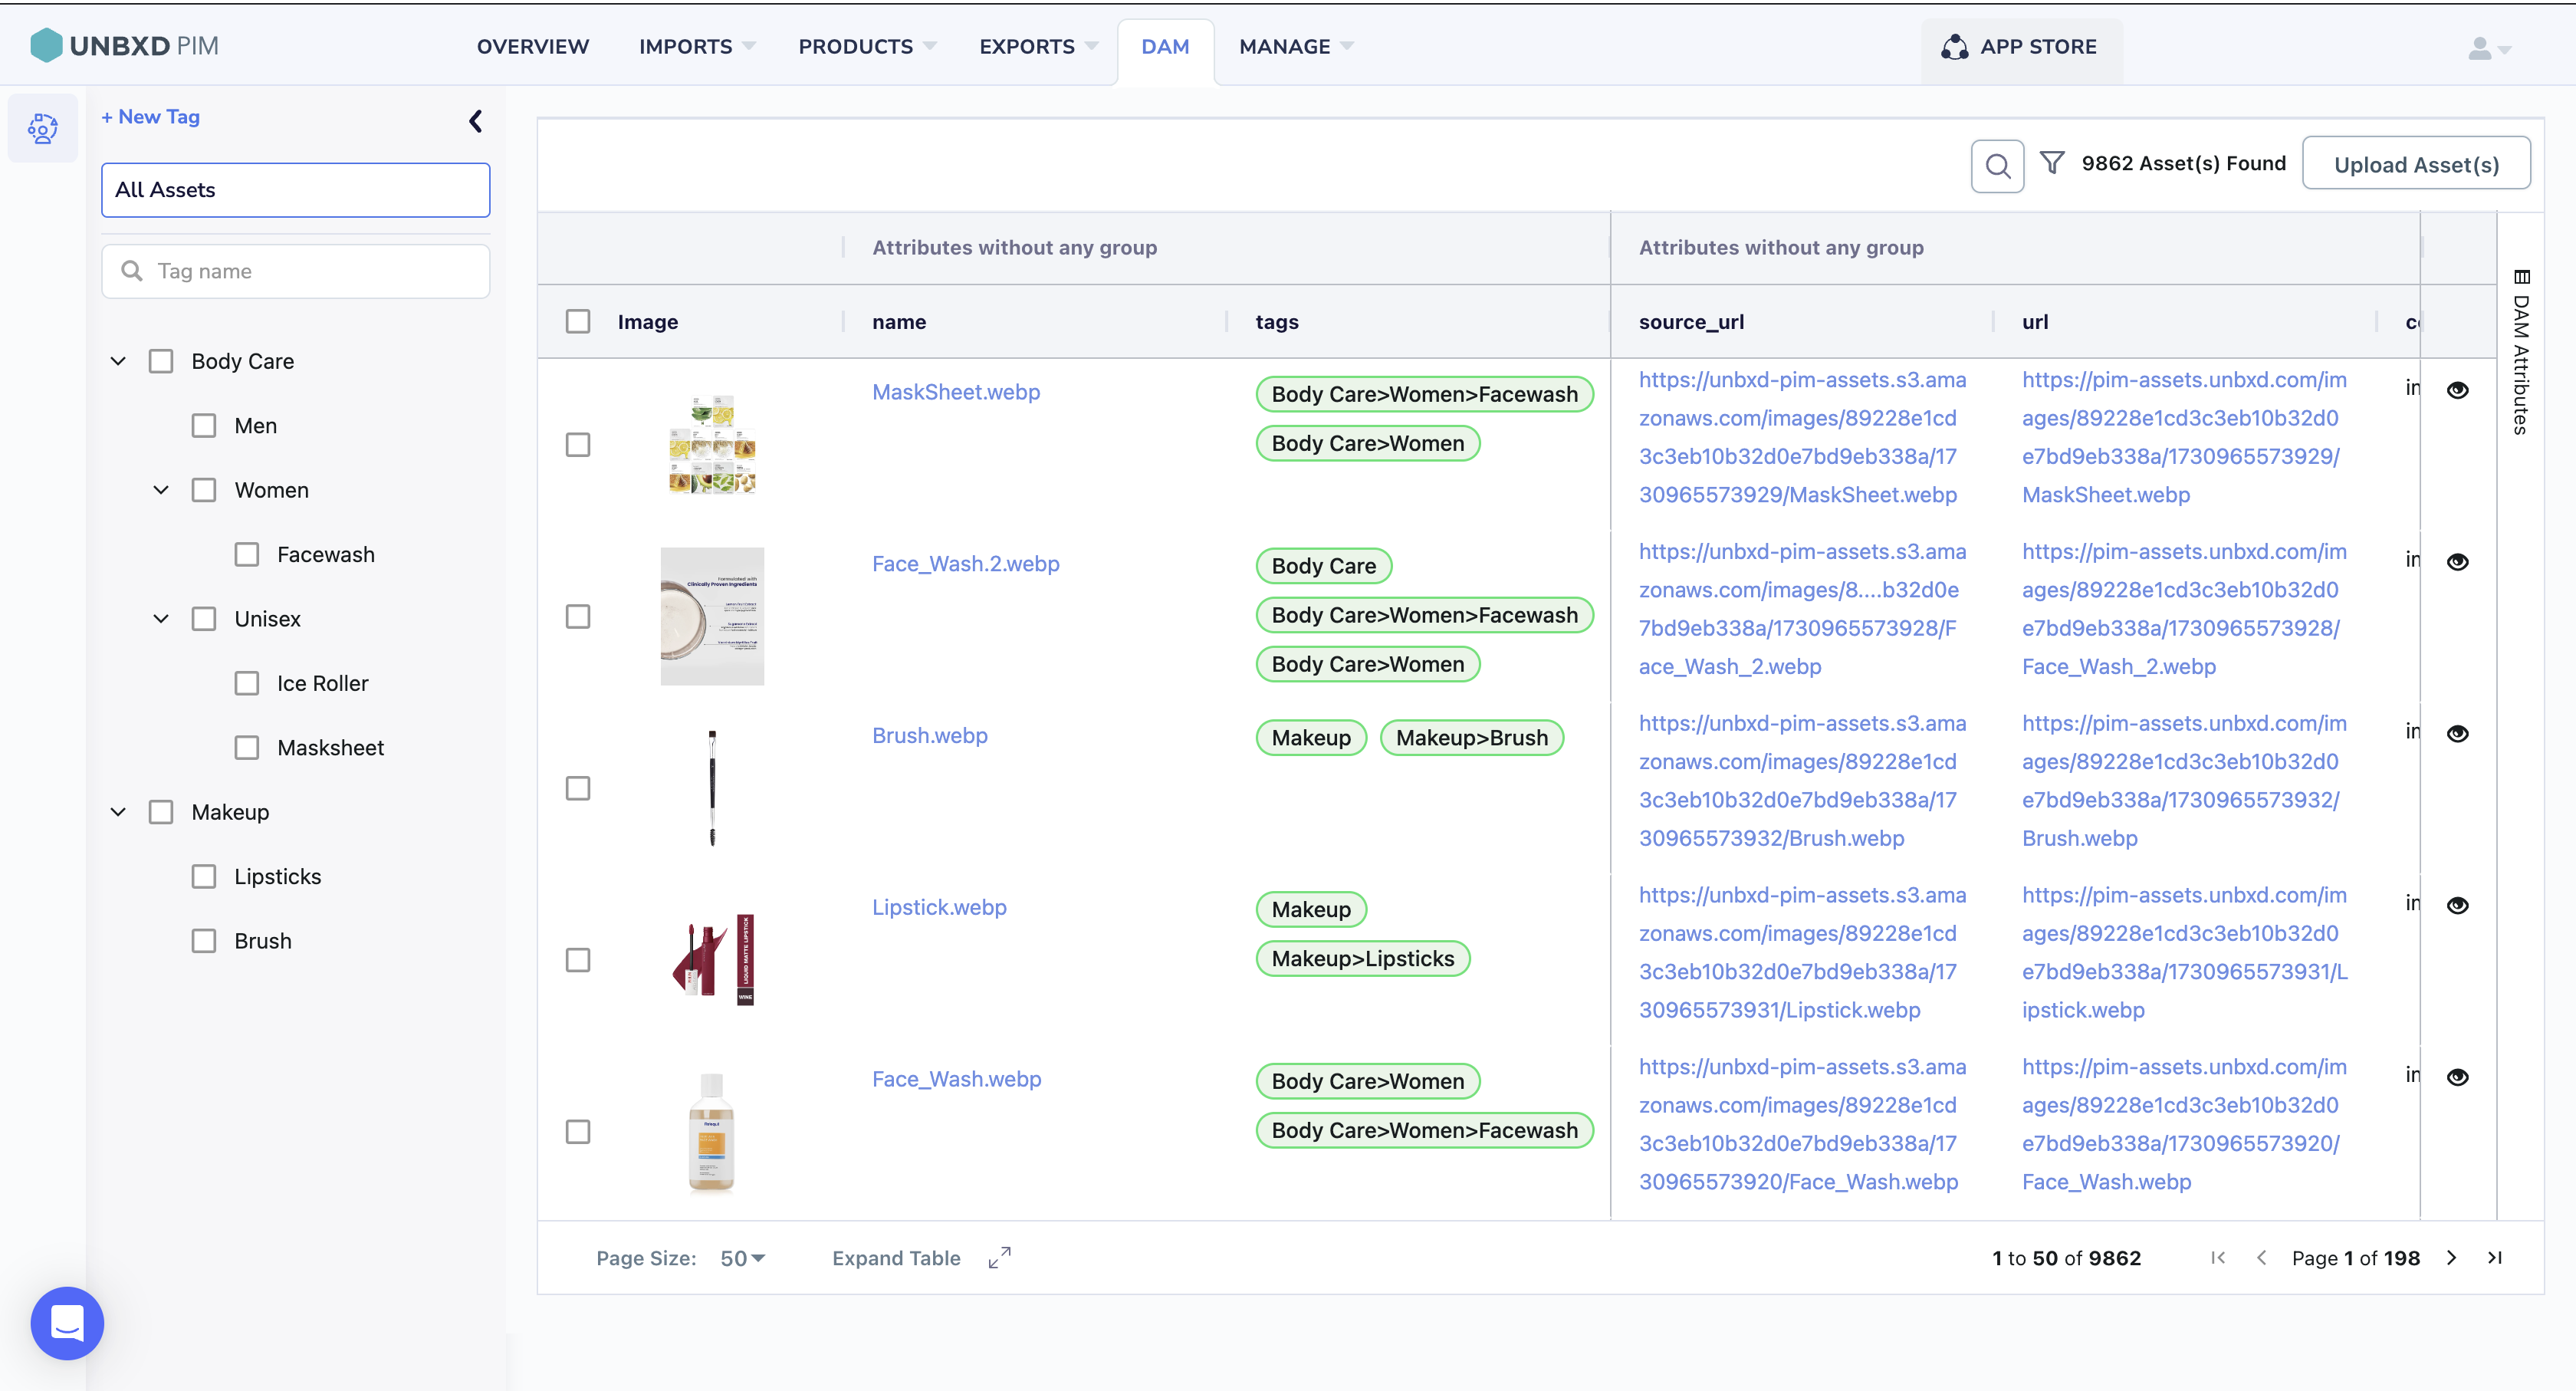
The Assets Listing Page provides a comprehensive view of all product images associated with your digital assets. This page is designed to function similarly to the Product Listing Page, allowing for a smooth and efficient experience with the following features:
- DAM Attributes Arrangement: Customize the order of Digital Asset Management (DAM) attributes for quick, streamlined access.
- Attribute Selection: Use the attribute panel on the right side to select which DAM attributes you want displayed on the page, tailoring the view to your specific needs.
- Inline Value Entry: Input values directly from the listing page, making it easier to update asset details on the go.
- Adjustable Column Size: Resize columns to ensure an optimal view of information.
- Drag-and-Drop for Values: Simplify data entry by dragging and dropping values within columns for a more efficient workflow.
- Copy-Paste Functionality: Easily copy and paste values across entries to streamline updates.
Asset Details Page: By selecting a specific product image, you can access detailed information about that asset, including its attributes.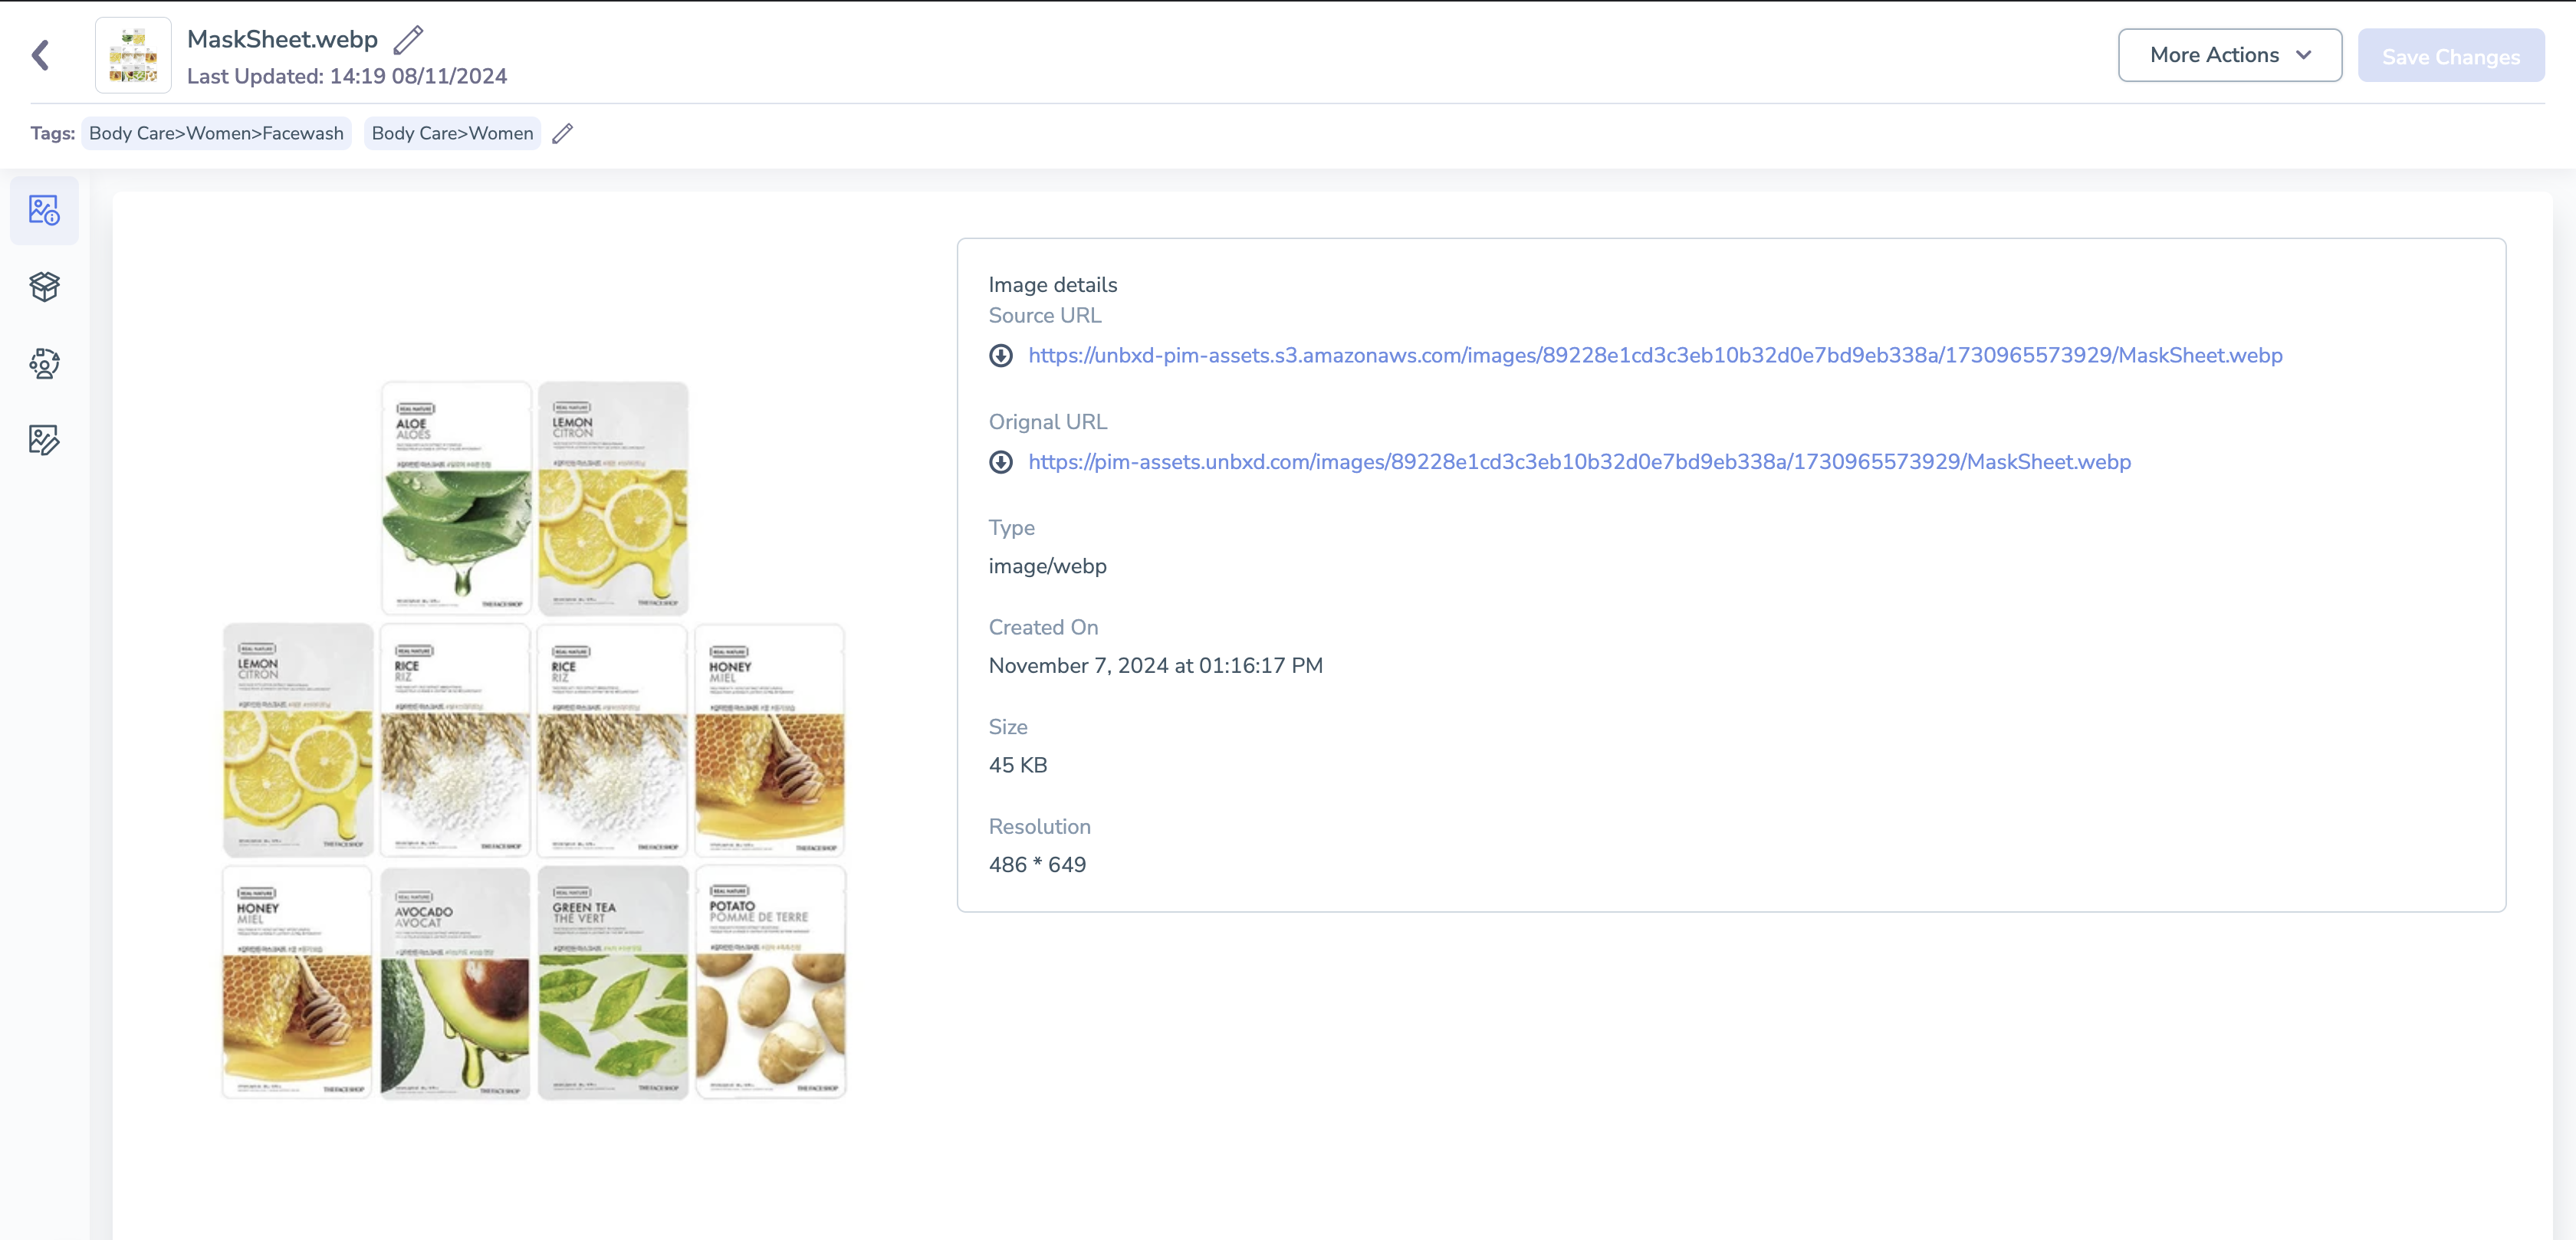
User Permissions:
You can access the DAM functionalities based on permissions set by the “admin” or any user equivalent to an admin.
The table below describes the different user privileges based on your system permissions.
| Permissions | Description or Action |
| Manage | If your system permission for DAM is set to Manage, you can perform the following actions:
|
| Read Only | If your system permission for DAM is set to Read Only, you can:
|
| Hide | You cannot access the functionality if your system permission for DAM is set to Hide. |
For more information about system permissions, see Setting System Permissions for a Role.
Here is how you can get started with managing digital assets.
| Quick Navigation → | Click DAM. |