Structured information to guide you through Unbxd PIM with minimal assistance
  1. Introduction
  2. Access Unbxd PIM
  3. Explore Unbxd PIM
  4. Features of Overview page
  5. Profile
  6. Organization - Set up your PIM Team
    1. Invite a New Member
    2. Update Member Information
    3. View a Member Information
    4. Delete a Member
    5. Create a New Role
    6. Set Property Permissions for a Role
    7. Set System Permissions for a Role
    8. Change Assigned Members of a Role
    9. Change Property Permissions for a Role
    10. Change System Permissions for a Role
    11. Change the Role Name
    12. View a Role Information
    13. Delete a Role
    14. Edit your Organization Profile Information
  7. Imports - Onboard & Schedule your Product Content
    1. Import File Best Practices
    2. Tips for doing an effective import
    3. Perform First-time Product Import
    4. View an Existing Import Information
    5. Schedule an Import
    6. Edit a Scheduled Import
    7. View a Scheduled Import Information
    8. Stop a Scheduled Import
    9. Delete a Scheduled Import
    10. Import Templates
  8. Products - Build & Enrich Product Content
    1. Advanced Search and Filtering
    2. Customize your Product Listing View
    3. Add a Solo Product
    4. Add a Variant Product
    5. Edit a Solo Product
    6. Edit a Parent Product
    7. Edit a Variant Product from Product Listing
    8. Edit a Variant Product from its Parent Product
    9. Cloning a Product
    10. Excel Mode
    11. View Activity Log Details for a Product
    12. View Product Details
    13. View Task Information for a Product
    14. Delete a Product
    15. Product Groups
      1. Create a Static Product Group
      2. Edit a Static Product Group
      3. View a Static Product Group Information
      4. Delete a Static Product Group
      5. Create a Dynamic Product Group
      6. Edit a Dynamic Product Group
      7. View a Dynamic Product Group Information
      8. Delete a Dynamic Product Group
    16. Bulk Actions for Products & Product Groups
      1. Add Products to a Static Product Group
      2. Edit Multiple Products
      3. Assign Categories for Multiple Products
      4. Create Task for Multiple Products
      5. Certify Products
      6. Delete Multiple Products
      7. Certify Product Groups
      8. Delete Product Groups
      9. Edit Multiple Products from a Static Product Group
      10. Remove Products from a Static Product Group
      11. Delete Products from a Static Product Group
      12. Edit Multiple Products from a Dynamic Product Group
      13. Delete Products from a Dynamic Product Group
      14. Enrich Products or Product group data
  9. Certified Products & Certified Product Group
    1. Customize your Products Listing View
    2. Export Certified Products
    3. Export Products with Readiness Check & Assign Task
    4. View Activity Log Details for a Network Product
    5. Delete Products from Certified Product Group
    6. Export Certified Product Groups
    7. Export Certified Product Groups with Readiness Check & Assign Task
    8. Add Channel Readiness for a Certified Product Group
    9. Edit a Certified Product Group
    10. View Certified Products
    11. Delete a Product Group
  10. Scripts - Transform your Product Data
    1. Using the Transformation Script Editor
    2. Post Transformation
    3. List of Transformation Scripts
  11. Properties - Manage your Product Characteristics
    1. Property Data Types
    2. Create a New Property
    3. Change the Property Name and Assigned Property Group
    4. Change Role Permissions for a Property
    5. Make a Property Searchable
    6. View a Property Information
    7. Download all Properties
    8. Delete a Property
    9. Property Groups
      1. Create a New Property Group
      2. Change Property Group Name and Associated Properties
      3. View a Property Group Information
      4. Delete a Property Group
  12. Categories - Manage your Product Classifications
    1. Create a New Category & Subcategory
    2. Change Category Name & Associated Properties
    3. View Category & Subcategory Information
    4. Delete a Category or Subcategory
    5. Bulk Remove Categories
    6. Bulk Upload and Download Categories
  13. Tasks - First Step Towards Building Processes
    1. Create a New Task
    2. Edit an Existing Task
    3. View Task Details and Task Status Details
    4. Task Templates
      1. Create a New Task Template
      2. Edit a Task Template
      3. View Task Template Details
      4. Create a Task using a Task Template
      5. Delete a Task Template
    5. Task Assignee
  14. Readiness Reports-Ensure product information completeness
    1. Creating Readiness Report
    2. Downloading Readiness Report
    3. Viewing Readiness Reports
    4. Assigning Task using Readiness Report
  15. Catalogs - Share real-time Product Content
    1. Create & Share a New Catalog
    2. Edit a Catalog
    3. View a Catalog Information
    4. Delete a Catalog
  16. Workflows - Automate PIM Processes
    1. Create a New Workflow
    2. Run a Workflow Manually
    3. Pause & Resume a Workflow
    4. Edit a Workflow
    5. View Workflow Details
    6. View Activity Log Details for a Workflow
    7. Delete a Workflow
    8. Bulk Actions
  17. Digital Asset Management - Manage your Digital Files
    1. Add a New Asset
    2. Associate Assets with Products
    3. Perform Asset Transformations
    4. Deassociate Asset from Products
    5. Download Assets
    6. Delete an Asset
  18. Exports
    1. View Exports
    2. Download an Exported File
    3. Send an Email with the Exported File
    4. Schedule an Export
    5. Edit a Scheduled Export
    6. View Scheduled Export Details
    7. Stop a Scheduled Export
    8. Delete a Scheduled Export
    9. Standard Templates and Custom Templates
      1. Edit a Standard Template
      2. View Standard Template Details
      3. Create a Custom Template
      4. Edit a Custom Template
      5. View Custom Template Details
      6. Delete a Custom Details
  19. AI Enrichment Apps
    1. Mandatory Properties and Prompt Values for each AI App
    2. Creation of templates for AI enrichment apps
      1. Amazon Description Generator
      2. Amazon Title Generator
      3. Amazon Ads Headline Generator
      4. Product Name Generator
      5. Google Ads Generator
      6. Google Ad Description Generator
      7. Google Title Generator
      8. Youtube Hooks Generator
      9. Youtube Outline Generator
      10. Youtube Description Generator
      11. Youtube Intros Generator
      12. Youtube Titles Generator
  20. Bulk Transform and Enrichment
  21. Custom Template Uploader
    1. Working of Custom Template Uploader
  22. Custom Template Downloader
  23. Bulk Asset Upload and Download
  24. Image Keyword Extraction
  25. Find Duplicates and Related Products
  26. Channel Integration
    1. Channel Integrations -
      1. Installing BigCommerce store via Unbxd PIM
      2. Importing data into Unbxd PIM from BigCommerce
      3. Mandatory Properties to export products to BigCommerce
      4. Exporting data from Unbxd PIM to BigCommerce
      5. Automating import and export using Templates and Workflows
    2. Channel Intergation-
      1. Installing Shopify via Unbxd PIM
      2. Mandatory Property Mappings for Shopify
      3. Importing the data into Unbxd PIM from Shopify
      4. Exporting data from Unbxd PIM to Shopify
      5. Automating import and export using Scheduled Imports/Exports and Workflows
    3. Channel Integrations -
      1. Installing Unbxd PIM via Brightpearl
      2. Importing the data into Unbxd PIM from Brightpearl
      3. Exporting data from Unbxd PIM to Brightpearl
      4. Automating import and export using Templates and Workflows
    4. Channel Integration -
      1. Installing Magento via Unbxd PIM
    5. Channel Intergation-
      1. Installing Etsy via Unbxd PIM
      2. Importing the data into Unbxd PIM from Etsy
      3. Exporting data from Unbxd PIM to Etsy
      4. Automating import and export using Scheduled Imports/Exports and Workflows
    6. Channel Integration -
      1. Installing Walmart via Unbxd PIM
    7. Channel Integration-
      1. Installing Unbxd PIM via Amazon Seller central
      2. Installing Amazon Seller Central via Unbxd PIM
      3. Importing data into Unbxd PIM from Amazon
      4. Exporting data from Unbxd PIM to Amazon
      5. Automating import and export using Templates and Workflows

Create & Share a New Catalog

You can use product group and certified product groups (static and dynamic) to create a new catalog.

For more information on product groups, see Product Groups.

Create a new catalog in Unbxd PIM and share it with others

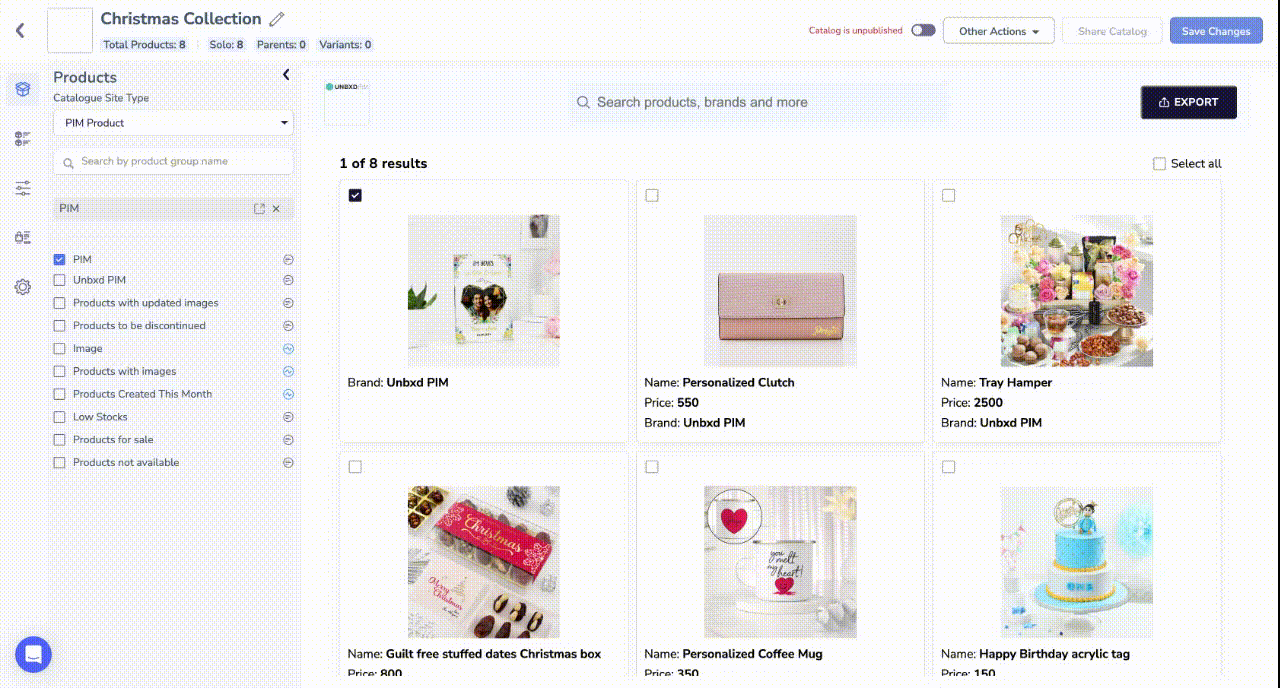
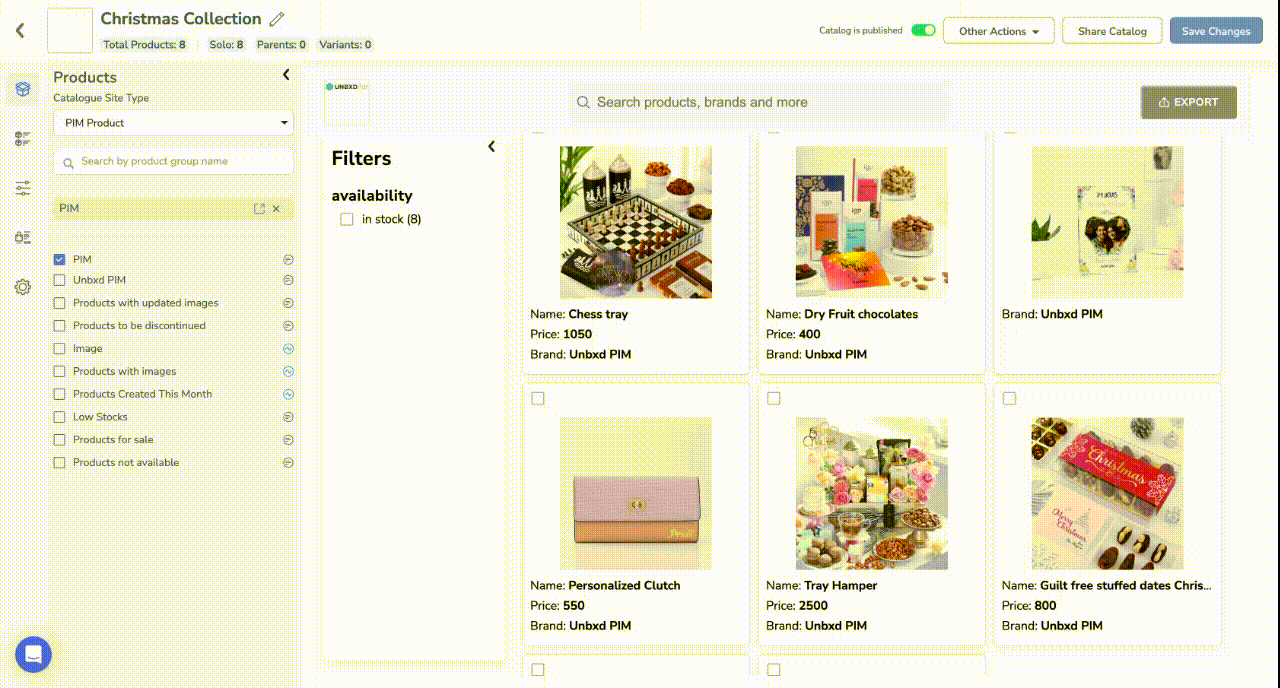
  1. On the MANAGE tab, click Catalogs.
  2. Click Create Catalog to start the process of creating a new catalog.
  3. Provide a name for the catalog in the designated field.
  4. Click Proceed to continue with the catalog creation process.
  5. From the dropdown option select from PIM Product Group and Certified PIM Products.
  6. To use product groups for your catalog. Select the desired product groups by checking the corresponding checkboxes.
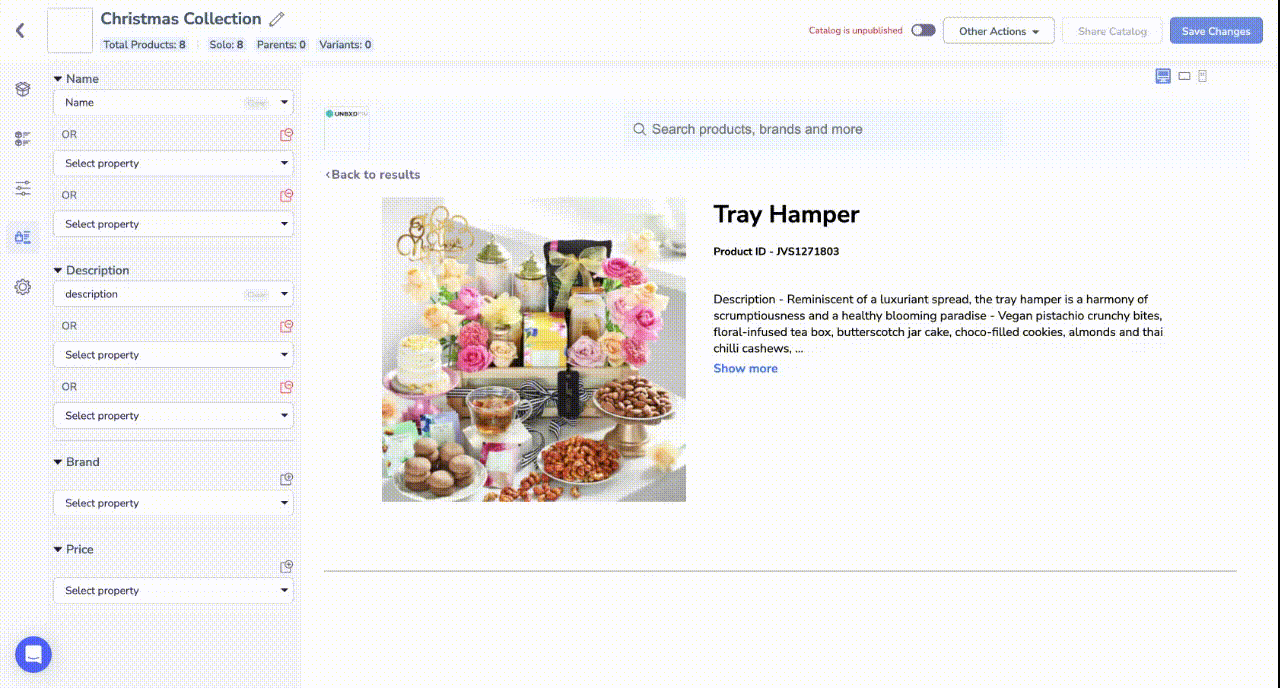
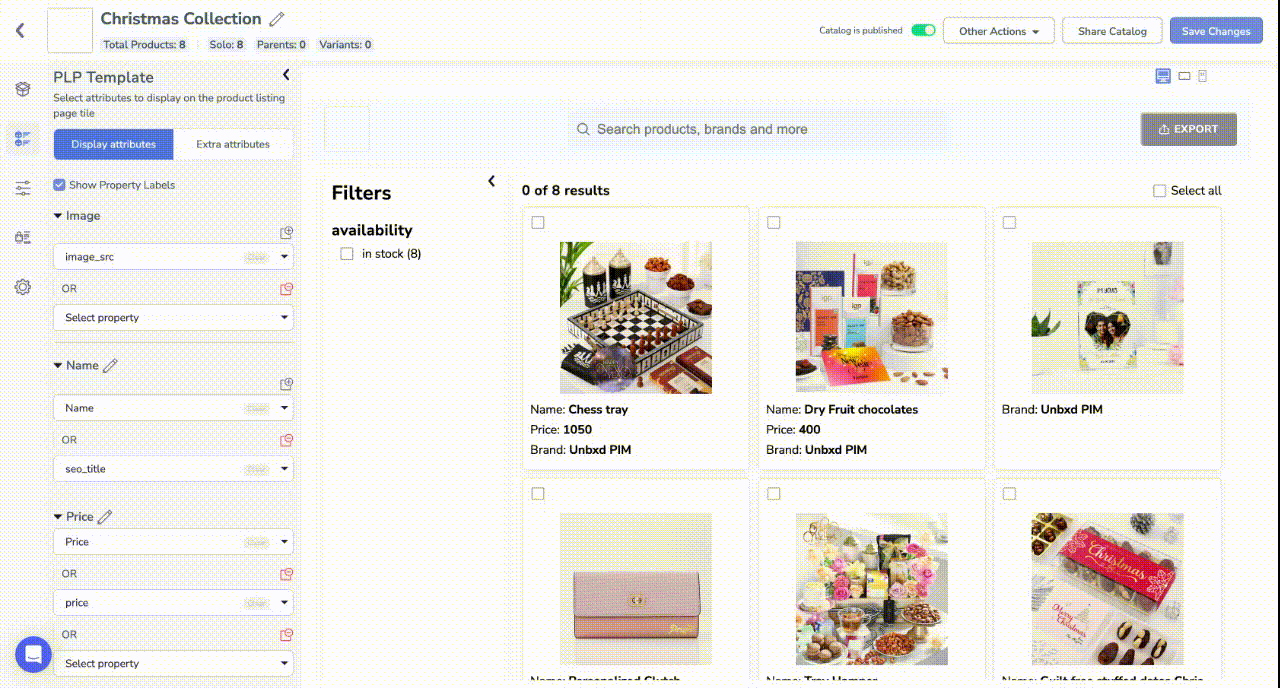
  7. If you want to customise the Product Listing Page displayed in the catalog
    1. Click the PLP Button
    2. Add or remove properties as needed by checkmarking the property .
    3. In the Properties list. By default, the following properties appear in Display attributes tab. For each property you can add 2 fallback values.
      1. Image
      2. Name
      3. Price
      4. Brand  
      5. Badge                                                                                                                                                                                                                                                        Switch to Extra attributes to add other attributes                                                                                                                                                                                                                                                 
  8. If you want to customise the Product Display Page displayed in the catalog
    1. Click the PDP Button
    2. Add or remove properties as needed by checkmarking the property .
    3. In the Properties list. By default, the following properties appear in Display attributes tab.
      1. Multi Image
      2. Name
      3. Description
      4. Brand
      5. Price.                                                                                                                                                                                                                                                            Switch to Extra Attribute  to add other attribute.
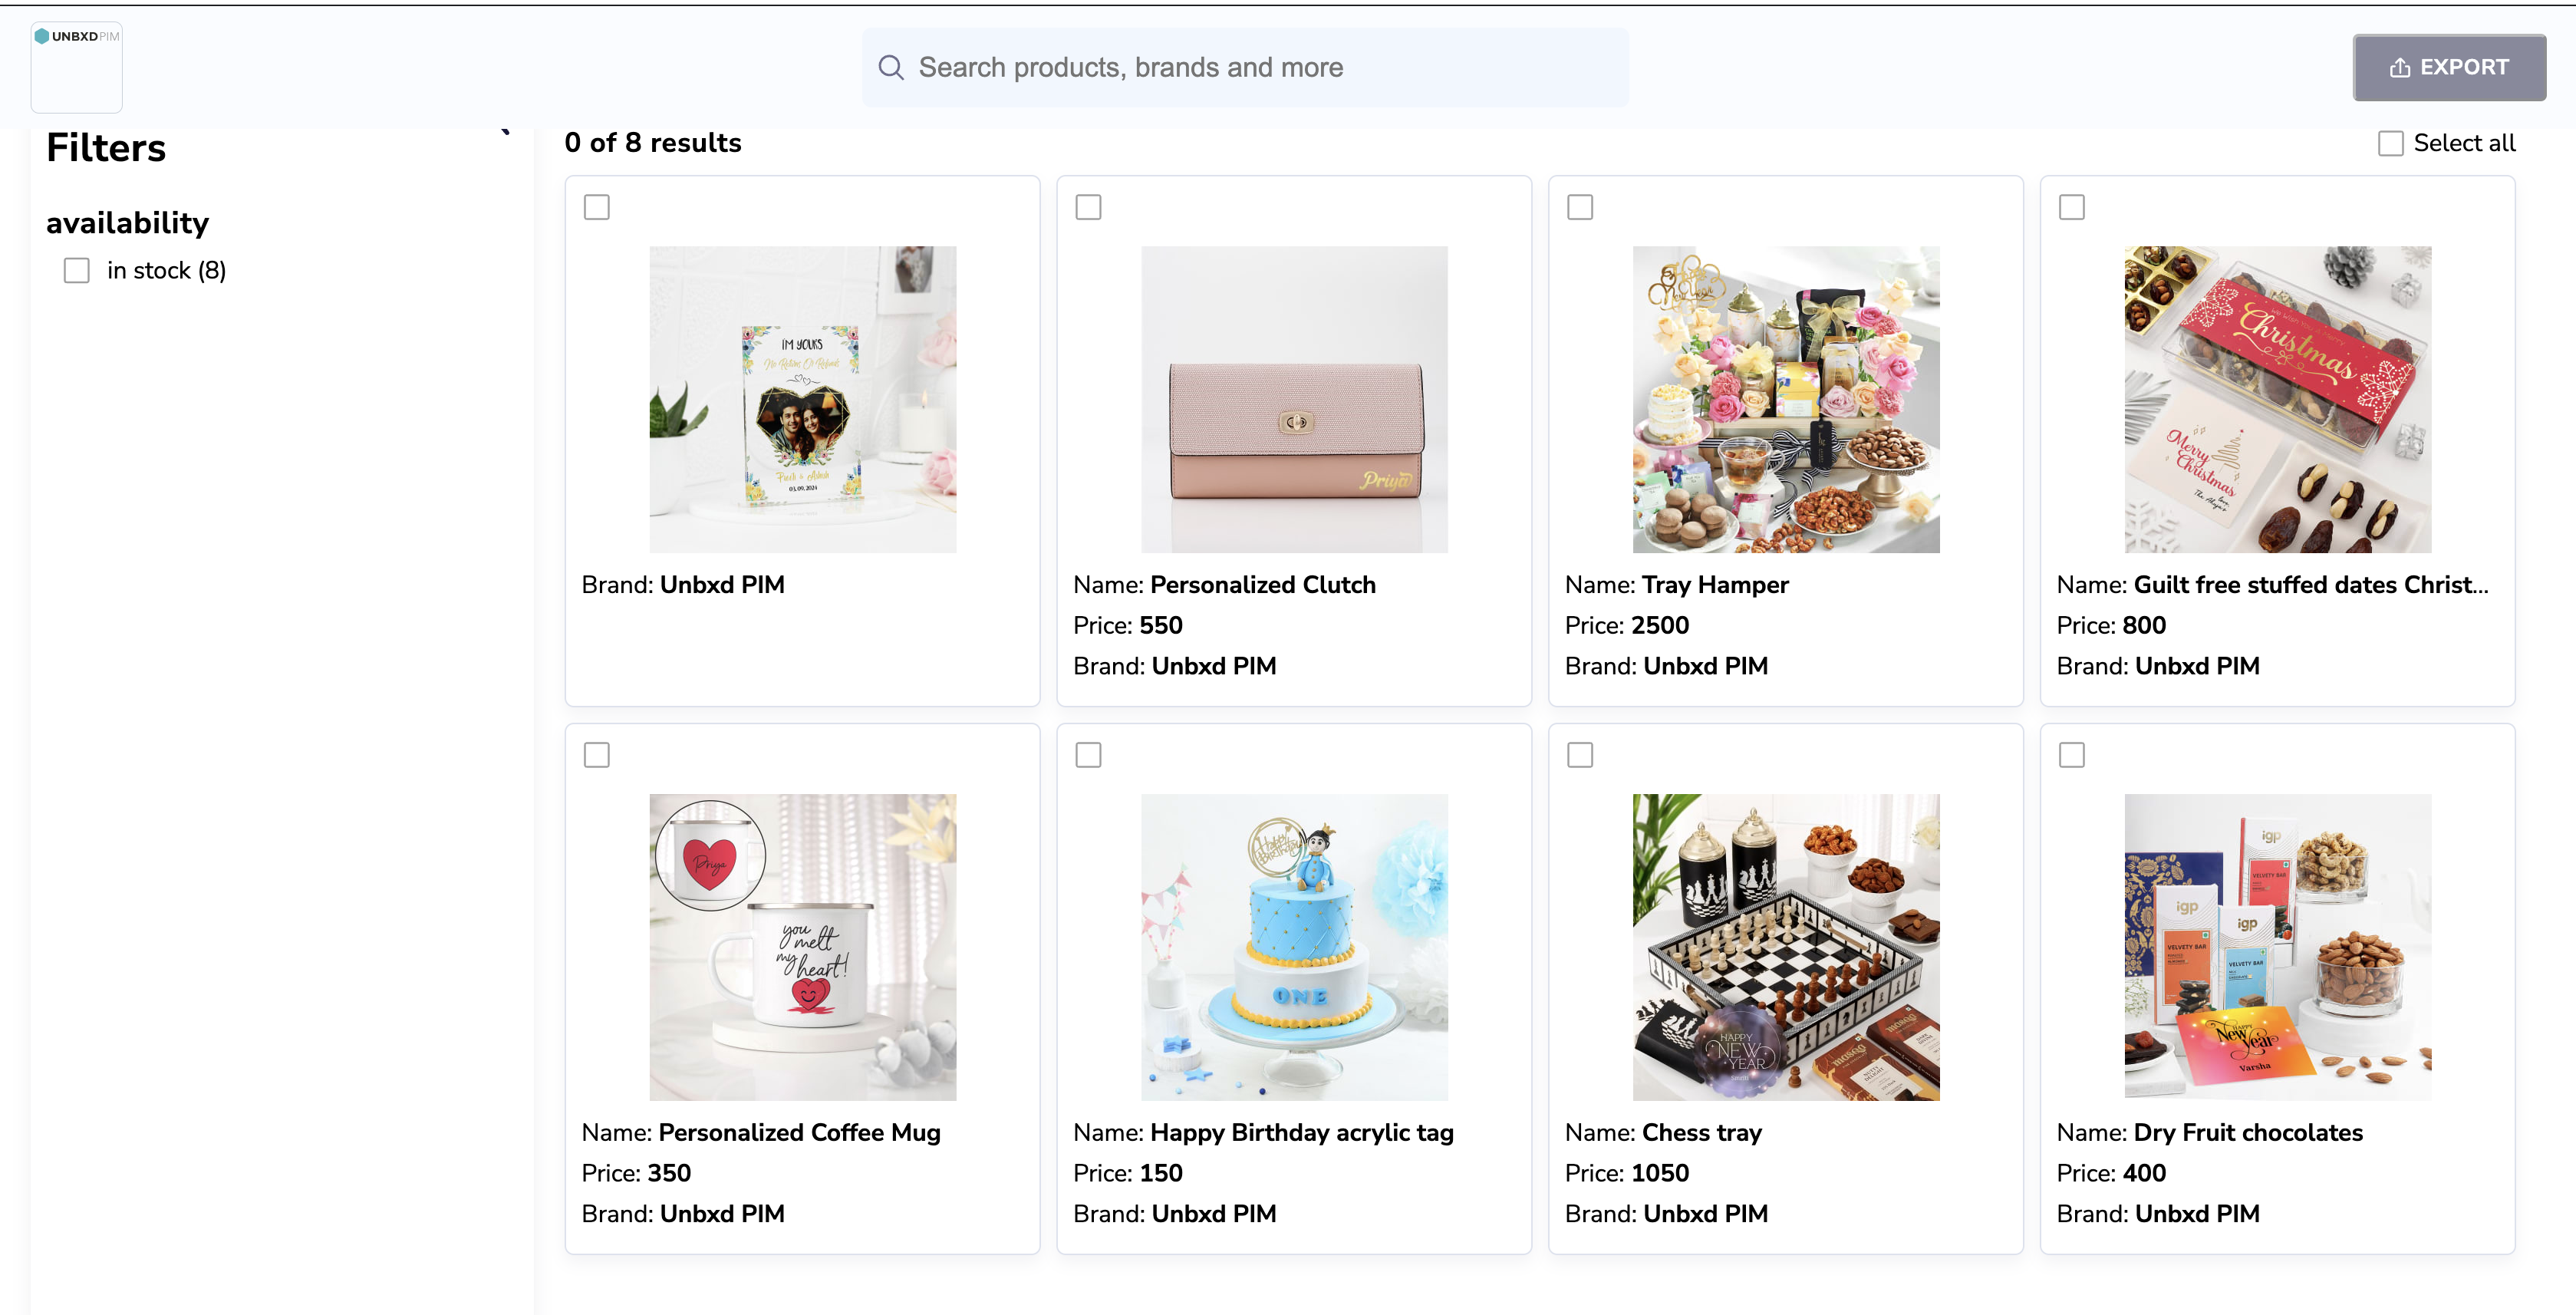
  9. To add or remove facets (filters) for the catalog
    1. Click the Facets button.
    2. Use the search box to find specific properties, and checkmark the desired properties.
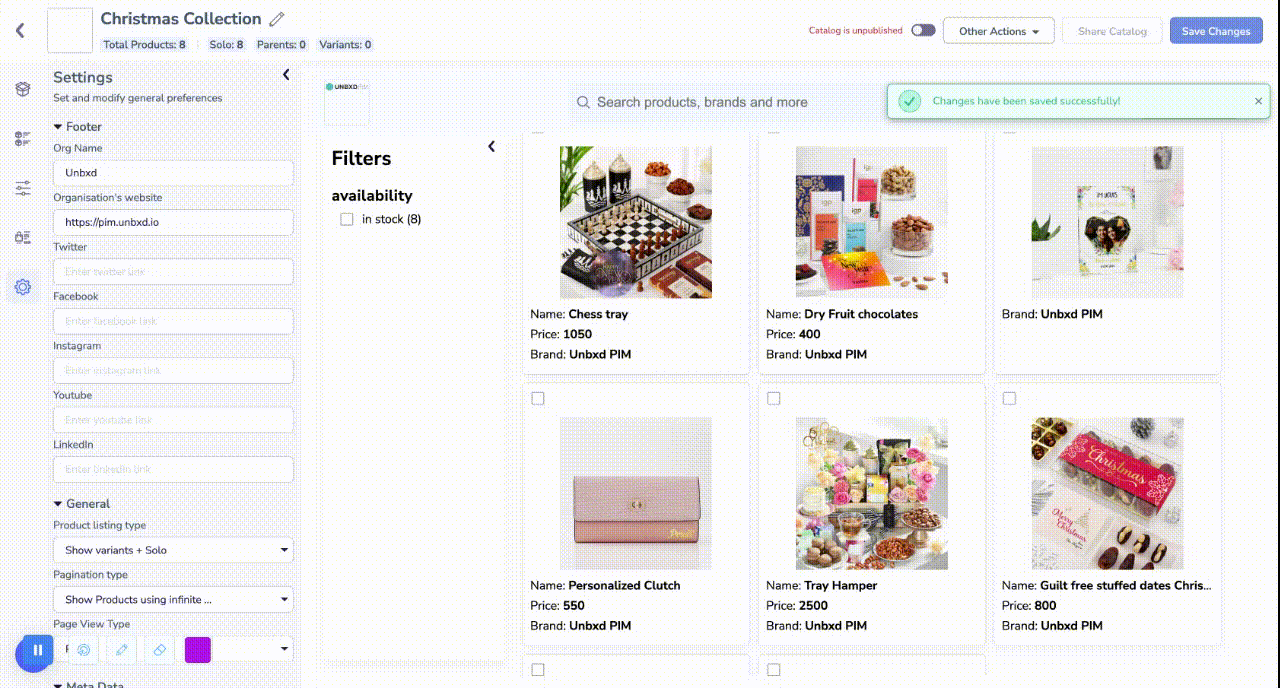
  10. If you want to configure additional settings for the catalog, click the Settings tab.
    1. Enter the Organisation name
    2. Enter Organisations website
    3. If you want to set the product listing type, do one of the following:
      1. Click Show all variants in Parents + Solo. This will display all variant products in their parent product and then display solo products separately.
      2. Click Show all variants upfront + Solo. This will first display all variant products and then display solo products separately.
      3. If you want to set the autosuggest type, do one of the following:
      4. If you want to set the pagination type for your catalog, do one of the following:
      5. Click Show products using pagination. This will display products with pagination.
      6. Click Show products using infinite scroll. This option enables an infinite scroll feature, where new products are dynamically loaded as the user scrolls down the catalog page.
      7. If you want to set the search response type for your catalog, do one of the following:
      8. Click Search products on submit/enter. The search response type for searching products in your catalog can be set to click of the Enter/Submit buttons.
      9. Click Search products on typing. This will refresh the Products Listing page as you search for products on typing.
      10. If you want to set the catalog layout type, do one of the following:
        1. Click on Full screen view
        2. Click on Tablet view
        3. Click on Mobile view
    4. If you want to upload a logo for your catalog, click Upload Catalog Logo.

   14. Click Save Changes to save the changes.

To Share the Catalog

  1. Move the radio button to Catalog is published
  2. Click on Share Catalog.

A published catalog:

Yes No
0 of 0 users found this section helpful
Suggest Edit