Structured information to guide you through Unbxd PIM with minimal assistance
  1. Introduction
  2. Access Unbxd PIM
  3. Unbxd PIM Nomenclature
  4. Explore Unbxd PIM
  5. Your Profile
  6. Unbxd PIM Info Mode
  7. Organization - Set up your PIM Team
    1. Invite a New Member
    2. Change Member Name and Assigned Roles
    3. View a Member Information
    4. Delete a Member
    5. Create a New Role
    6. Set Property Permissions for a Role
    7. Set System Permissions for a Role
    8. Change Assigned Members of a Role
    9. Change Property Permissions for a Role
    10. Change System Permissions for a Role
    11. Change the Role Name
    12. View a Role Information
    13. Delete a Role
    14. Edit your Organization Profile Information
  8. Imports - Onboard & Schedule your Product Content
    1. Import File Best Practices
    2. Tips for doing an effective import
    3. Perform First-time Product Import
    4. View an Existing Import Information
    5. Schedule an Import
    6. Edit a Scheduled Import
    7. View a Scheduled Import Information
    8. Stop a Scheduled Import
    9. Delete a Scheduled Import
    10. Import Adapters
  9. Products - Build & Enrich Product Content
    1. Advanced Search and Filtering
    2. Customize your Product Listing View
    3. Add a Solo Product
    4. Add a Variant Product
    5. Edit a Solo Product
    6. Edit a Parent Product
    7. Edit a Variant Product from Product Listing
    8. Edit a Variant Product from its Parent Product
    9. Edit Mode
    10. View Activity Log Details for a Product
    11. View Product Details
    12. View Task Information for a Product
    13. Delete a Product
    14. Product Groups
      1. Create a Static Product Group
      2. Edit a Static Product Group
      3. View a Static Product Group Information
      4. Delete a Static Product Group
      5. Create a Dynamic Product Group
      6. Edit a Dynamic Product Group
      7. View a Dynamic Product Group Information
      8. Delete a Dynamic Product Group
    15. Bulk Actions for Products & Product Groups
      1. Add Products to a Static Product Group
      2. Edit Multiple Products
      3. Assign Categories for Multiple Products
      4. Create Task for Multiple Products
      5. Certify Products for Network
      6. Delete Multiple Products
      7. Certify Product Groups to Network
      8. Delete Product Groups
      9. Edit Multiple Products from a Static Product Group
      10. Remove Products from a Static Product Group
      11. Delete Products from a Static Product Group
      12. Edit Multiple Products from a Dynamic Product Group
      13. Delete Products from a Dynamic Product Group
  10. Properties - Manage your Product Characteristics
    1. Property Data Types
    2. Create a New Property
    3. Change the Property Name and Assigned Property Group
    4. Change Role Permissions for a Property
    5. Make a Property Searchable
    6. View a Property Information
    7. Download all Properties
    8. Delete a Property
    9. Property Groups
      1. Create a New Property Group
      2. Change Property Group Name and Associated Properties
      3. View a Property Group Information
      4. Delete a Property Group
  11. Categories - Manage your Product Classifications
    1. Create a New Category & Subcategory
    2. Change Category Name & Associated Properties
    3. View Category & Subcategory Information
    4. Delete a Category or Subcategory
  12. Assets - Manage your Digital Files
    1. Add a New Asset
    2. Associate Assets with Products
    3. Perform Asset Transformations
    4. Disassociate Asset from Products
    5. Download Assets
    6. Delete an Asset
  13. Tasks - First Step Towards Building Processes
    1. Create a New Task
    2. Edit an Existing Task
    3. Stop a Task
    4. View Task Details and Task Status Details
    5. Task Templates
      1. Create a New Task Template
      2. Edit a Task Template
      3. View Task Template Details
      4. Create a Task using a Task Template
      5. Delete a Task Template
    6. Task Assignee
  14. Catalogs - Share real-time Product Content
    1. Create & Share a New Catalog
    2. Edit a Catalog
    3. View a Catalog Information
    4. Delete a Catalog
  15. Network - Partner Readiness & Content Distribution
    1. Certified Products & Product Labels
      1. Customize your Network Products Listing View
      2. Export Certified Products
      3. Export Products with Readiness Check & Assign Task
      4. View Activity Log Details for a Network Product
      5. Delete Products from Network
      6. Export Certified Product Labels
      7. Export Product Labels with Readiness Check & Assign Task
      8. Add Partner Readiness for a Product Label
      9. Edit a Product Label
      10. View Certified Products
      11. Delete a Product Label
    2. Partners
      1. Create a Partner
      2. Edit a Partner
      3. View Partner Details
      4. Delete a Partner
    3. System Adapters & Custom Adapters
      1. Edit a System Adapter
      2. View System Adapter Details
      3. Create a Custom Adapter
      4. Edit a Custom Adapter
      5. View Custom Adapter Details
      6. Delete a Custom Adapter
    4. Exports
      1. View Exports
      2. Download an Exported File
      3. Send an Email with the Exported File
      4. Schedule an Export
      5. Edit a Scheduled Export
      6. View Scheduled Export Details
      7. Stop a Scheduled Export
      8. Delete a Scheduled Export
  16. Workflows - Automate PIM Processes
    1. Create a New Workflow
    2. Run a Workflow Manually
    3. Pause & Resume a Workflow
    4. Edit a Workflow
    5. View Workflow Details
    6. View Activity Log Details for a Workflow
    7. Delete a Workflow
    8. Bulk Actions
  17. Scripts - Transform your Product Data
    1. Using the Transformation Script Editor
    2. List of Transformation Scripts
  18. Channel Integration
    1. Channel Integrations -
      1. Installing Unbxd PIM via BigCommerce
      2. Installing BigCommerce store via Unbxd PIM
      3. Importing Data from BigCommerce to Unbxd PIM (via BigCommerce)
      4. Sending Data from BigCommerce to Unbxd PIM (Subsequent Transfer)
      5. Getting Data from BigCommerce via Unbxd PIM
      6. Getting Data into BigCommerce from Unbxd PIM
      7. Sending Data to BigCommerce via Unbxd PIM
      8. Importing data into Unbxd PIM from BigCommerce
      9. Exporting data from Unbxd PIM to BigCommerce
      10. Automating import and export using Adapters and Workflows
    2. Channel Integrations -
      1. Installing Unbxd PIM via Brightpearl
      2. Importing the data into Unbxd PIM from Brightpearl
      3. Exporting data from Unbxd PIM to Brightpearl
      4. Automating import and export using Adapters and Workflows

Exporting data from Unbxd PIM to Brightpearl

After product enrichment in the PIM, you can send it to your storefront in Brightpearl after mapping respective properties. You can use saved export adapters for ease. By selecting Export to Channel and then selecting your Brightpearl storefront, all the products will be sent to your storefront. 


It is important that you map your properties with the Channel adapter properties and then use this channel for exporting data automatically to the Channel system. For mapping properties with the channel adapter, you need to follow the given steps- 

1. Go to Network and click on Channels. 

2. The Channel listing page will appear. You can select your Brightpearl channel and click on View Mappings.

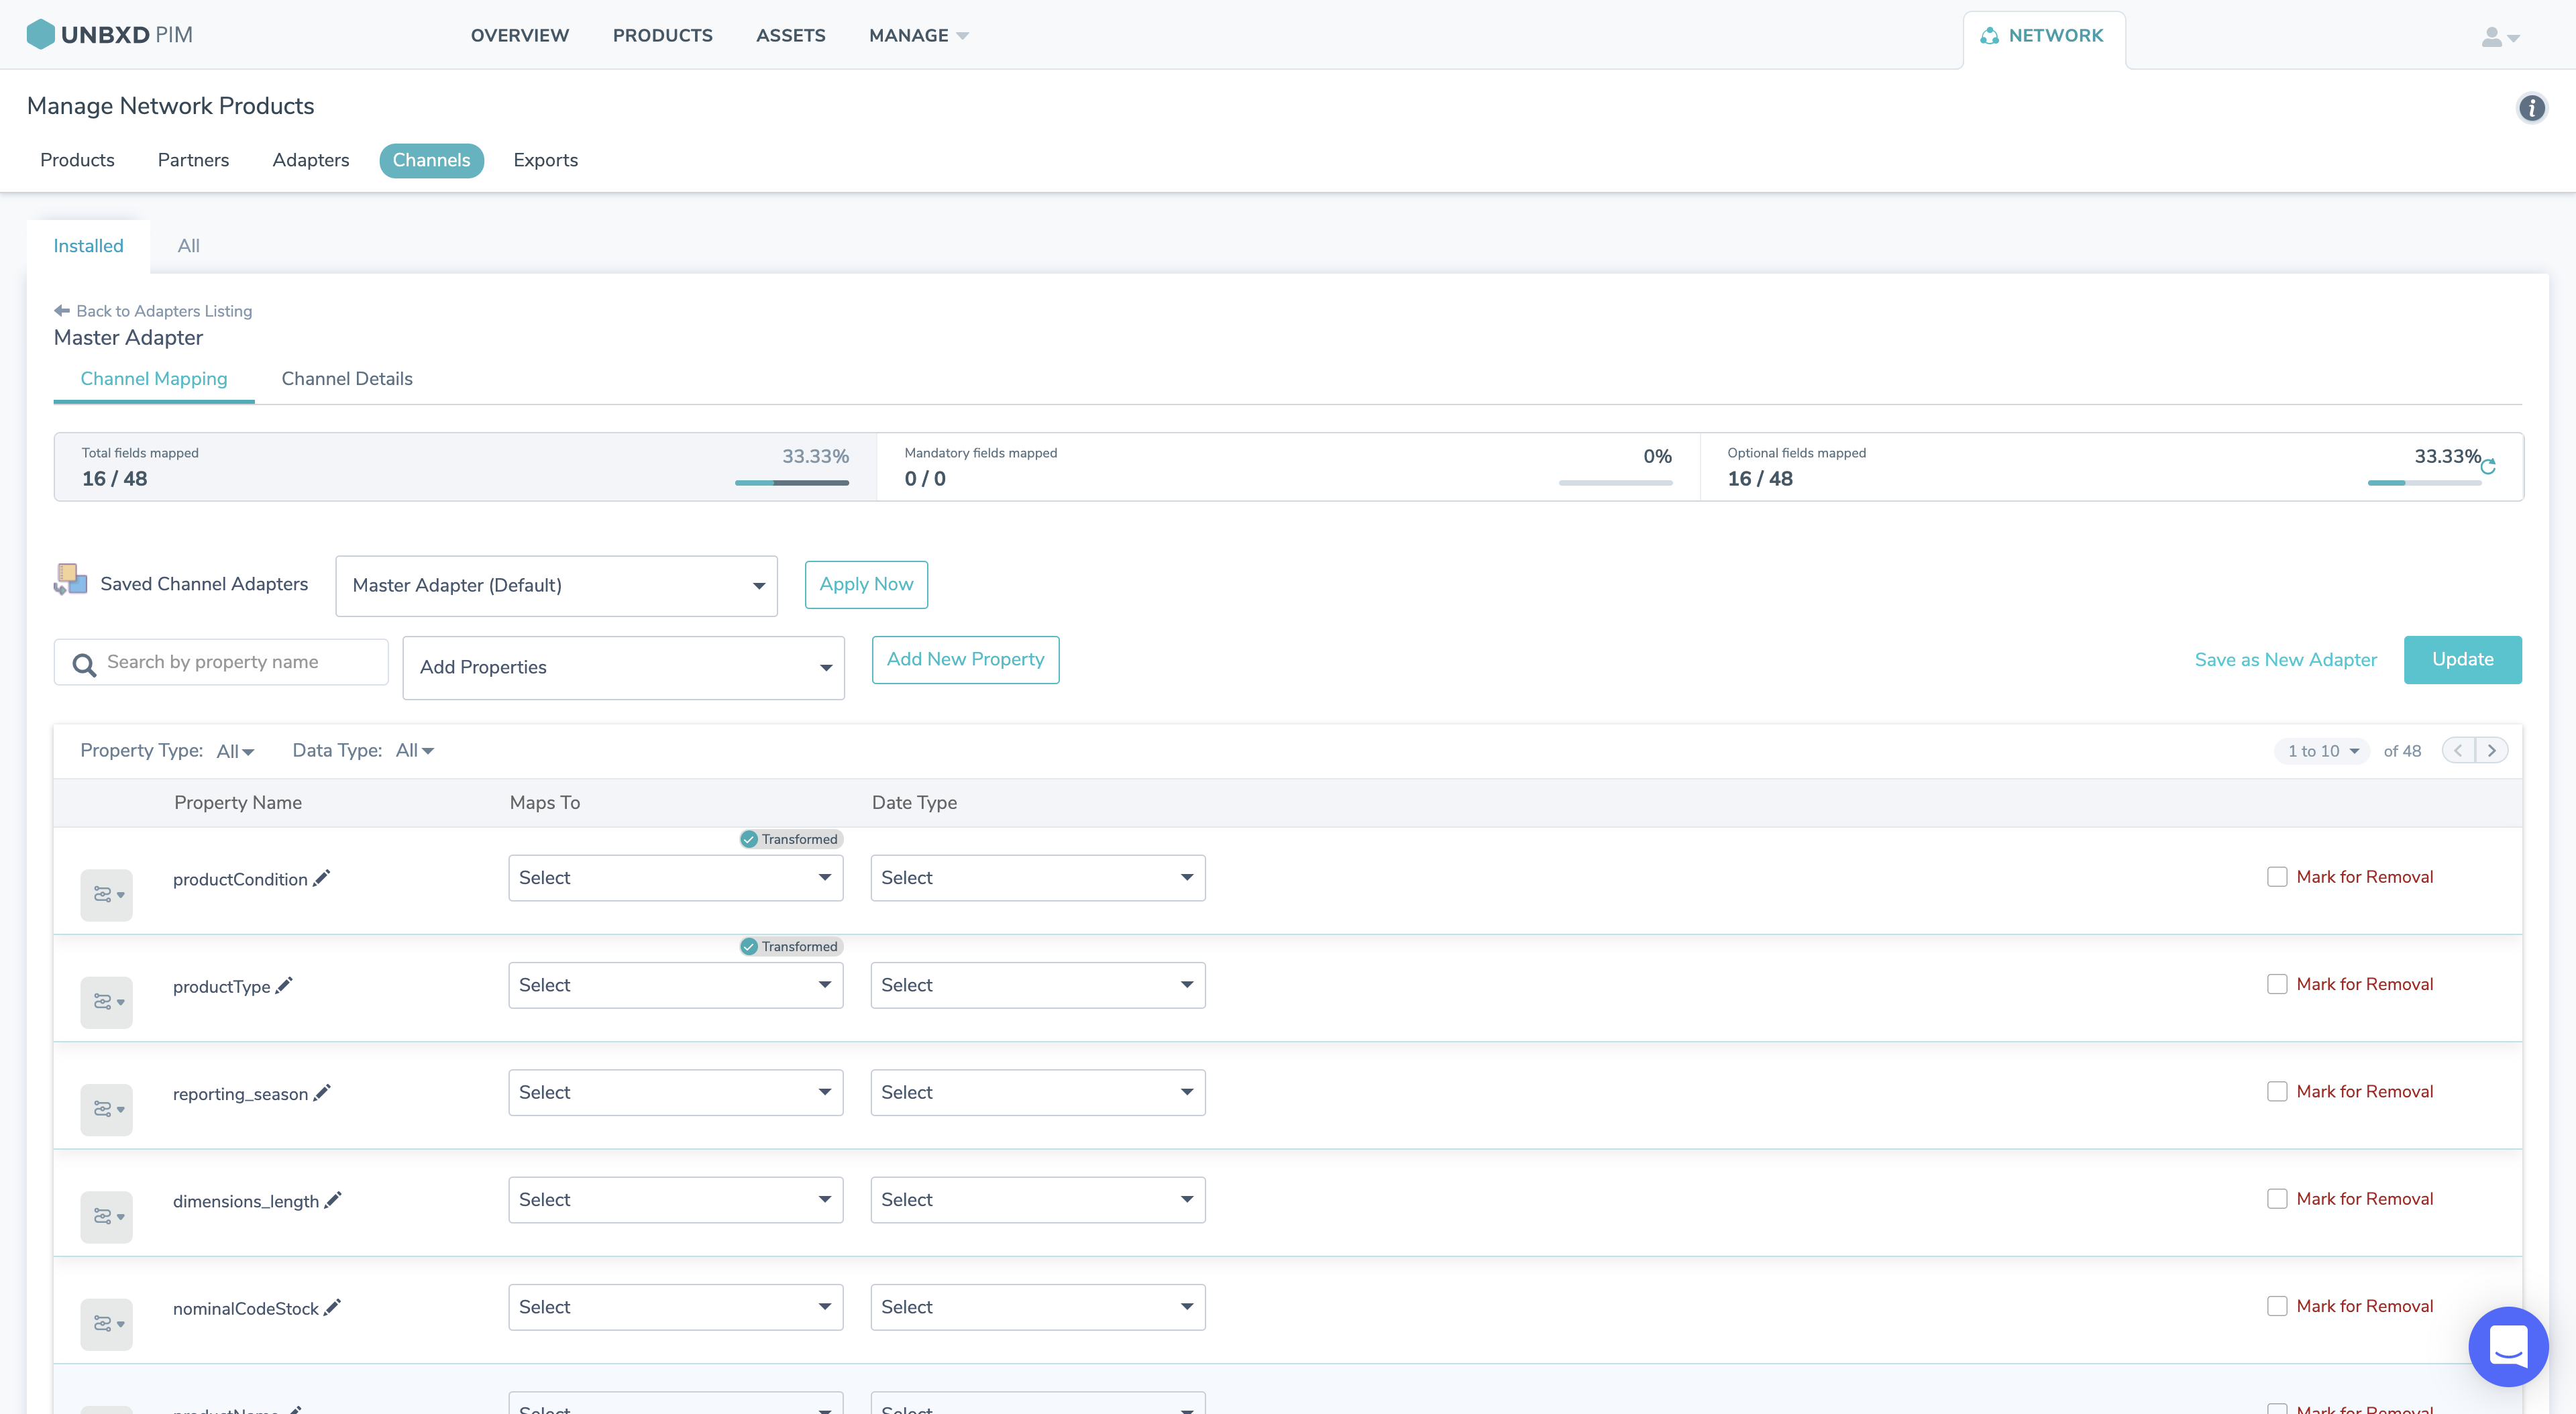
3. You will be taken to the Channel Mapping page. For Brightpearl, there are a total of 61 fields, out of which 11 are mandatory fields. 

4. You can select an already saved adapter, or make changes to it according to your requirements. 

5. You will have to map your properties to the Mandatory and Optional fields of Brightpearl. 

6. Using the adapter, you can manage your storefronts 

  • Custom fields
  • Pricing and bulk pricing rules 
  • Category creation and management
  • Variants creation and updation 
  • Images and videos for products and variants along with Image title and position.
  • Inventory updates from other systems
  • Product dimensions like height, width, weight etc 
  • Manage your product visibility and featured products

7. Along with the Brightpearl defined fields you can also manage custom fields or store related product attributes to transmit via warranty field using transformations.

8. All the properties can be dynamically enriched before sending it to Brightpearl using property and product level transformation capabilities. 

9. Once you have mapped all the fields, click update if you want to make changes to an already existing channel adapter, or you can save it as a new adapter.

10. Go to Network product or product labels and filter the product which you want to syndicate to Brightpearl and export the same. 

For more information on exports, please follow this link – https://help.pim.unbxd.com/help-documentation/?section=export-products-with-readiness-check-and-assign-task  

Yes No
0 of 0 users found this section helpful
Suggest Edit