Structured information to guide you through Unbxd PIM with minimal assistance
  1. Introduction
  2. Access Unbxd PIM
  3. Unbxd PIM Nomenclature
  4. Explore Unbxd PIM
  5. Your Profile
  6. Unbxd PIM Info Mode
  7. Organization - Set up your PIM Team
    1. Invite a New Member
    2. Change Member Name and Assigned Roles
    3. View a Member Information
    4. Delete a Member
    5. Create a New Role
    6. Set Property Permissions for a Role
    7. Set System Permissions for a Role
    8. Change Assigned Members of a Role
    9. Change Property Permissions for a Role
    10. Change System Permissions for a Role
    11. Change the Role Name
    12. View a Role Information
    13. Delete a Role
    14. Edit your Organization Profile Information
  8. Imports - Onboard & Schedule your Product Content
    1. Import File Best Practices
    2. Tips for doing an effective import
    3. Perform First-time Product Import
    4. View an Existing Import Information
    5. Schedule an Import
    6. Edit a Scheduled Import
    7. View a Scheduled Import Information
    8. Stop a Scheduled Import
    9. Delete a Scheduled Import
    10. Import Adapters
  9. Products - Build & Enrich Product Content
    1. Advanced Search and Filtering
    2. Customize your Product Listing View
    3. Add a Solo Product
    4. Add a Variant Product
    5. Edit a Solo Product
    6. Edit a Parent Product
    7. Edit a Variant Product from Product Listing
    8. Edit a Variant Product from its Parent Product
    9. Edit Mode
    10. View Activity Log Details for a Product
    11. View Product Details
    12. View Task Information for a Product
    13. Delete a Product
    14. Product Groups
      1. Create a Static Product Group
      2. Edit a Static Product Group
      3. View a Static Product Group Information
      4. Delete a Static Product Group
      5. Create a Dynamic Product Group
      6. Edit a Dynamic Product Group
      7. View a Dynamic Product Group Information
      8. Delete a Dynamic Product Group
    15. Bulk Actions for Products & Product Groups
      1. Add Products to a Static Product Group
      2. Edit Multiple Products
      3. Assign Categories for Multiple Products
      4. Create Task for Multiple Products
      5. Certify Products for Network
      6. Delete Multiple Products
      7. Certify Product Groups to Network
      8. Delete Product Groups
      9. Edit Multiple Products from a Static Product Group
      10. Remove Products from a Static Product Group
      11. Delete Products from a Static Product Group
      12. Edit Multiple Products from a Dynamic Product Group
      13. Delete Products from a Dynamic Product Group
  10. Properties - Manage your Product Characteristics
    1. Property Data Types
    2. Create a New Property
    3. Change the Property Name and Assigned Property Group
    4. Change Role Permissions for a Property
    5. Make a Property Searchable
    6. View a Property Information
    7. Download all Properties
    8. Delete a Property
    9. Property Groups
      1. Create a New Property Group
      2. Change Property Group Name and Associated Properties
      3. View a Property Group Information
      4. Delete a Property Group
  11. Categories - Manage your Product Classifications
    1. Create a New Category & Subcategory
    2. Change Category Name & Associated Properties
    3. View Category & Subcategory Information
    4. Delete a Category or Subcategory
  12. Assets - Manage your Digital Files
    1. Add a New Asset
    2. Associate Assets with Products
    3. Perform Asset Transformations
    4. Disassociate Asset from Products
    5. Download Assets
    6. Delete an Asset
  13. Tasks - First Step Towards Building Processes
    1. Create a New Task
    2. Edit an Existing Task
    3. Stop a Task
    4. View Task Details and Task Status Details
    5. Task Templates
      1. Create a New Task Template
      2. Edit a Task Template
      3. View Task Template Details
      4. Create a Task using a Task Template
      5. Delete a Task Template
    6. Task Assignee
  14. Catalogs - Share real-time Product Content
    1. Create & Share a New Catalog
    2. Edit a Catalog
    3. View a Catalog Information
    4. Delete a Catalog
  15. Network - Partner Readiness & Content Distribution
    1. Certified Products & Product Labels
      1. Customize your Network Products Listing View
      2. Export Certified Products
      3. Export Products with Readiness Check & Assign Task
      4. View Activity Log Details for a Network Product
      5. Delete Products from Network
      6. Export Certified Product Labels
      7. Export Product Labels with Readiness Check & Assign Task
      8. Add Partner Readiness for a Product Label
      9. Edit a Product Label
      10. View Certified Products
      11. Delete a Product Label
    2. Partners
      1. Create a Partner
      2. Edit a Partner
      3. View Partner Details
      4. Delete a Partner
    3. System Adapters & Custom Adapters
      1. Edit a System Adapter
      2. View System Adapter Details
      3. Create a Custom Adapter
      4. Edit a Custom Adapter
      5. View Custom Adapter Details
      6. Delete a Custom Adapter
    4. Exports
      1. View Exports
      2. Download an Exported File
      3. Send an Email with the Exported File
      4. Schedule an Export
      5. Edit a Scheduled Export
      6. View Scheduled Export Details
      7. Stop a Scheduled Export
      8. Delete a Scheduled Export
  16. Workflows - Automate PIM Processes
    1. Create a New Workflow
    2. Run a Workflow Manually
    3. Pause & Resume a Workflow
    4. Edit a Workflow
    5. View Workflow Details
    6. View Activity Log Details for a Workflow
    7. Delete a Workflow
    8. Bulk Actions
  17. Scripts - Transform your Product Data
    1. Using the Transformation Script Editor
    2. List of Transformation Scripts
  18. Channel Integration
    1. Channel Integrations -
      1. Installing Unbxd PIM via BigCommerce
      2. Installing BigCommerce store via Unbxd PIM
      3. Importing Data from BigCommerce to Unbxd PIM (via BigCommerce)
      4. Sending Data from BigCommerce to Unbxd PIM (Subsequent Transfer)
      5. Getting Data from BigCommerce via Unbxd PIM
      6. Getting Data into BigCommerce from Unbxd PIM
      7. Sending Data to BigCommerce via Unbxd PIM
      8. Importing data into Unbxd PIM from BigCommerce
      9. Exporting data from Unbxd PIM to BigCommerce
      10. Automating import and export using Adapters and Workflows
    2. Channel Integrations -
      1. Installing Unbxd PIM via Brightpearl
      2. Importing the data into Unbxd PIM from Brightpearl
      3. Exporting data from Unbxd PIM to Brightpearl
      4. Automating import and export using Adapters and Workflows

Workflows

Workflows streamline your daily PIM processes to deliver accurate and up-to-date product information with a key focus on “faster-time to  market”. In a workflow, the crucial PIM components work in cohesion to leverage your resources and improve operational efficiency of the organization.

There are two parts to a workflow:

  1. Trigger
  2. Nodes

A Trigger is what will initiate your workflow. It is either “Time” based or “Event” based:

  • Time – This will start the workflow at a specific time and frequency. You can also specify week and months
  • Event – This will start the workflow when there are changes in the PIM system. For example, the workflow starts after a PIM task completion.

A Node is a PIM component that can be configured to automatically perform a PIM action or requires manual intervention for its completion.

Once you have defined the trigger, you can start adding the most suitable nodes to execute the specific PIM processes. Initiated by a “Time” trigger or an “Event” trigger, workflows are collection of nodes that lets you automate the PIM processes.

Workflows Listing Page
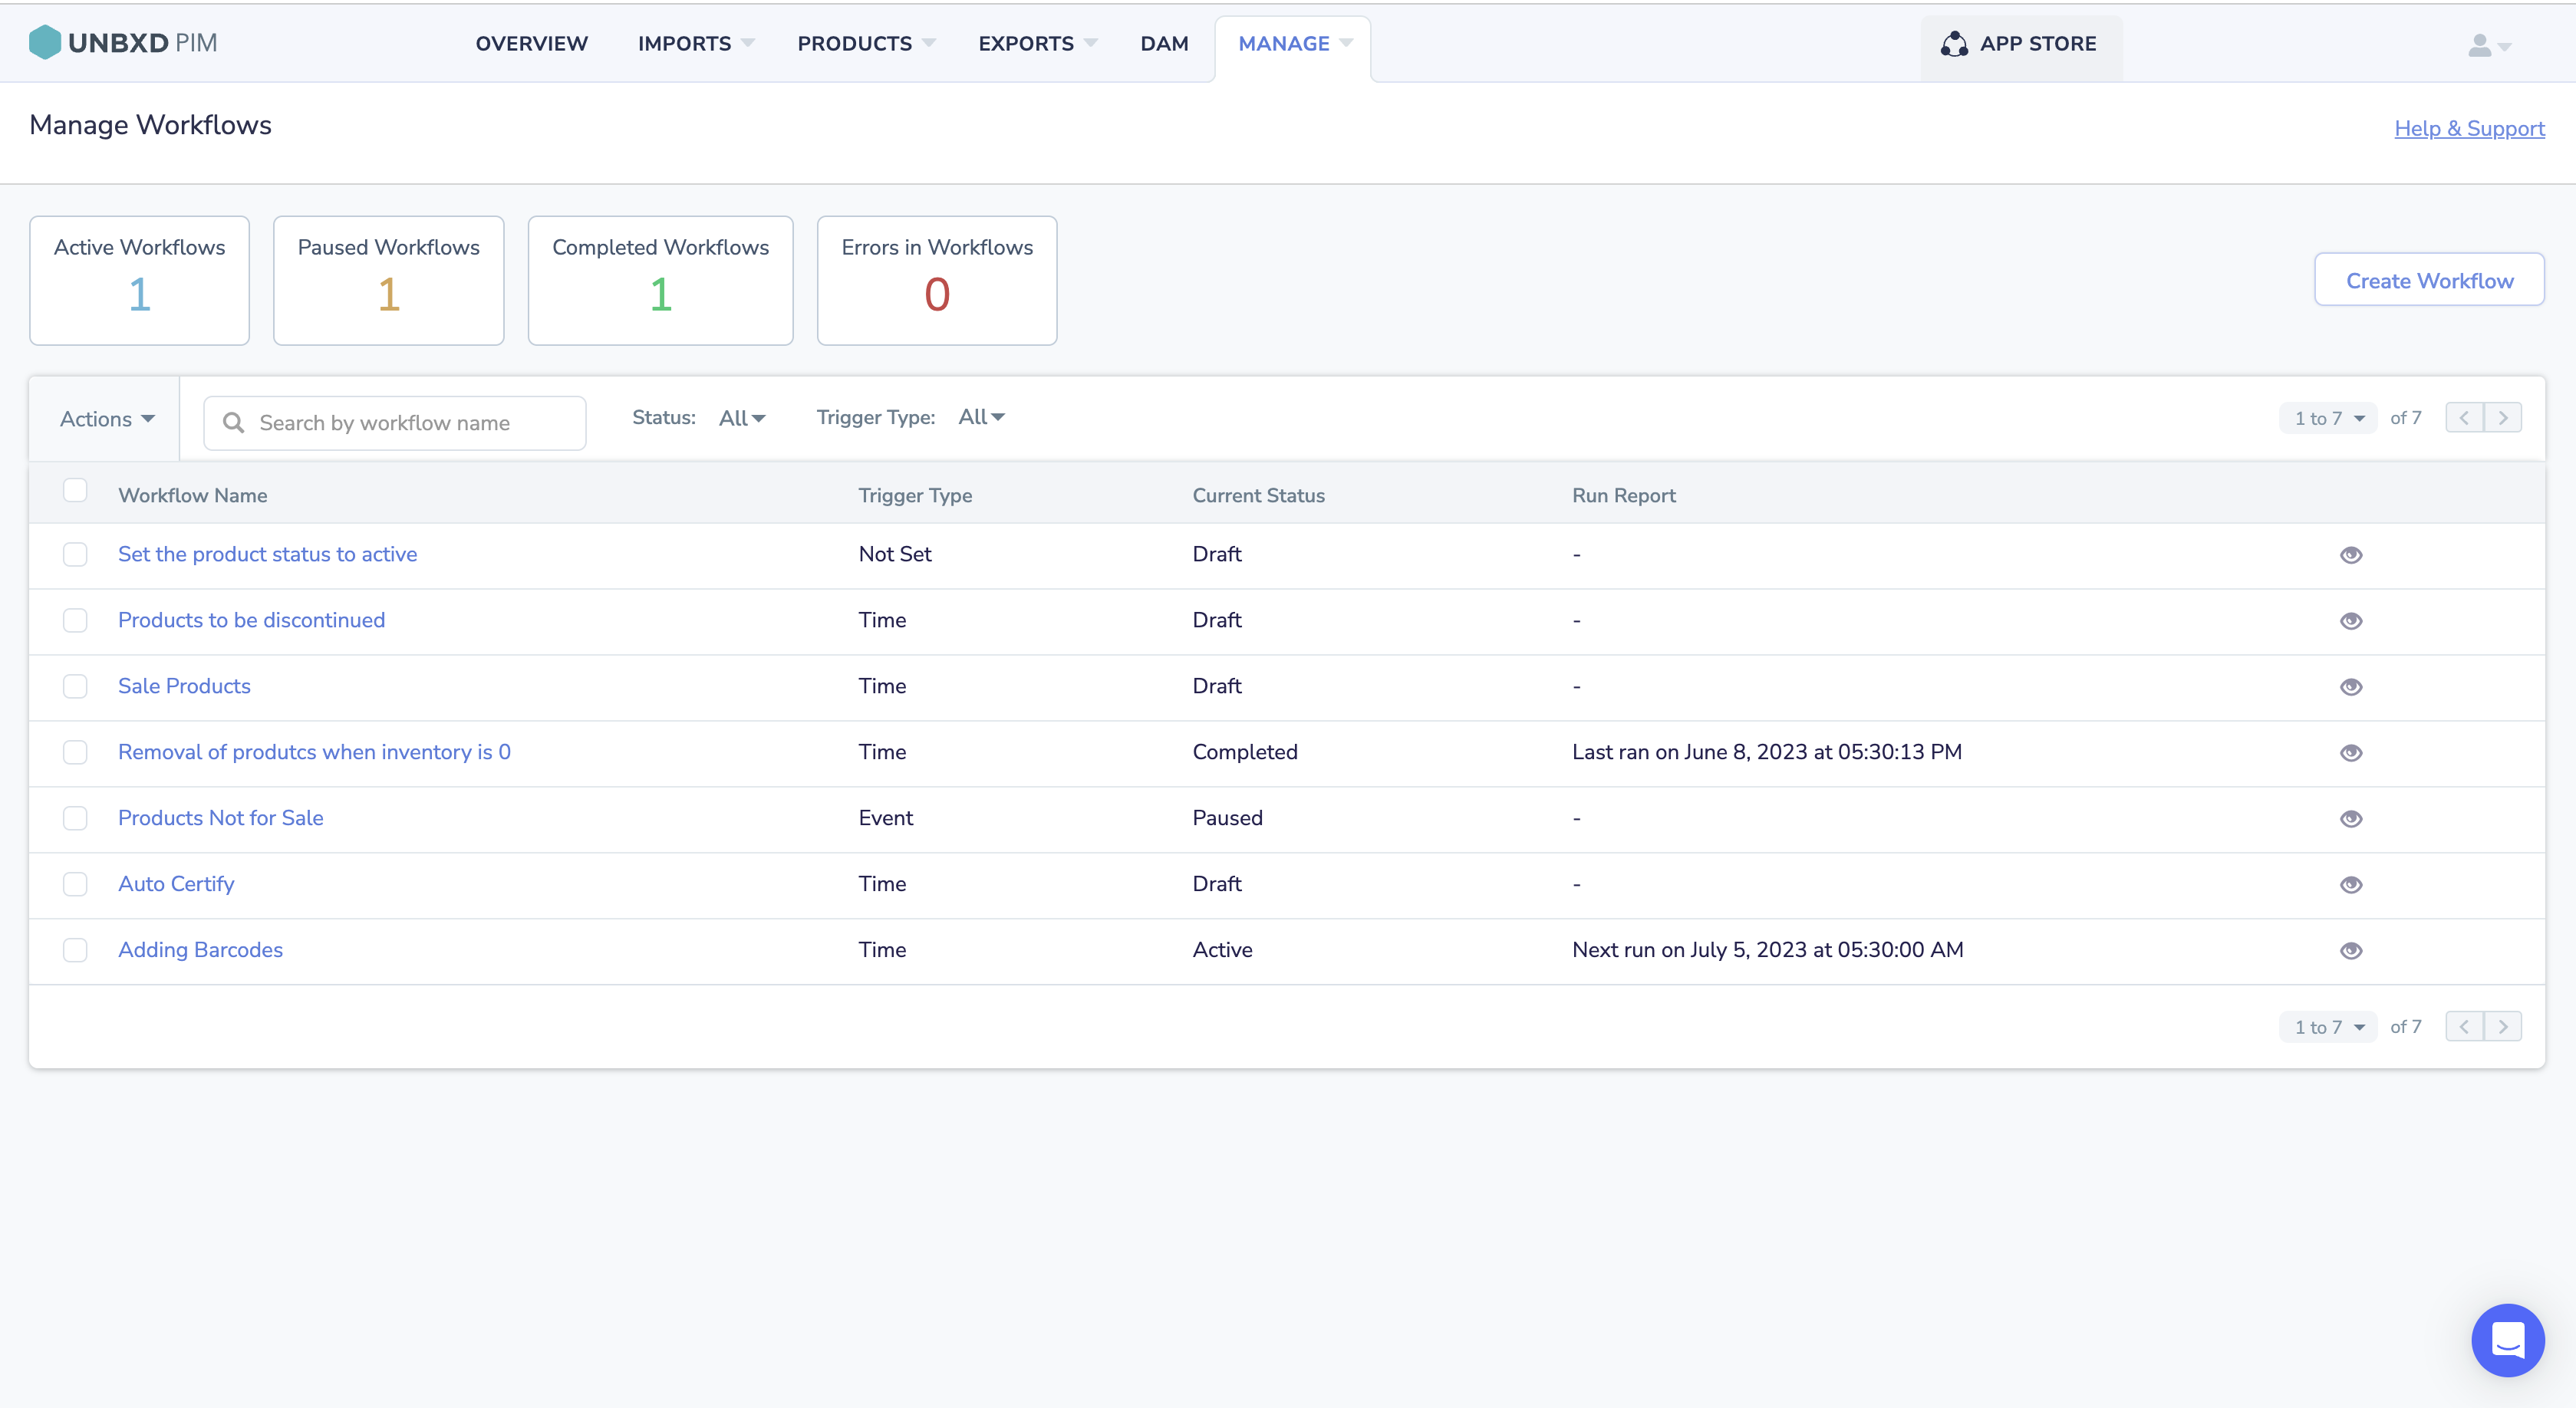
You can use the Workflows Listing page to view all the existing workflows of your organization. It always shows a brief summary for the list of Active workflows, Paused workflows, Completed workflows, and Errors in workflows. You can also view the following details:

  • Workflow name
  • Trigger type
  • Current status
  • Run report

User Permissions:

You can access the Workflow functionalities based on permissions set by the “admin” or any user equivalent to an admin.

The table below describes the different user privileges based on your system permissions.

Permissions Description or Action
Manage If your system permission for Workflow is set to Manage, you can perform the following actions:

  • Create a workflow
  • Edit a workflow
  • Run the workflow manually
  • View activity log details for a workflow
  • Delete a workflow
Read Only If your system permission for Workflow is set to Read Only, you can:

  • View a workflow information
  • View activity log details for a workflow
Hide If your system permission for Workflow is set to Hide, you cannot access the functionality.

For more information about system permissions, see Setting System Permissions for a Role.

Here is how you can get started with products.

Quick Navigation Click   , and then click Workflow.
Yes No
0 of 0 users found this section helpful
Suggest Edit